Steps to put a Course on hold
| Table of Contents | ||||||
|---|---|---|---|---|---|---|
|
Related Helpguide Pages
| Panel | ||||||||
|---|---|---|---|---|---|---|---|---|
| ||||||||
Learn how to place a Course ‘on hold’ until it is confirmed to be running. |
Issues are sometimes inevitable! If it seems that a Course is no longer certain to run, whether that is due to trainer illness or your customer does not think the date is suitable for them, you can place it ‘on hold’ until you have confirmation that it will go ahead.
While your Course is on hold, you will prevent additional bookings and make it clear in your schedule that this Course is not confirmed.
Follow this page to learn the steps to set a Course to ‘on hold’.
✋ Place a scheduled Course on hold
| Panel | ||||||||
|---|---|---|---|---|---|---|---|---|
| ||||||||
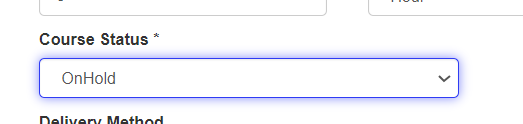
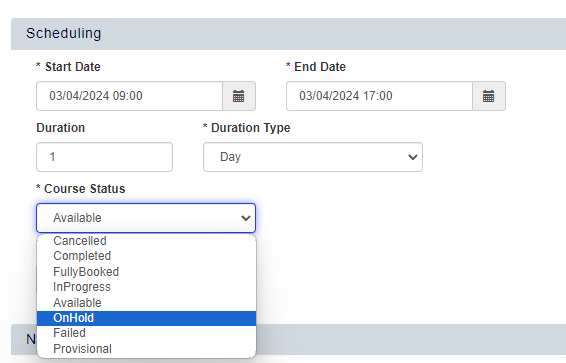
This step will take you through updating a Course to have the status ‘On Hold’ |
| Expand | ||
|---|---|---|
| ||
|

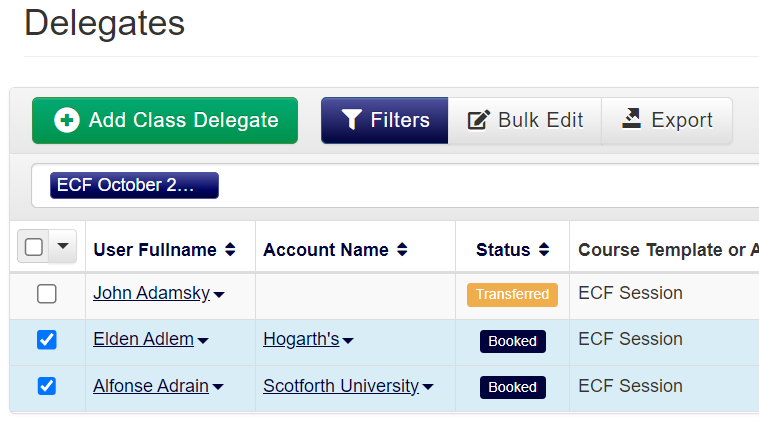
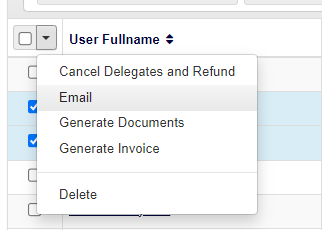
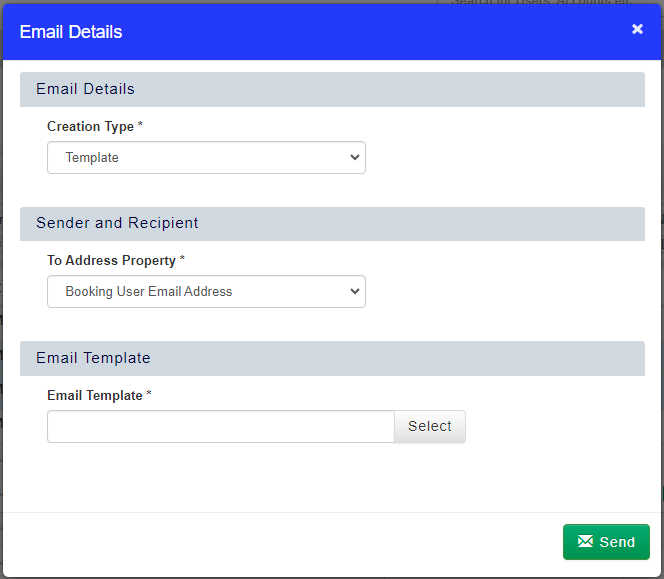
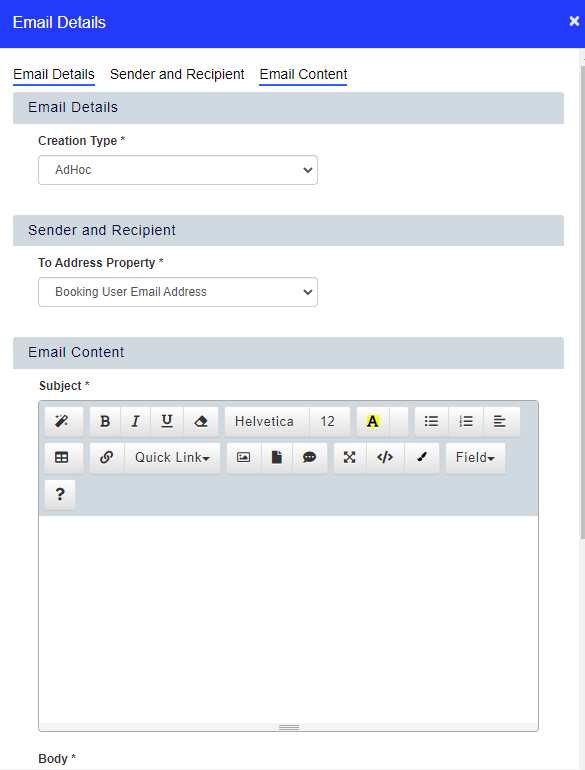
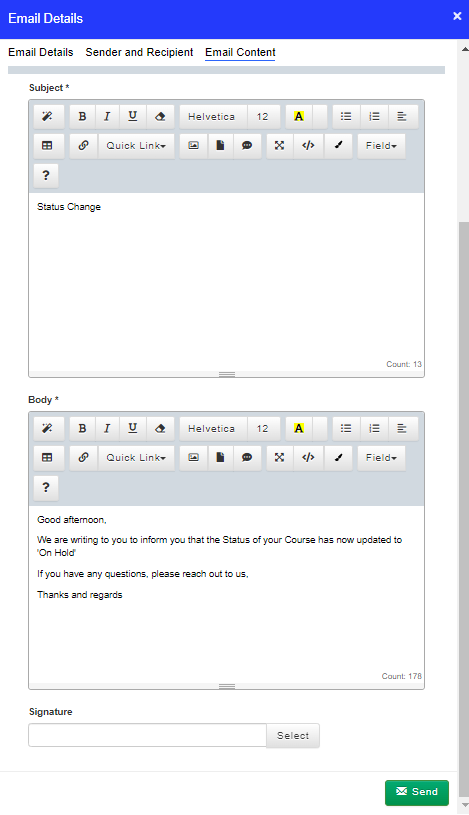
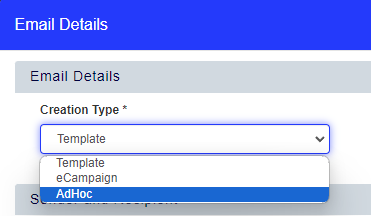
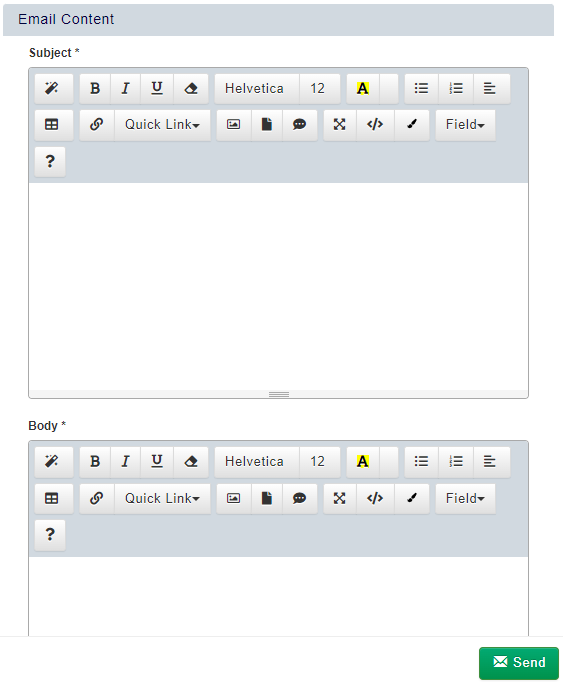
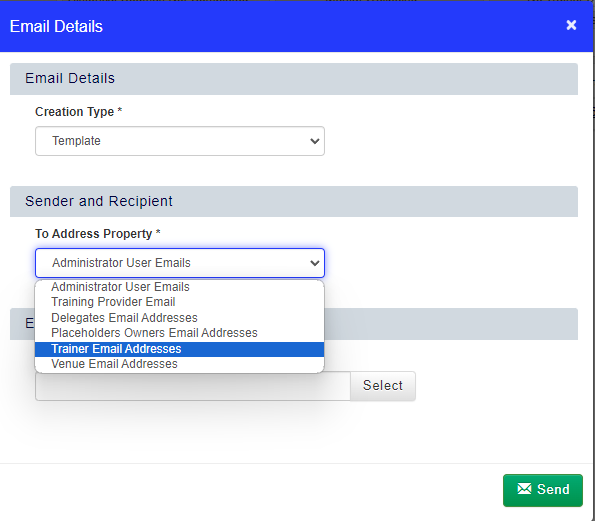
📧 Optional - Notify your Delegates
| Panel | ||||||||
|---|---|---|---|---|---|---|---|---|
| ||||||||
If you do not have an automatic Workflow email to let your Delegates know that their Course has changed to ‘On Hold’, follow this step to inform them |
| Expand | ||
|---|---|---|
| ||
|
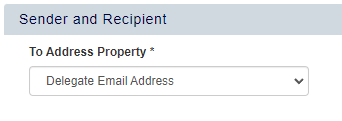


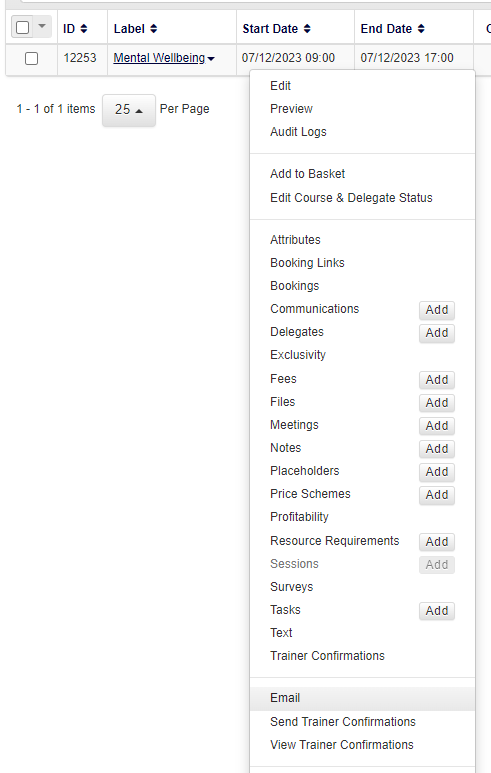
📧 Optional - Notify your Trainer(s)
| Panel | ||||||||
|---|---|---|---|---|---|---|---|---|
| ||||||||
If you do not have an automatic Workflow email to let your Trainer know that their Course date has changed, follow this step to inform them |
| Expand | ||
|---|---|---|
| ||
|


🖥️ Optional - Check that your Course is not available on your website
| Panel | ||||||||
|---|---|---|---|---|---|---|---|---|
| ||||||||
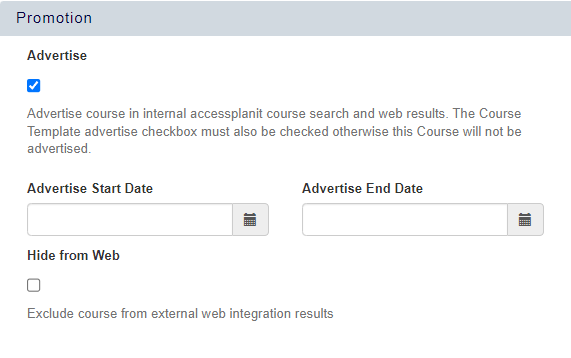
Your 'on hold' Course should be hidden from your websiteIf your Course was previously advertised on your website, once it is set to be 'On Hold' is should now be hidden to prevent bookings |
To stop advertising the Course, untick this checkbox, you will see the additional 'Advertise Date Range' and 'Hide from Web' options are now hidden
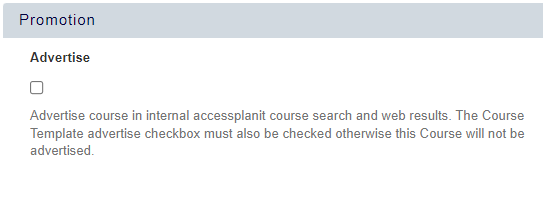
Click the 'Save' button at the top right to apply your changes

| Expand | ||
|---|---|---|
|
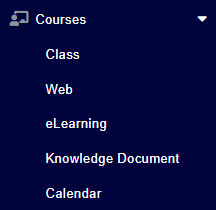
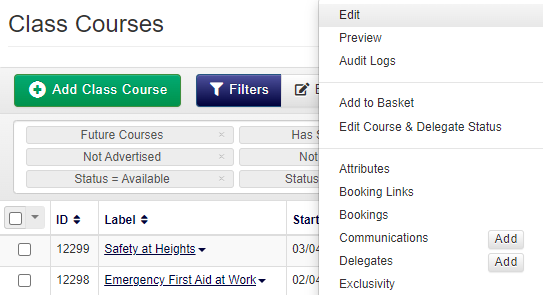
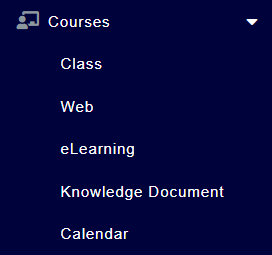
Open the ‘Class’ or ‘Web’ Courses DataGrid from your main navigation menu on the left
This will open the Courses DataGrid
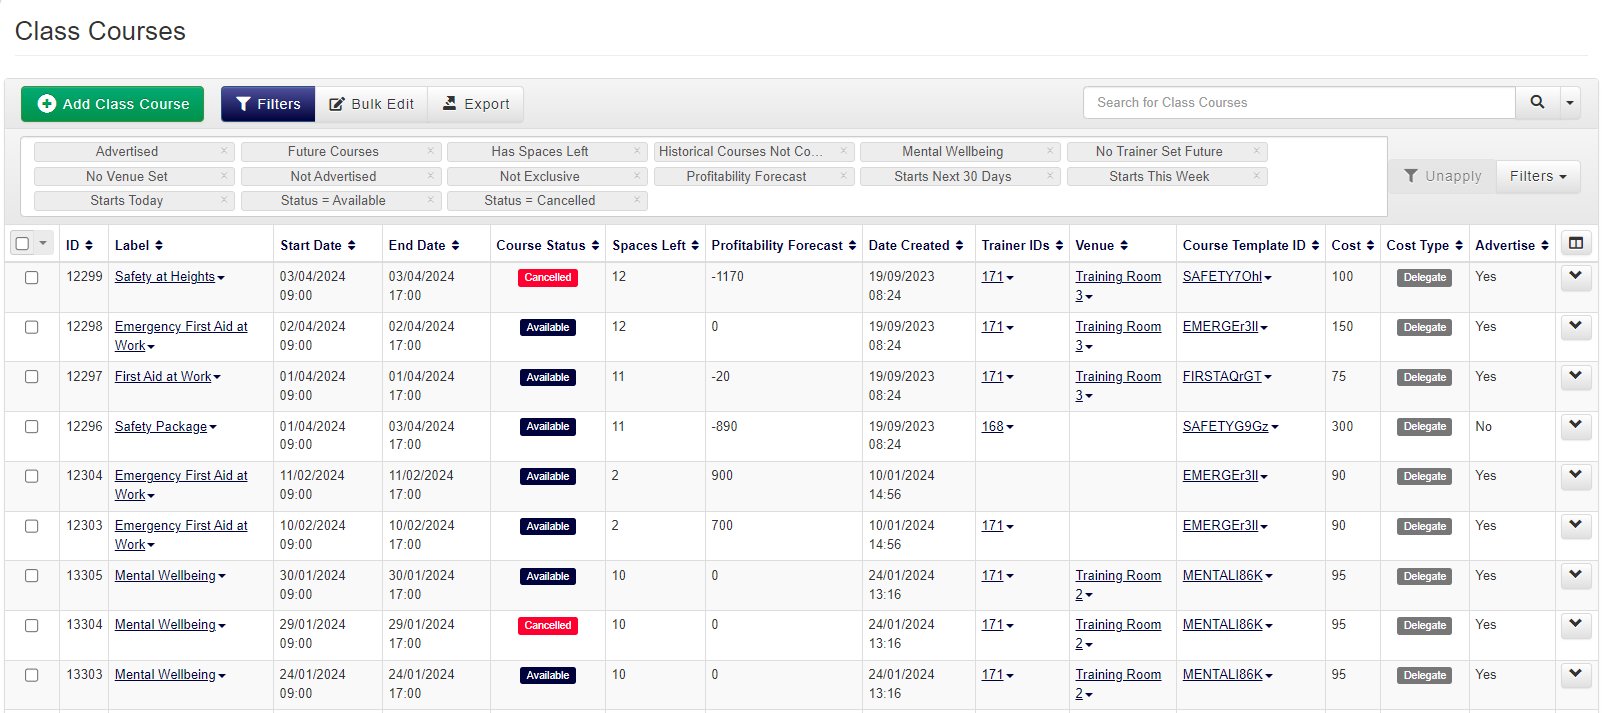
Find the Course you would like to preview by applying filters and/or searching the Courses DataGrid using the Course ID or Course Name

Edit the Course you wish to set to not be advertised, by right-clicking on the Course in your DataGrid, and selecting ‘Edit’ from the context menu options
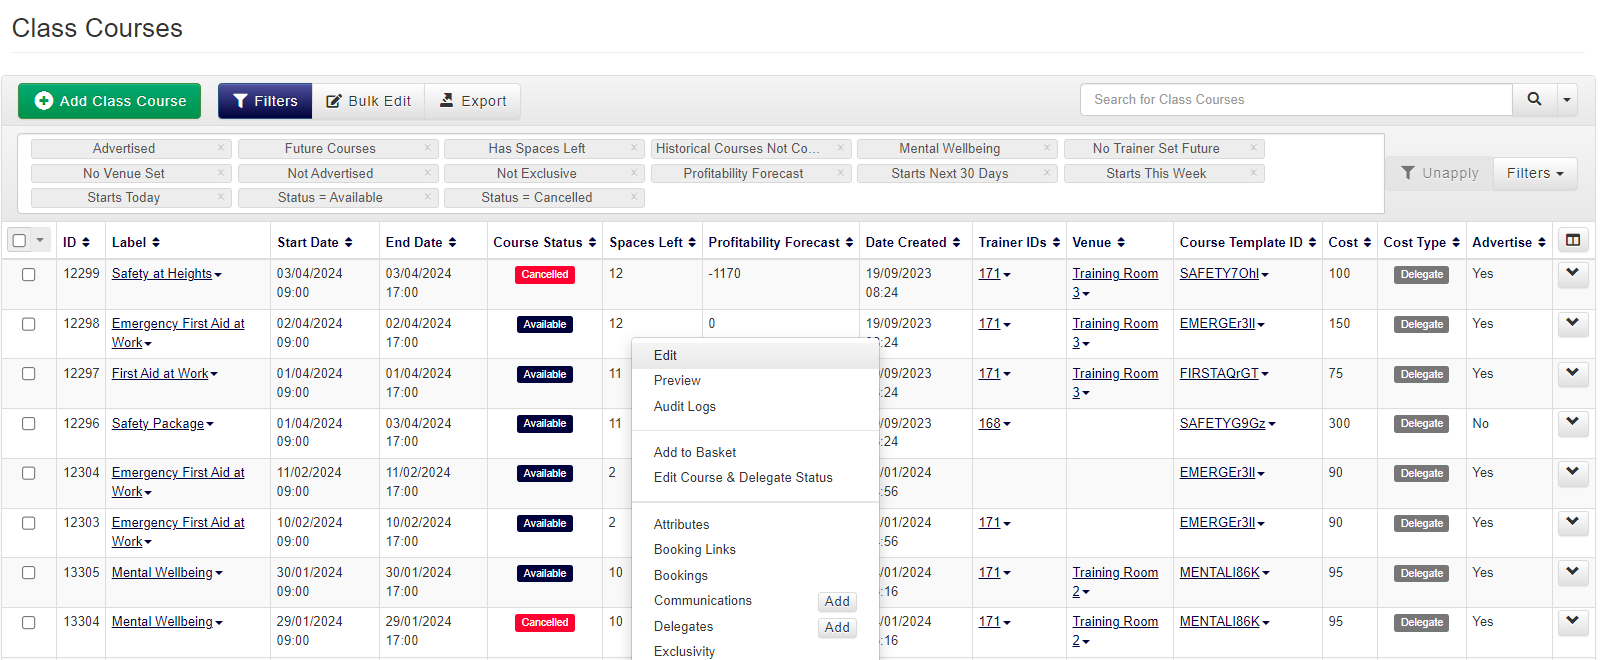
This will open the 'Details' page of the course
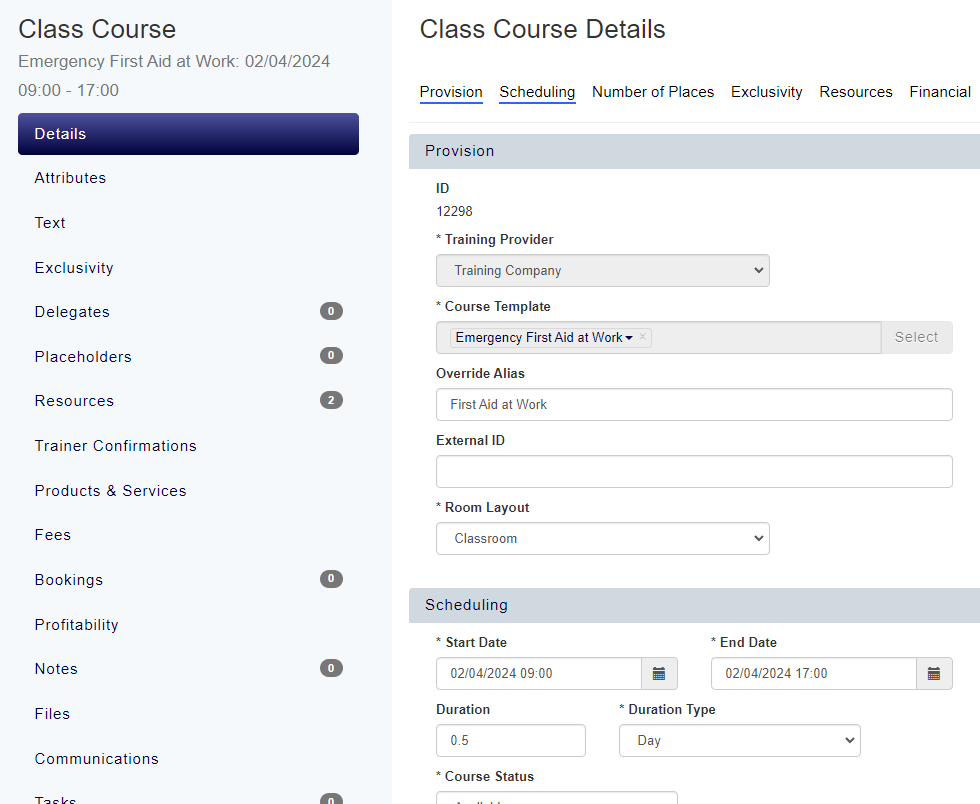
Scroll down to the ‘Promotion’ section on the page which has an ‘Advertise’ checkbox available, if this is checked the Course is currently advertised
|