$customHeader
Skip to end of metadata
Go to start of metadata

You are viewing an old version of this page. View the current version.

Compare with Current View Page History

« Previous Version 6 Next »


How to define Colours on the Course Calendar

  1. Navigate to the Courses - Calendar view.

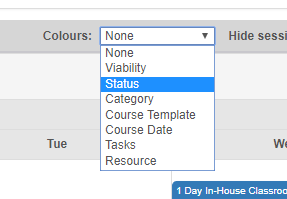
  2. At the top of the Calendar, you will see Colours: with a drop down list. This drop down list will apply colours to courses depending on the Colour filter you choose. In the example below, Course Status has been chosen:


  3. Once you have selected Status to show on the Course Calendar, you will see the Courses on the calendar change colour, depending on the different statuses that the Courses have:


  4. To view what each colour means, click Colour Legend in the top left hand corner. This will show each Colour and what they represent based on the Colours type you have chosen. 

How to use Filters on your Course Calendar

  1. Click Advanced in the top right hand corner of the Calendar.

  2. The Advanced settings will then appear. Here you can set what you would like to filter your Calendar by Course Templates, Course Status, or Resource Types. You can also choose what information you would like the Course item on the Calendar to show. The "Tooltip" on the Calendar Item is the menu that appears when you right-click on an Item. The link to create a Public Link to the Calendar is also here.


  3. After making your changes, you can choose to Clear Options, Save Options, or Apply Options. 
  • No labels