| Live Search | ||||||||
|---|---|---|---|---|---|---|---|---|
|
Raising an Invoice for an individual Delegate
Navigate to the the appropriate Course DataGrid.
Right-click on the Course and select Delegates from the context menu.
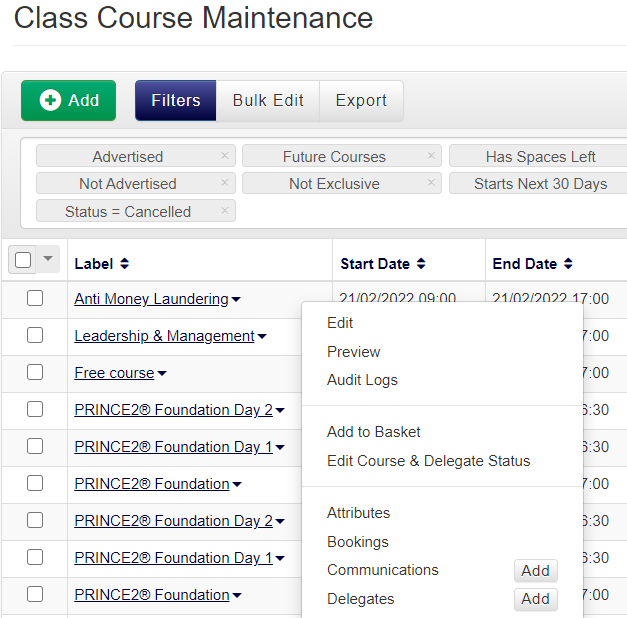
Right click the Delegate on the Delegate Maintenance DataGrid within the course date.
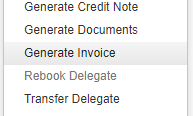
Click Generate Invoice from the context menu.
This will launch the Mini Invoice Generator. From here you can choose to include Fees and manually set the date the Invoice is due:
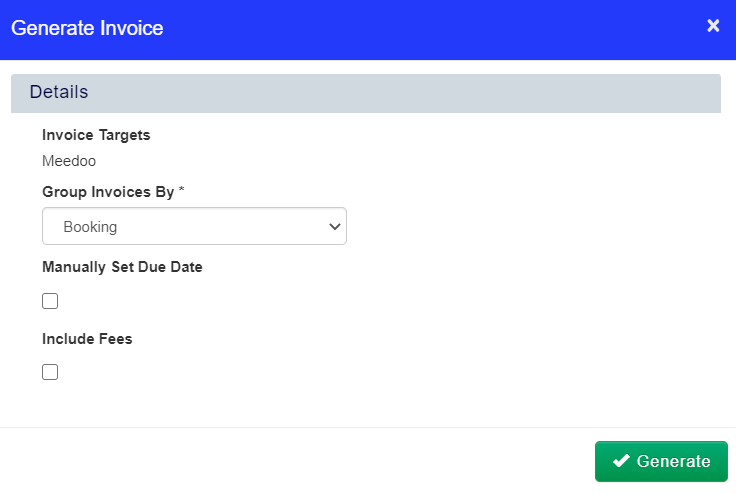
Select Generate. You will be asked to confirm if you would like to create a Temporary Invoice
Click Yes.

How to Commit an Invoice
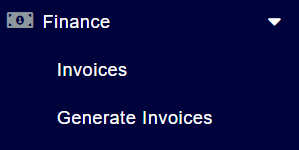
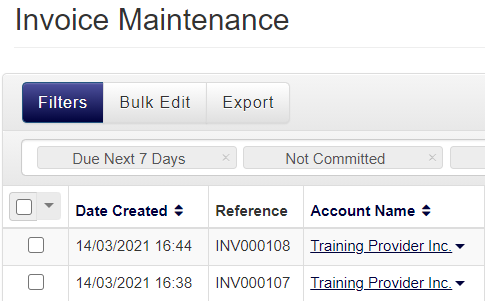
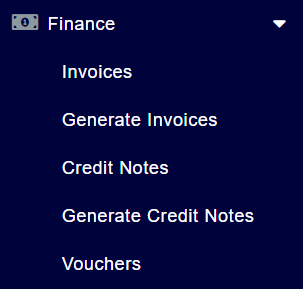
Navigate to Finance, and select Invoices from the drop-down. You will be taken to a DataGrid displaying all of the Invoices currently in the platform.
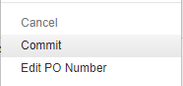
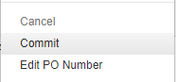
Once you have found the Temporary Invoice, right click on the record and select Commit from the context menu.
To view the Invoice and its details before you commit, you can select View from the context menu.
You will now find that the platform generates a unique Invoice record and reference for this Invoice.
How to view an Invoice
Navigate to Finance > Invoices.
Within the Invoices DataGrid, right-click the Invoice you wish to view and select View from the context menu.
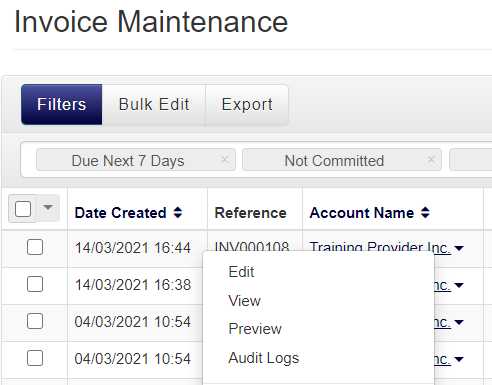
This will open up the Invoice Maintenance area, and also you can see what the Invoice looks like.
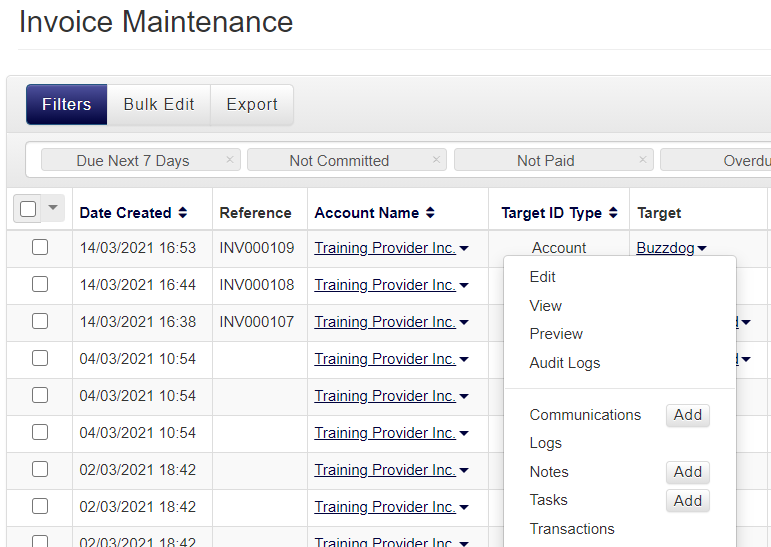
From here, you can navigate to different areas for this particular invoice, such as any Transactions made against it, and any Workflows or Communications relating to it.
How to Refund a Transaction on an Invoice
Navigate to Finance > Invoices.

2. Within the Invoices DataGrid, find and right-click the invoice upon which you wish to refund a transaction.
From the options that appear, left-click Transactions to go to the Transactions DataGrid on the invoice in question.
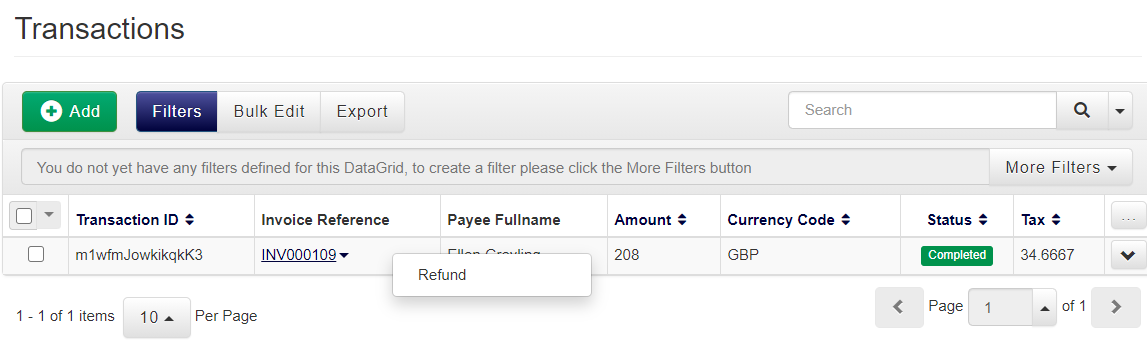
3. Within the Transactions Datagrid, right-click on the transaction you wish to refund. Left click the option to Refund.
4. Scroll down through the information that appears in the Refund Payment options until you reach Refund. From here you can input the Amount to Refund, determine specific items that might be refunded, and find the option to Keep Refund Local.
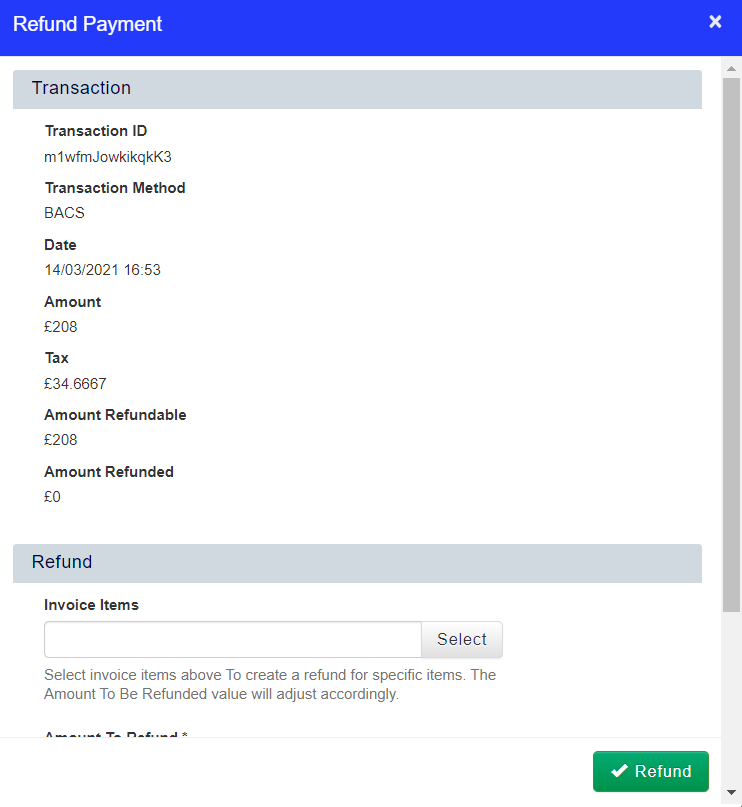
The option to Keep Refund Local is used if there is a Payment Gateway being used, and you do not want to pass the money back to the account it was paid from automatically. Leaving this option un-ticked will mean money will be pushed back to the booker's bank account. Ticking this box will mean that the refund money will need to be refunded by the control panel of the original Merchant Gateway itself.
Please note, the Keep Refund Local option should only apply to bookers using a payment gateway, in any other instance no refund will be issued, and any necessary refund will have to be processed manually, through the original Merchant Gateway.
An External Transaction ID will be recorded against the refund transaction when the Keep Refund Local option is unchecked. Local refunds will have an empty External Transaction ID field.
5. When you are satisfied with the information you have entered, left-click Refund.