| Live Search | ||||||||
|---|---|---|---|---|---|---|---|---|
|
| Info |
|---|
The Google Analytics module allows you to synchronise your Shopping Basket with your Google Analytics account to gain valuable statistics. Both Google Analytics and Google Tag Manager are supported within this module, which you can use dependent on your requirements. |

Using the Google Analytics Module
You
must be within the Advanced band or higher to use Google Analytics as this isneed to have a Google Analytics account to use this module.
This is NOT a chargeable module/integration and is part of the core modules for all customers. Please speak to your CSM if you
are unsure whether you should have access to this feature.You need to have a Google Analytics account to use this module

would like any more information about this feature or visit our help guide here Google Analytics (GA4)
Where to find the Google Analytics Options
Firstly, the Google Analytics module needs to be added to your system platform by your CSM (Customer Success Manager).
Once this has been made available, it can be found in the Administration area.

The option this lives under the Shopping Basket Options

Right (if you are using SB3)
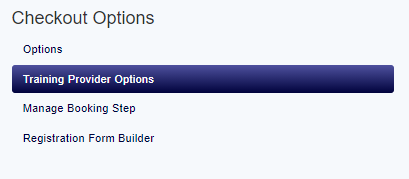
If you are using Checkout, go to Checkout Options
When in Shopping Basket Options - Right click on any one of the Training Providers and select Google Analytics Options
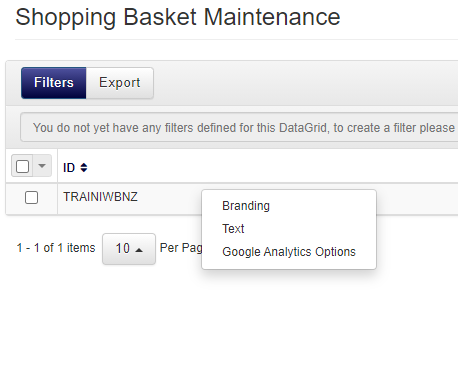
When in Checkout Options - go to 'Training Provider Options' - Right click on any one of the Training Providers and select Google Analytics Options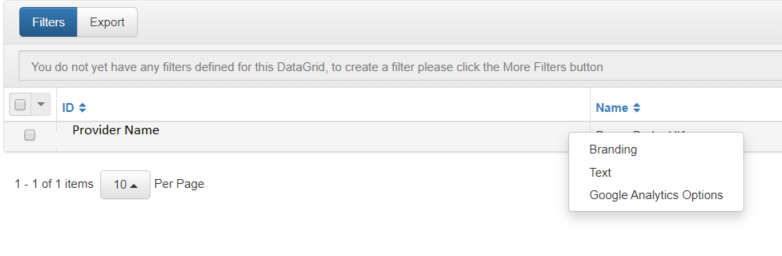
How to set up your Google Analytics Account
The first step is to set up your Google Analytics account, so that there is a dedicated tracking code for your accessplanit system.
Within the Admin section of your Google Analytics account you can create a new account.
When creating a new account, select that you will be tracking a website. You can choose an account and website name that’s easily identifiable for you (which is important if you have lots of different accounts set up).
Insert the website URL (for example ‘config.accessplanit.com’ - where 'config' is your system name). Once you have completed the rest of the form, click Get Tracking ID.
Once you have your Tracking ID code, you will need to insert it into your accessplanit system.
Please note – you need to have a Google Analytics account set up which follows the standard Google Analytics implementation.
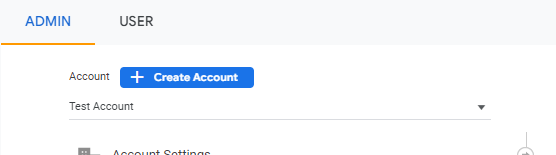
Go to your Google Analytics account
Open the Admin options from the bottom left of your Analytics homepage
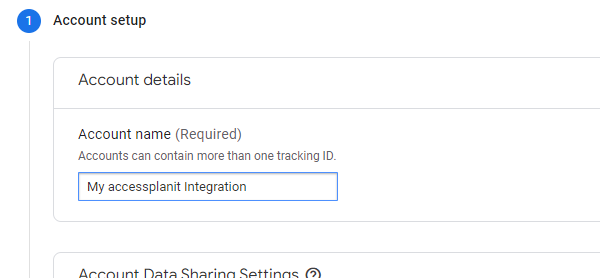
Click on the Create Account option from the top of this page
Enter in a name for the account, and click Next to complete the rest of the Account setup
Within the Property section of the page, click on the Create Property button

Enter in a name for your Property, and select the time zone and currency
Before Saving, show the advanced options to create a Universal Analytics property.
Enter the URL for your accessplanit platform, and click to Create a Universal Analytics property only
Save your new Property.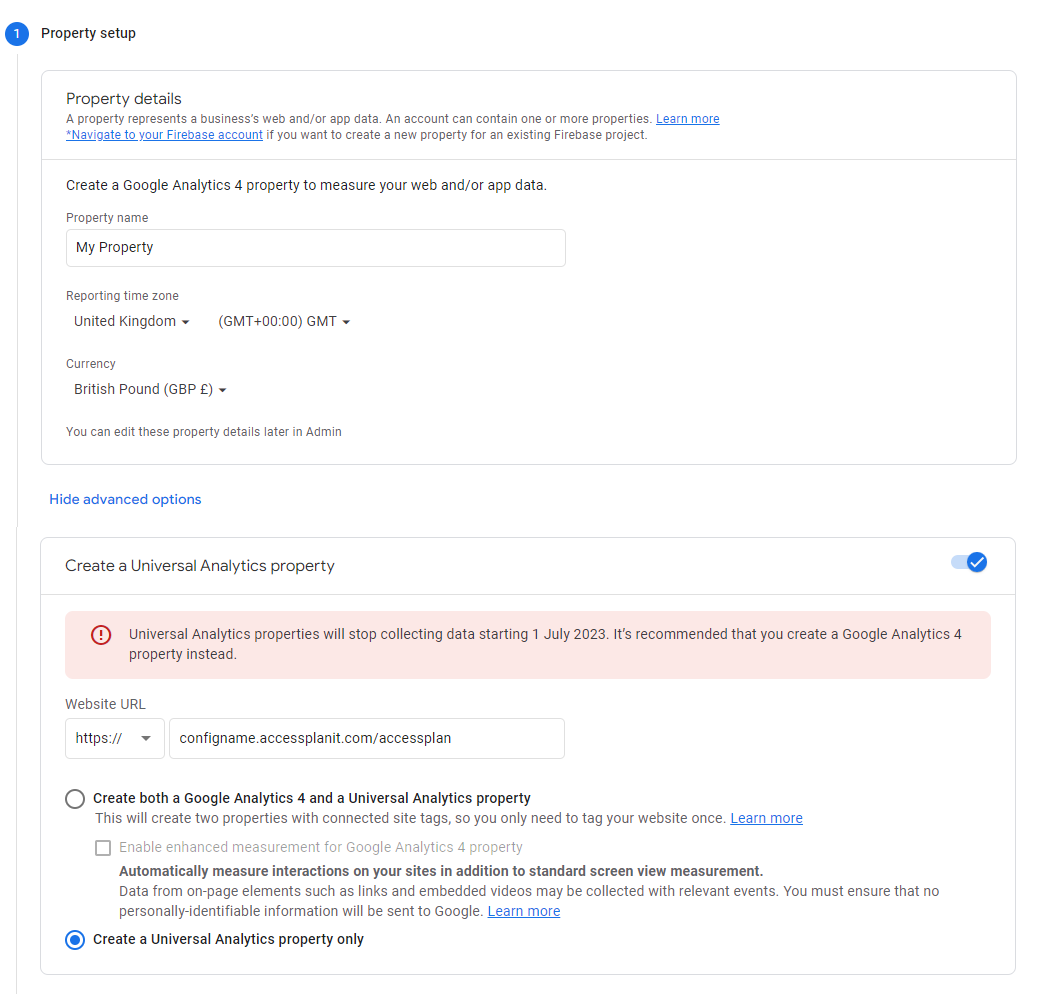
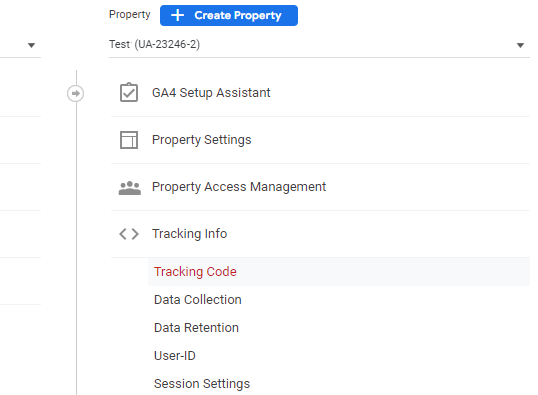
You will then be able to access the Google Analytics Tracking ID when you view this Property
Your Tracking ID will begin with 'UA-'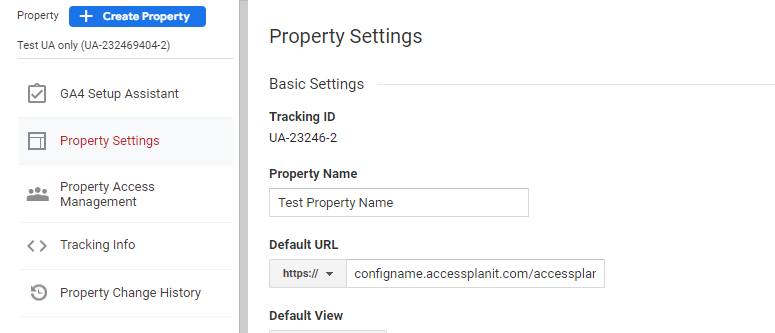
Head over to your accessplanit platform and paste your Tracking ID your Google Analytics Settings in accessplanit
If you are using the older Shopping Basket please paste your Tracking ID into the Account ID option on the page.
You can access these settings by going to Administration > Shopping Basket Options > select your Training Provider > Google Analytics Options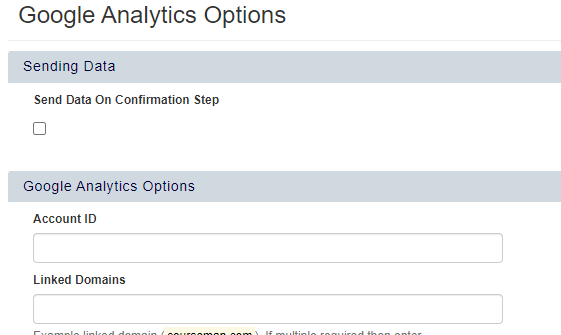
If you are using the newer Checkout Basket please paste your Tracking ID into the Google Analytics Training ID option on the page.
You can access these settings by going to Administration > Checkout Options > Training Provider Options > Google Analytics Options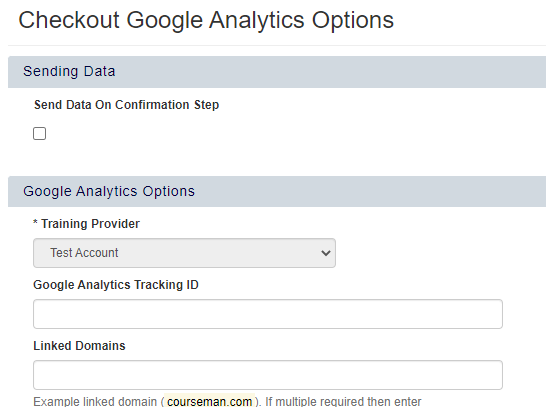
How to set up Google Tag Manager
Google Tag Manager allows you to track each stage of the Shopping Basket. This will help you determine page views and key events, such as drop out statistics. In order to set this up, you'll need to create a Tag Manager account on Google Analytics (if you don’t already have one).
Select the Admin option (the small cog) in the bottom left hand corner of the Analytics page:
Under the Properties column, select Tracking Info, and click Tracking Code.
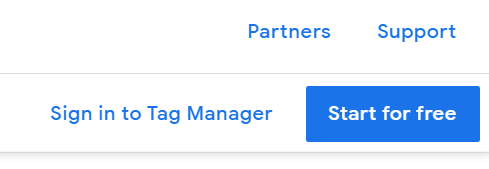
Scroll down the Tracking Code page until you find the Google Tag Manager heading, and click the link saying Learn how to get started with Google Tag Manager.

Click Start for Free when the Tag Manager page loads:
Enter in your company name, the URL you're wanting to track into the container, and make sure that the target platform is web:
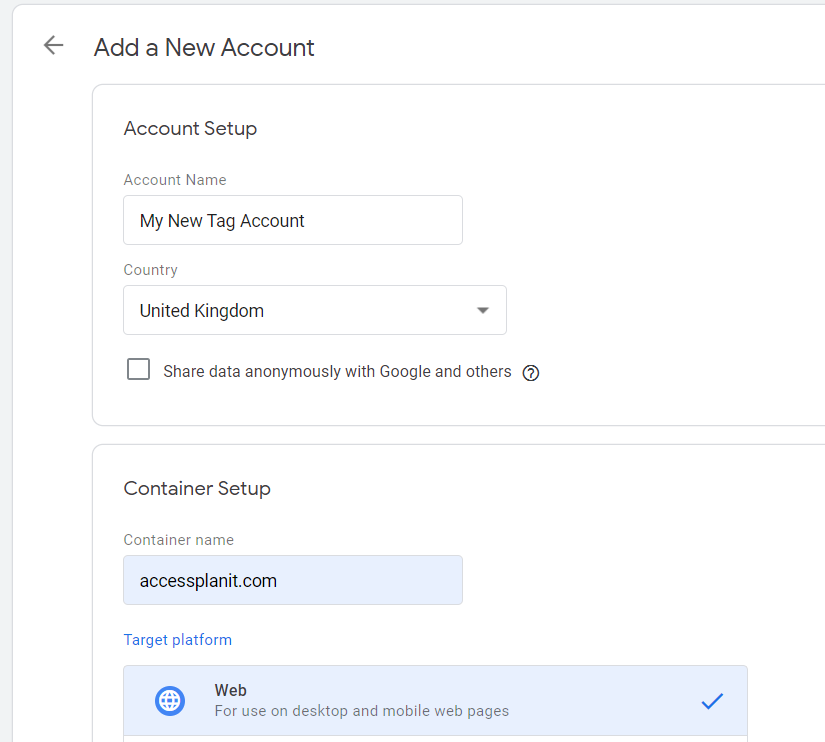
Click Create, and agree to the terms and conditions.
A pop up will then appear. Copy both sets of code into a notepad, one after the other.
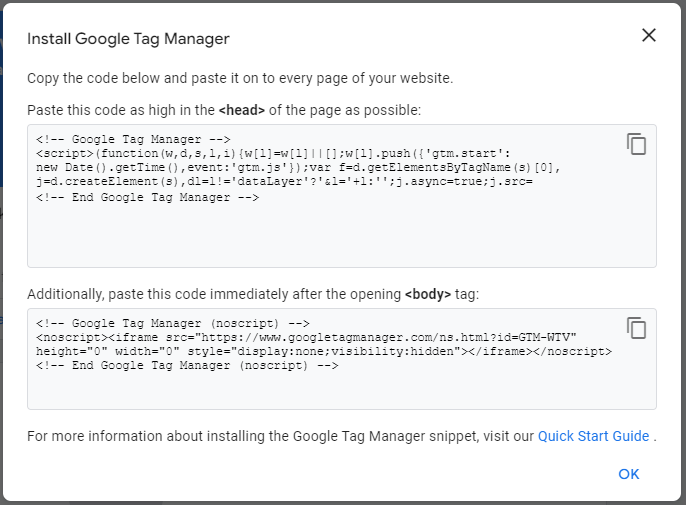
Alternatively, if you’re logging into an established tag manager, you can click on the Container name in the top right of Tag Manager (GTM-5LNVWSQ in the image below) to bring this screen up.

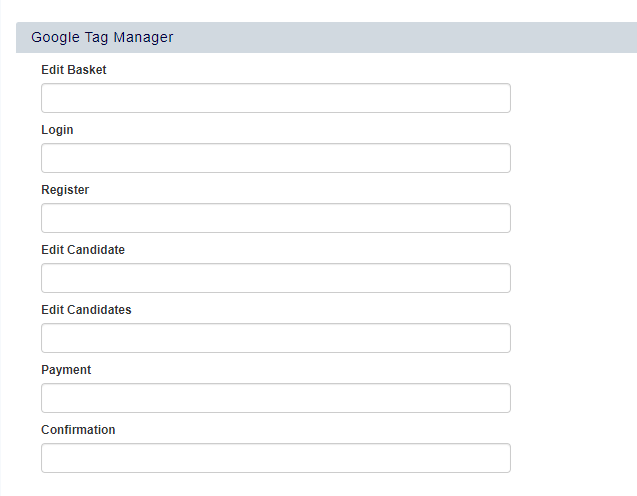
Paste this into each of the Tag Manager fields in your Google Analytics Options page in your accessplanit platform.
Linking Google Tag Manager to your Google Analytics Account
The final step is to link your Tag Manager account back to your Analytics account.
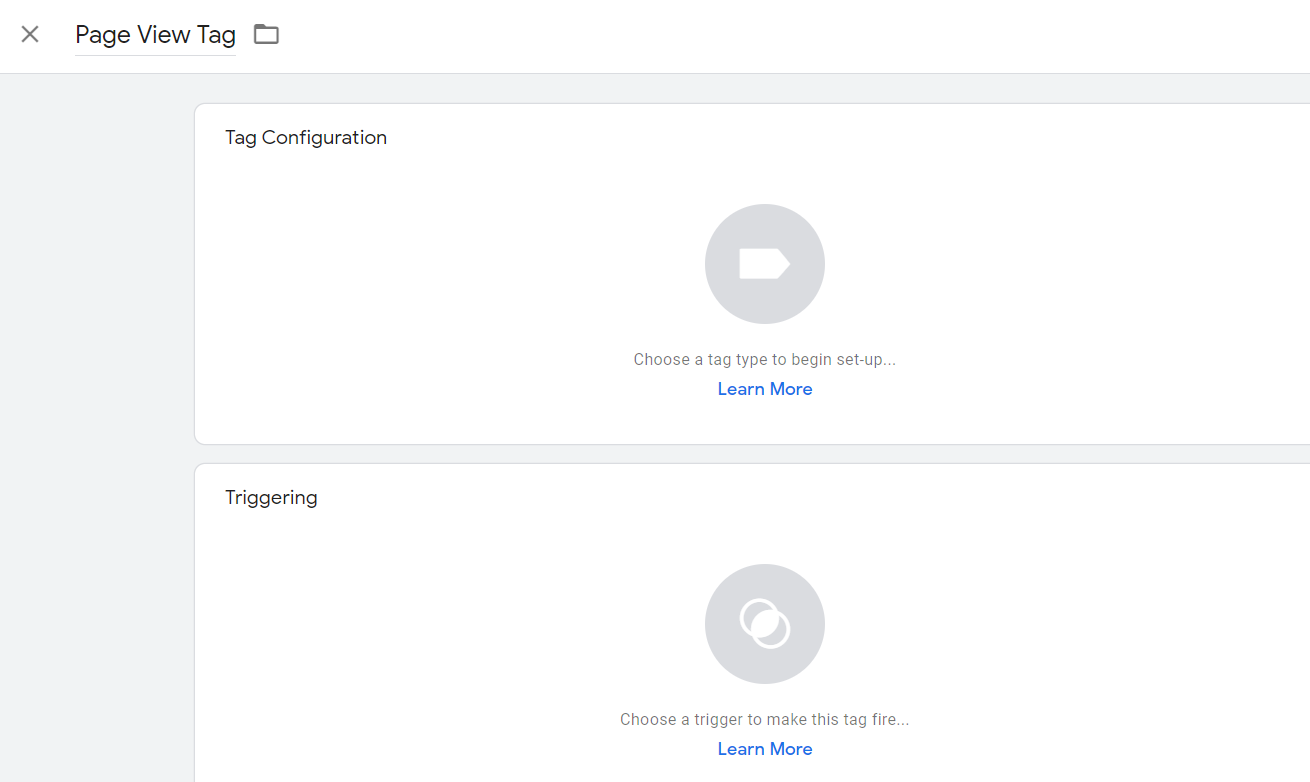
In your Tag Manager account, click Add New Tag:

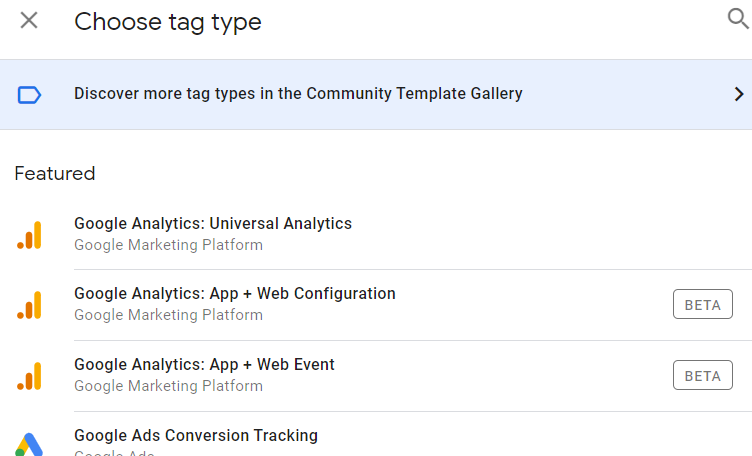
Click Tag Configuration from the pop up:
Select Google Analytics: Universal Analytics from the menu:
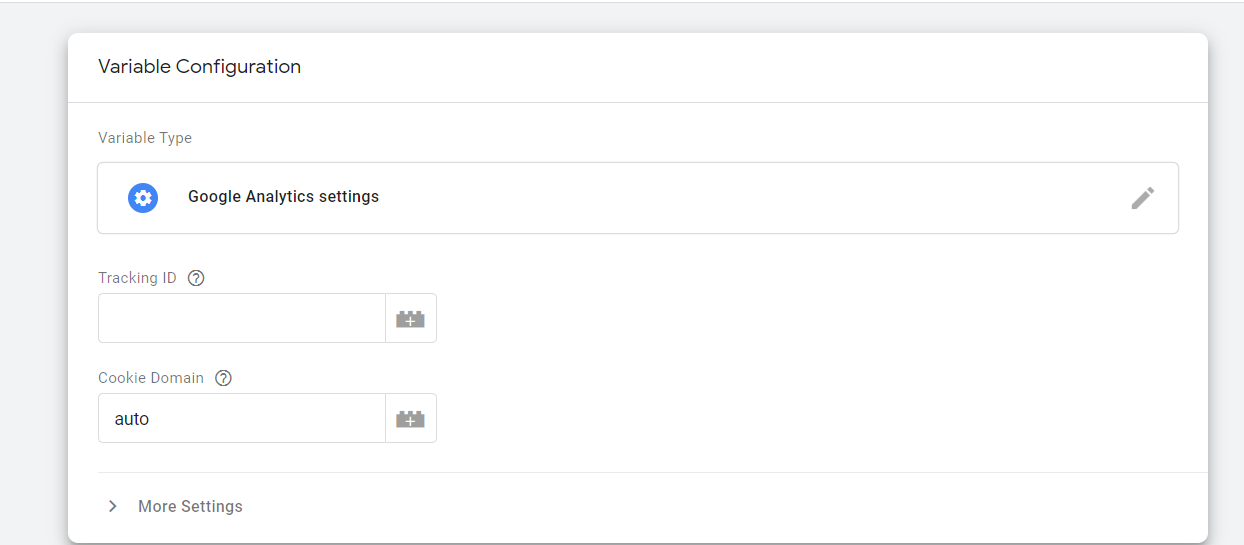
From the Select Settings Variable drop down, select New Variable
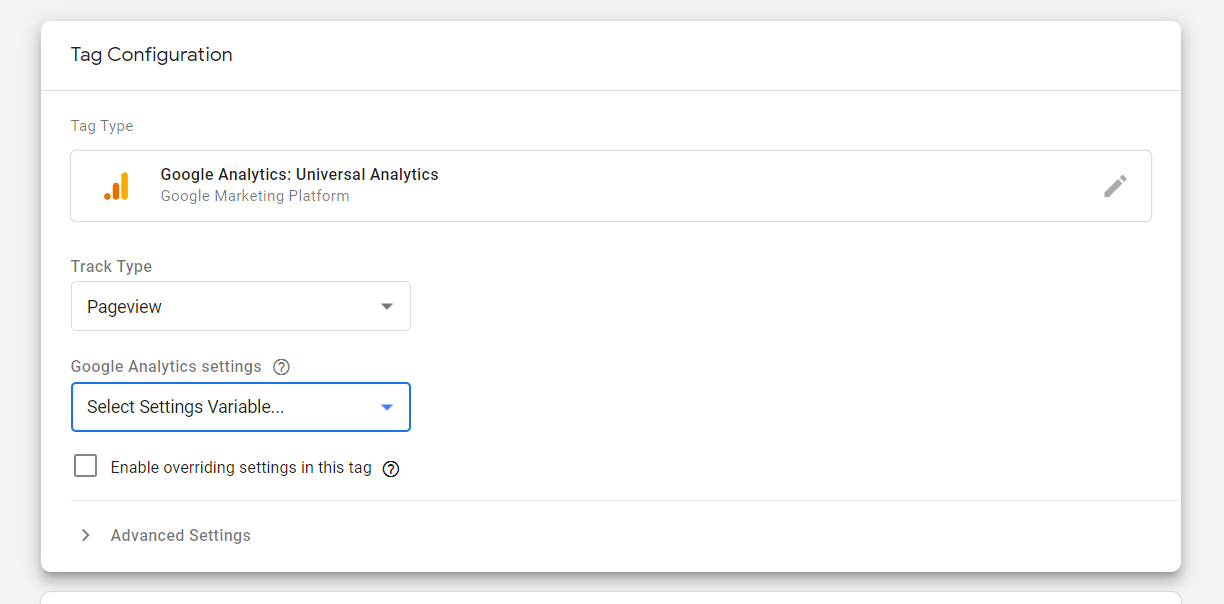
Enter the Tracking ID of your Google Analytics account into the Tracking ID field:
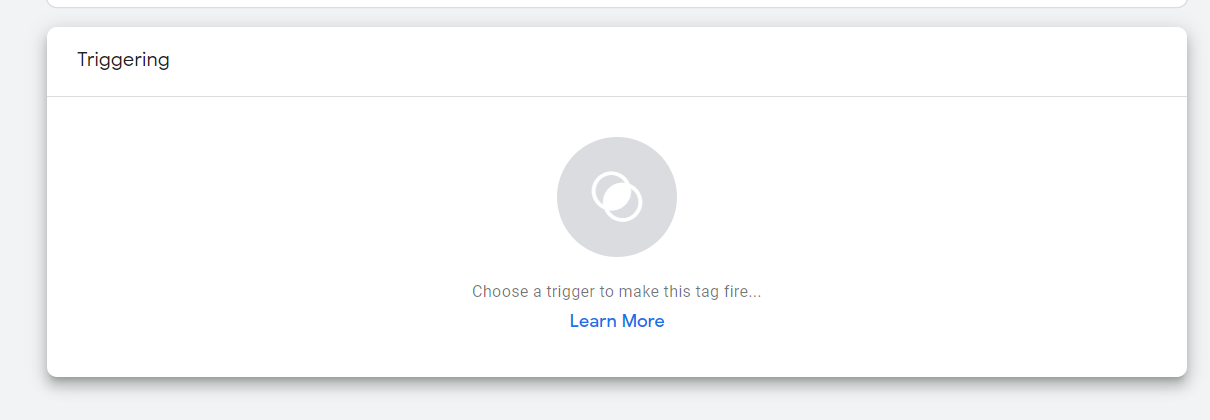
Once you've saved your variable, go to the Triggering page:
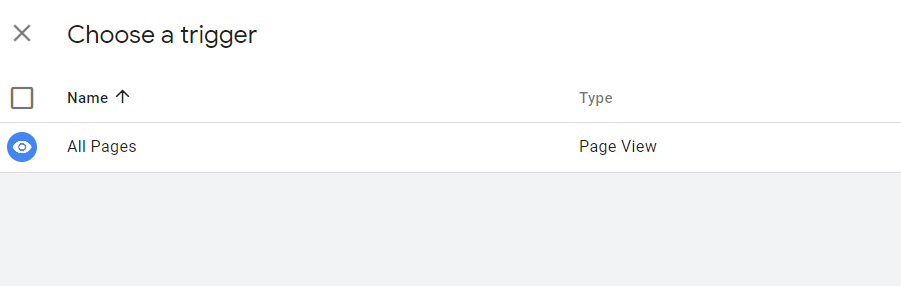
Select All Pages - Page View (this is the default)
Click Save. Your tag will now appear under your Tag tab:

How to link your Google Analytics Account to
your systemaccessplanit
There are three areas to configure:
Sending Data

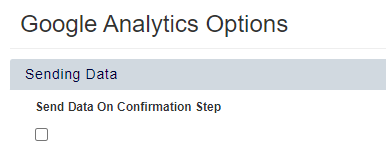
Tick this option to have all transactional data sent through to your Google Analytics account on the Confirmation Step of the Shopping Basket.
Google Analytics Options
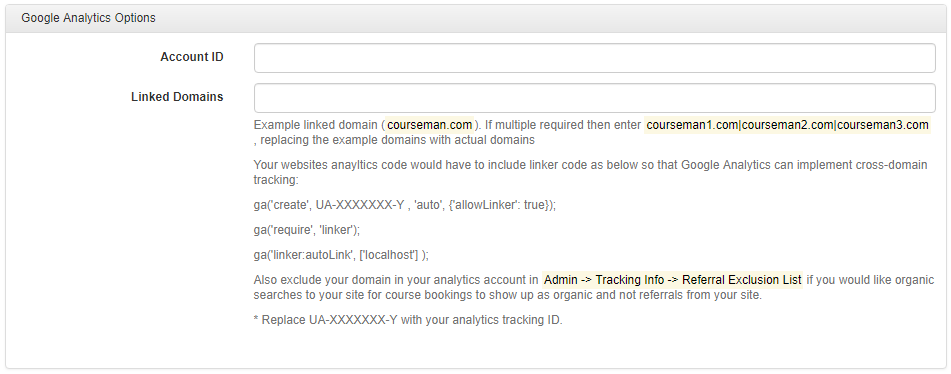
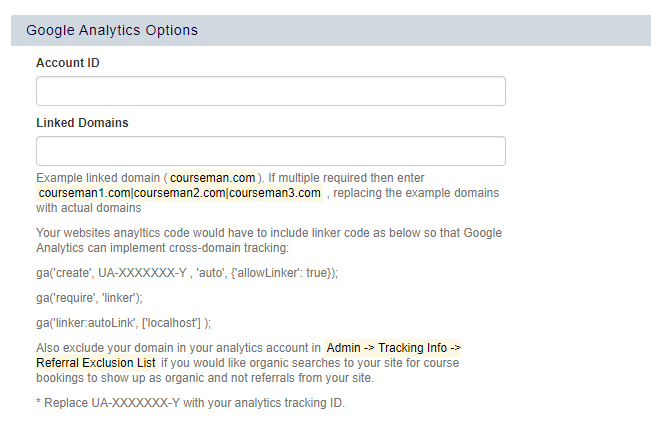
Within this section, enter your Google Analytics Tracking ID code into the Account ID field.
Then enter the required domain(s) into the Linked Domains section, which is only needed if there is a related site.
For example, if you use accessplanit as the Shopping Basket and another website to display the courses, then set the linked domain to the other site.
Google Tag Manager Options
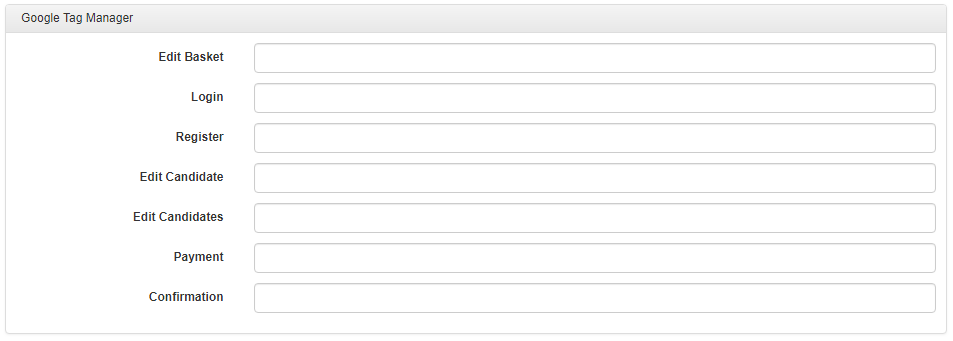
Google Tag Manager allows you to track each stage of the Shopping Basket. This will help you determine page views and key events, such as drop out statistics. In order to set this up, you'll need to create a Tag Manager account on Google Analytics (if you don’t already have one).
You will need to create a new container for your accessplanit system, where you will enter the URL of your system.
After you have created this container, you will be presented with the codes you need (don’t forget to publish the container once you’ve added in tags such as page views).
Once you have your codes, you will need to insert them into your accessplanit system, in the related fields shown above.
Once you have completed these areas click Save to start tracking.
FAQs
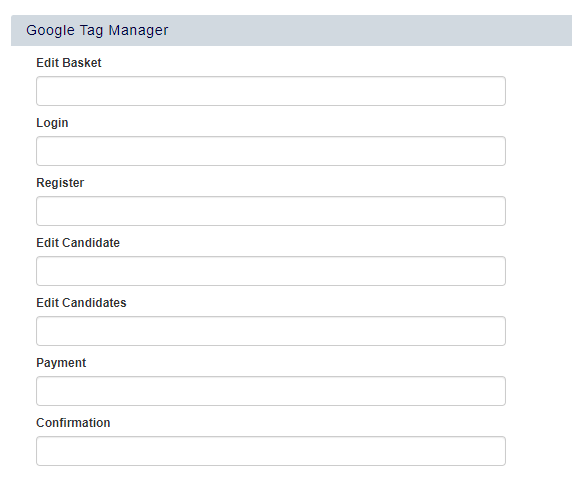
Paste the codes generated in the Google Tag manager into each of these settings in order to track conversions for each page of the shopping basket.
FAQs
My Google Analytics integration is not tracking the source correctly
To support cross-domain training, a “_ga” query string needs to be appended to the URL, as cookies are domain specific we cannot use the ga cookies for this purpose.Can you implement Enhanced eCommerce for the Analytics?
This is not currently possible, if this is something that you would be interested in please
log this with us in our Product Suggestions portal.