| Live Search | ||||||||
|---|---|---|---|---|---|---|---|---|
|
CONTENT:
This area has different tasks that can be done in this area of the system.
Use numbered lists, never use bullet points here.
Line breaks only when necessary
No tables
Some useful sentence structures to use in How-To Pages:
- The first line of an instruction: To add X to Area, go to Area.
- Subsequent instructions within that area: begin with an imperative (ie. a command - Go to the DataGrid, Enter your data etc.)
- The first instruction in a new area, window, or tab: In the New Area, edit/click/enter etc.
- Optional instructions: You can add/enter X...
- Last line of the instruction: end it with the imperative 'Click Save.' (or an equivalent).
- Directing to another help guide page: To find out more about X, click here / Click here to find out more about X
TEXT STYLING:
This is a heading, using Heading 2.
paragraph paragraph paragraph paragraph paragraph paragraph paragraph.
This is a sub-section, using Heading 3.
paragraph paragraph paragraph paragraph paragraph.
This is a sub-sub-heading, using paragraph and bolding.
paragraph paragraph paragraph paragraph paragraph paragraph.
IMAGES:
Images must:
- Be the "Original" size.
- Clear and concise, relevant!
- Use the Systems "Natural" borders, to help show the end/sides of the image
- Be below the text explaining the image
Images must not:
- Have borders
- Be of singular areas of the system e.g. no images of buttons, search boxes etc. Always grab the as much of the interface as possible.
- Be smaller or bigger than the original size
- Never contain personal information. Always use test users. Not real names.
EXAMPLE:
How to do X in this area:
Before you send users or delegates an eCampaign, you will need to create an email template for this, which dictates the content of the eCampaign.
How to create an eCampaign email template:
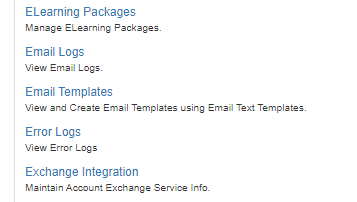
- Navigate to the Administration area.
- Go to Email Templates.
- Click the green Add button.
- You will see the following dialog box:
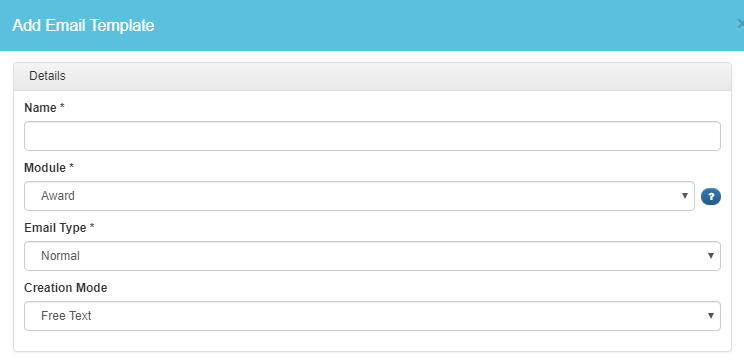
- Enter a name for your email template.
- The Module for the email template will depend on whether you would like to send the eCampaign to a group of users or to delegates. If users, select the module User, and if delegates, then select Delegate.
- The Email Type you need to select is eCampaign.
- The Creation Mode will be Free Text, unless your email template will be made up of text templates.
- After this, you can then fill in the Subject, Body and Signature boxes with the content of the email you would like to send out.
- Once finished, click the green Save & Close button.
How to send an eCampaign to a group of users:
- Go to the Users DataGrid.
- Select the users you would like to receive the eCampaign, and if this is more than the number of records that show in your DataGrid, you can select the "Click here to select all items in the result set" option as shown below:
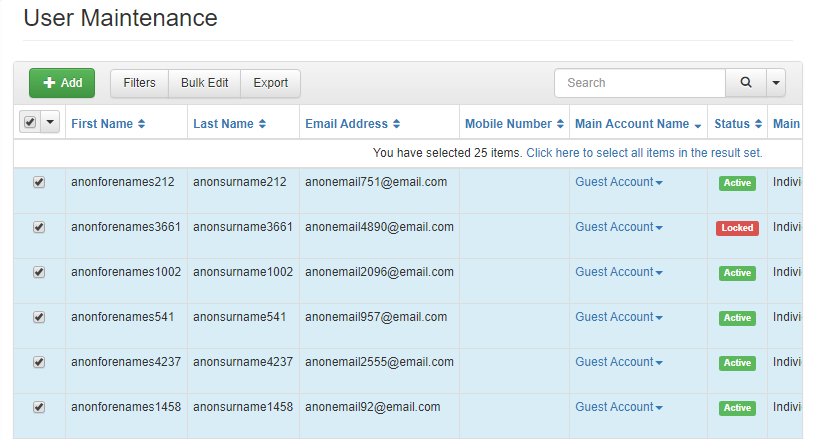
- This will select all users on the system, unless you have are currently using a filter on this DataGrid.
- Select the down arrow icon in the top left of the DataGrid, which will produce a drop-down list of options as below.
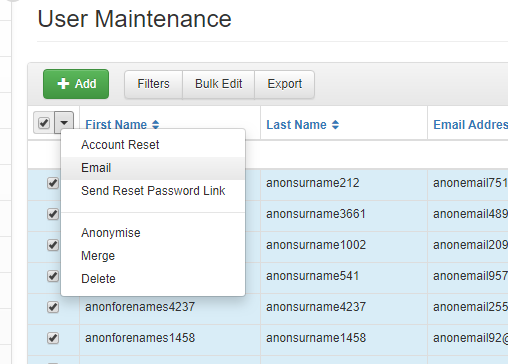
- Click on Email. This will open a dialog box as below:
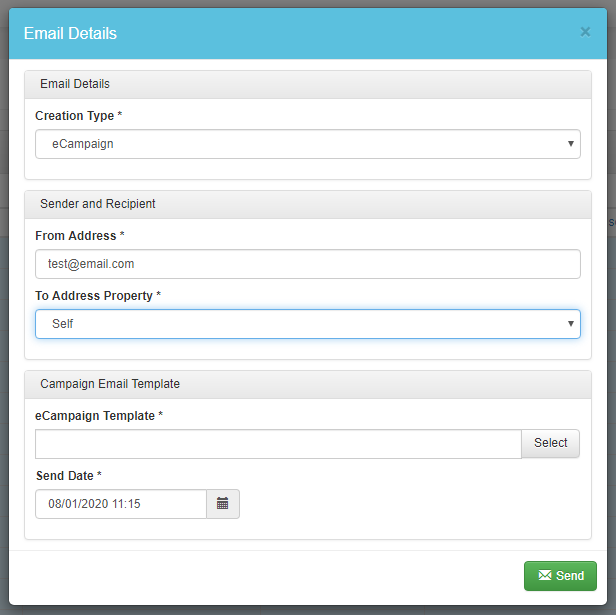
- For Creation Type, select the eCampaign option from the drop-down list.
- The From Address is the email address that the eCampaign will come from, which will default to your system email address. You can change this however, if you would like your eCampaign to be sent from a different email address other than your system email.
- You can then go to the eCampaign Template field and click on the grey Select button to choose your previously-created email template.
- Once your email template has been selected, you can choose when you would like your eCampaign to be sent.
- Once finished, click Send and your eCampaign will be scheduled to send.
How to send an eCampaign to a group of delegates:
- Go to Smart Grids, and then your chosen Delegates DataGrid (Class, Web, etc.).
- Select the delegates you would like to receive the eCampaign, and if this is more than the number of records that show in your DataGrid, you can select the "Click here to select all items in the result set" option as shown below:
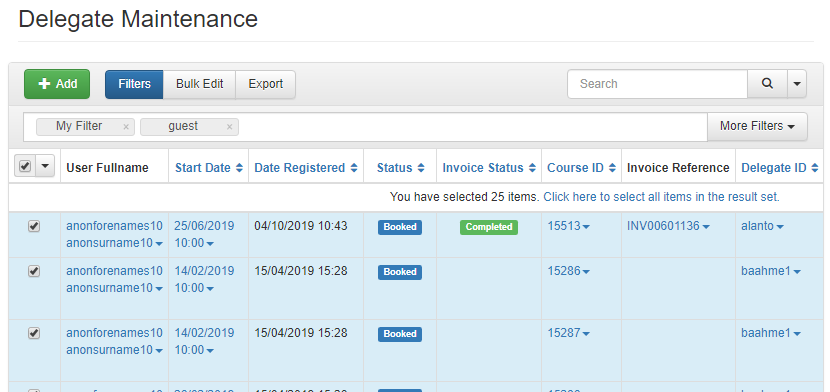
- This will select all past and future delegates on the system, unless you have are currently using a filter on this DataGrid.
- Select the down arrow icon in the top left of the DataGrid, which will produce a drop-down list of options as below.
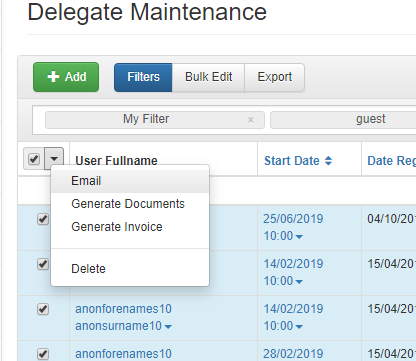
- Click on Email. This will open a dialog box as below:
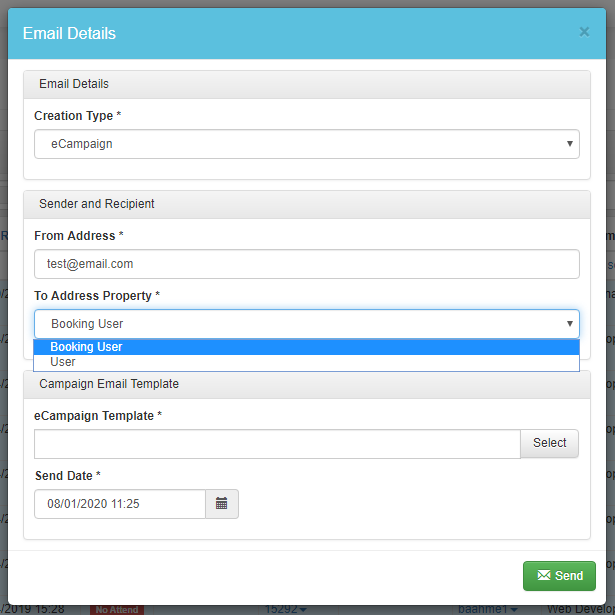
- For Creation Type, select the eCampaign option from the drop-down list.
- The From Address is the email address that the eCampaign will come from, which will default to your system email address. You can change this however, if you would like your eCampaign to be sent from a different email address other than your system email.
- The To Address Property is where you can select whether you want to send the eCampaign to either the booker or the delegate themselves.
- You can then go to the eCampaign Template field and click on the grey Select button to choose your previously-created email template.
- Once your email template has been selected, you can choose when you would like your eCampaign to be sent.
- Once finished, click Send and your eCampaign will be scheduled to send.