| Live Search | ||||||||
|---|---|---|---|---|---|---|---|---|
|
Adjust
How to adjust the available stock level
for myfor Products & Services
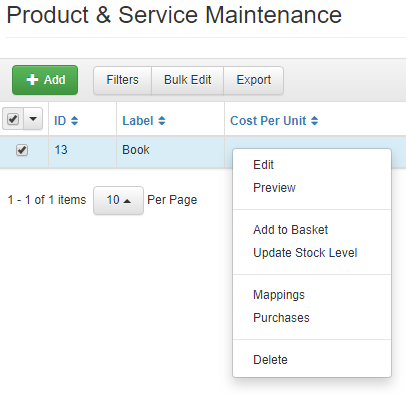
- Find your item in Navigate to the Products & Services Maintenance DataGrid DataGrid. To learn more about DataGrids, click here.
- Right - click the Product or Service and select Update Stock Level from the context menu.
- Change the value in the Stock Level field to be the correct numbervalue.
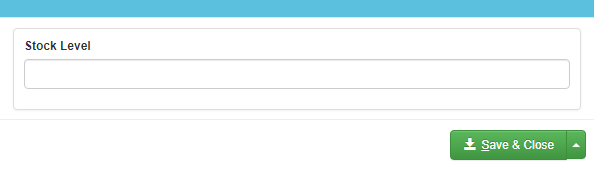
- Press Click Save & Close
- Close to save your changes.
How to view key changes made to a Product/Service
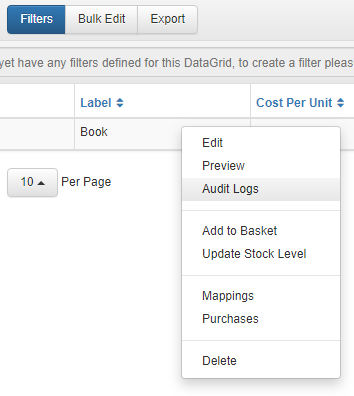
- Find your item in Navigate to the Products & Services Maintenance DataGrid.
- Right - click and select Audit Logs from the context menu.
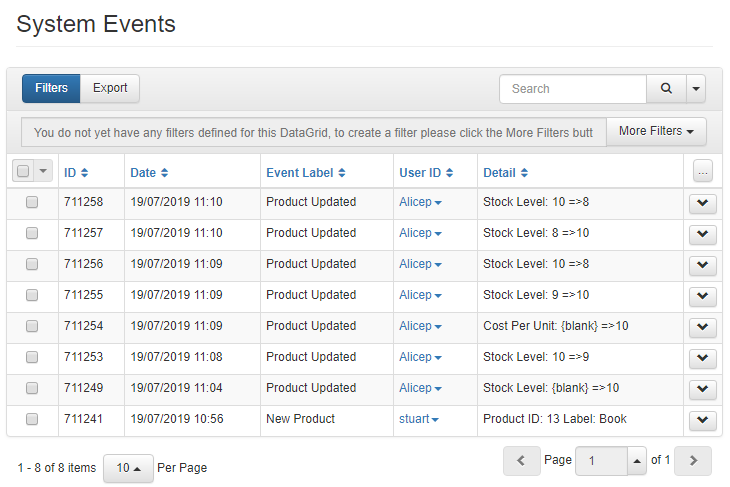
- This will take you to a System Events DataGrid for this Product/Service, where you can see what changes have been made and by whom.
Generate How to generate an invoice Invoice for a Product purchase
From the purchase record
- Find your item in Navigate to the Products & Services Maintenance DataGrid.
- Right - click and select Purchases from the context menu.
- Right - click on the purchase record you want to invoice.
- Select Generate Invoice.
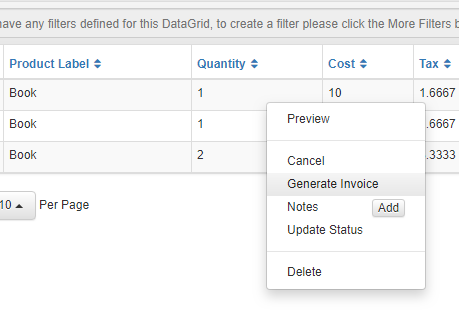
- You will then be able to access this invoice Invoice by exposing the Invoice ID or Reference column and clicking on the hyperlink in that field.
Cancel a Product purchase
- Find the item in Navigate to the Products & Services Maintenance DataGrid.
- Right - click and select Purchases from the context menu.
- Find the purchase record you would like to cancel, right - click and select Cancel from the context menu.
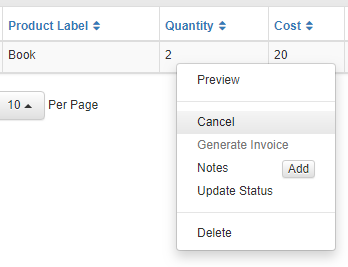
- If there is a cancellation fee, you can enter this into the Charge field. You can also add any Cancellation Notes.

- Choose whether you want to Keep Refund Local, or if you want the user User to receive a refund through the Payment Gateway they originally paid with.
- Press Click Cancel
- to confirm the cancellation.
How to manage the status of the Product purchase
- Find the item in Navigate to the Products & Services Maintenance DataGrid.
- Right - click and select Purchases from the context menu.
- Find the purchase record you would like to cancel, right - click and select Update Status from the context menu.
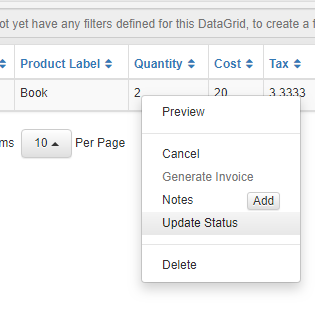
- Select which status you would like to change the purchase record to (the . The default statuses are New, Cancelled, and In Progress).
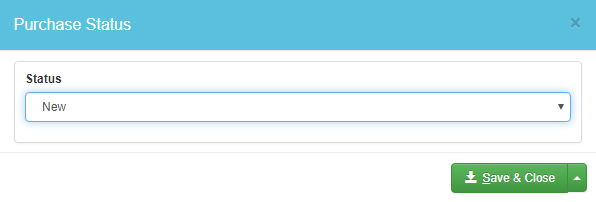
- Press Click Save & Close
- Close to save your changes.
How to create your own Product purchase statuses
- To create your own customised Product purchase status, first go navigate to the the Administration area Click into the and select Custom List Items area.
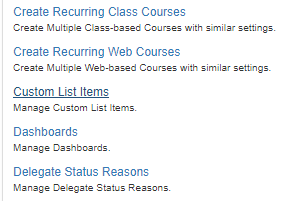
Select Add and a dialog box will open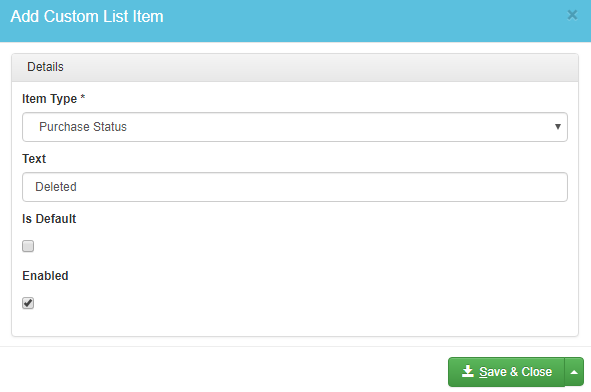
- The Item Type will be Purchase Status and in the Text field, enter the label you want for your statusClick Add at the top of the DataGrid. This will open the Add Custom List Items window.
- Select Purchase Status as your Item Type, and enter the name of the status into the Text field.
- Ticking Is Default will make sure your status is automatically selected as the default purchase status.
- Make sure the Enabled option is ticked so the status can be used for a purchase record.
- Click Save & CloseClose to save your new Purchase Status.