| Live Search | ||||||||
|---|---|---|---|---|---|---|---|---|
|
The Enquiry Plugin allows you to link your website's enquiry form with your Opportunities module in your accessplanit system, and automatically create new Opportunities when someone completes the form!
This provides people with an alternative option to booking, helps to keep track of enquiries, and keeps prospects and customers within the same system - and you can also have different enquiry forms per training provider (if you have multiple), so you can organise these easier.
When people make an enquiry via the Enquiry Form, they will be created as a new user (unless they already exist within the system), and an Opportunity will be created within your system ready to be managed.
Please note that you will require the Opportunities module to use this functionality. Please speak to your| Live Search | ||||||||
|---|---|---|---|---|---|---|---|---|
|
| Info |
|---|
The Enquiry Form Plug-in allows you to link your website's enquiry form with your Opportunities module in accessplanit, to automatically add new Opportunities when someone completes the form, automating the boring! The enquiry form plug-in provides your customers with a way to express their interest in your courses without having to commit to a booking, helps you to keep track of your enquiries without manually typing them up, and keeps your prospects and customers within the same platform. |
You need the Opportunities module to use this functionality. Please speak to your Customer Success Manager if you are unsure if you have this module.
Example Website
Here is an example website which uses this API, the structure and design of the form (i.e. the layout, the fields included and the styling) are defined by yourselves, so you are not restricted to a basic design!
https://www.accessplanit.com/health-and-safety-courses
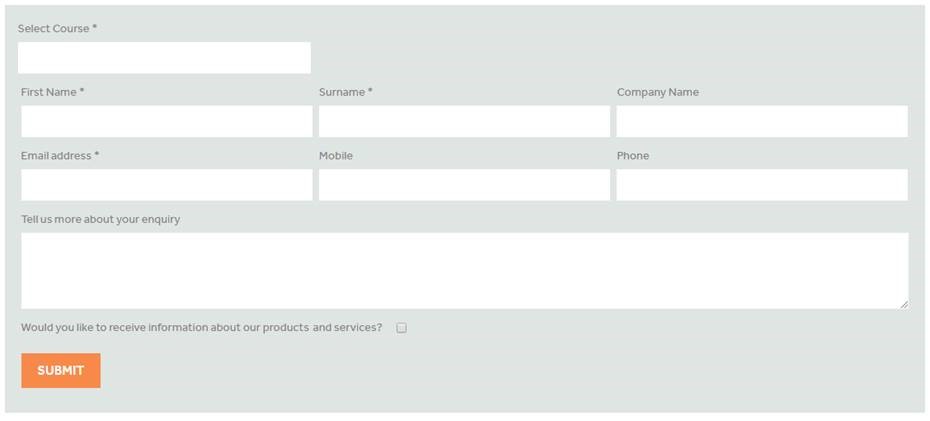
Enquiry Fields
When you are building the enquiry form on the website, you can link the options in your form to a selection of fields in your accessplanit system.
The following fields are available to be updated via the Enquiry Form plugin:
User Based fields
- Forename (Mandatory)
- Surname (Mandatory)
- Phone
- Mobile
- Address
- Town
- County
- Country
- Postcode
- MarketingOptIn
Company/Account Based Fields
- CompanyName
- CompanyEmail
- CompanyPhone
- CompanyAddress
- CompanyTown
- CompanyCounty
- CompanyCountry
- CompanyPostcode
- CompanyGroupID
- CompanyGroupName
- IndustryName
Enquiry Based Fields
- CourseTemplateID (the course that is being enquired about)
- Title
- AdditionalInformation
Please note that you must supply a valid OwnerID back alongside this information when submitting an enquiry.
The OwnerID is the ID of the training provider that will own this Opportunity, please speak to a system administrator for a list of the Owner IDs.
Behind the Scenes
When someone completes the enquiry form that you have built, the following events will happen in the linked accessplanit system:
A new User is created within the systemUnless this User already exists, a new user will be created using the personal information supplied in the form
A new Account is created within the system
If Account details have been supplied, a new account will be created using the 'Company' information supplied, unless this Account already exists
The newly-created User is linked to the newly created Account
The User created in step 1 will be added into the Account created in step 2
If Account details are not supplied by the user, or you do not capture them in your form, the user will be added into the holding 'Guest Company'
The Account is linked to an Industry
If the user has selected an Industry within the form, their new Account will be added to that Industry
- If the user has selected a Course Template for their enquiry, a new Opportunity item for that specific course will be created and linked to the new Opportunity.
We could then build a Workflow to automatically notify a member of the admin team once an Opportunity has been generated.
Integration Script
Before you begin to build your enquiry form and link it to your accessplanit system using the below script, please get in touch with your Customer Success Manager to whitelist your website URL, otherwise you will not be able to successfully complete the below process.Integration script
| Code Block | ||||
|---|---|---|---|---|
| ||||
<script src="https://yoursystemnamehere/accessplan/NetLibrary/ClientScripts/webintegration.js"></script> |
Build Options object
In a <script> tag, build up an options object:
| Code Block | ||||||
|---|---|---|---|---|---|---|
| ||||||
var courseOptions = {
        ListID: 'courses',
        CourseIDs: [],
        CompanyID: "",
        CategoryIDs: []
       }

var opportunityOptions = {
        OwnerID: "",
        Title: "Online Enquiry",
        Forename: "",
        Surname: "",
        Email: "",
        Phone: "",
        Mobile: "",
        Address: "",
        Town: "",
        County: "",
        Country: "",
        Postcode: "",
        CompanyName: "",
        CompanyEmail: "",
        CompanyPhone: "",
        CompanyAddress: "",
        CompanyTown: "",
        CompanyCounty: "",
        CompanyCountry: "",
        CompanyPostcode: "",
        CompanyGroupID: "",
        CompanyGroupName: "",
        IndustryName: "",
        CourseTemplateID: ""
        AdditionalInformation: ""
        MarketingOptIn: ""
} |
opportunityOptions are the options which can be passed to the ‘EnquiryManager.createOpportunity’ function as below. These options can be populated by the values in your form elements.
3. Call EnquiryManager
To populate a list with all courses call the EnquiryManager function as below:
EnquiryManager.getCourses(courseOptions);
Now after the User has selected values on your form, the opportunityOptions options object needs to be passed in to the course manager object as below: EnquiryManager.createOpportunity (opportunityOptions, success, error);
As this is an asynchronous process, success and error call backs can be used to monitor results. The example below shows how these callbacks can be used:
Example HTML
Please note that the CompanyID and OwnerID fields are the account ID of the training provider, please speak to your Customer Success Manager for a list of training provider IDs
| Code Block | ||||
|---|---|---|---|---|
| ||||
<script src="https://yoursystemnamehere.accessplanit.com/accessplan/netlibrary/clientscripts/webintegration.js"/> |
| language | js |
|---|---|
| theme | DJango |
| linenumbers | true |
Why integrate?
There are two main scenarios where website enquiries work well!
To provide your customers with a way to request more information about your public courses
An enquiry form on your website let’s your customers get in touch with you to find out more, perhaps they’re unsure about whether they are qualified enough to attend the course, perhaps they have accessibility requirements, perhaps they just want to know a little more about your course! By providing an enquiry form, you give your customers the opportunity to check with you, and do not automatically lose that booking.To receive requests for bespoke, in-house course bookings
An enquiry form on your website let’s your customers provide the detail about what course they would like running for their team, if they have any particular topics that need to be included, or anything bespoke factored in.
While an enquiry form on it’s own is a great way to capture your customers' questions and requests, by connecting your website enquiry form to your accessplanit Opportunities you can save countless admin hours and reduce the chance of human error.
New customers are automatically added into your accessplanit platform
If the person enquiring does not yet exist as a User, they will be automatically added as a User alongside their company information as a new or existing Account. Meaning your back office is adding new customers, even when you’re not!Enquiries are automatically added as Opportunities
Each enquiry will be automatically added as a new Opportunity and linked to the enquiring customer. Ready for your team to review and feedback to them!
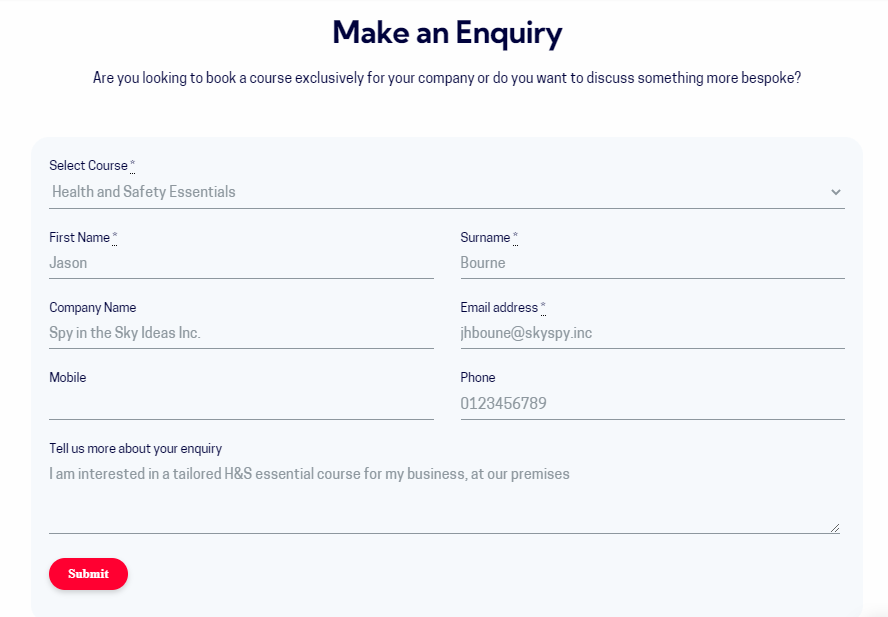
Example website
Here is an example website containing an enquiry form that is connected to an accessplanit platform, the structure and design of the form (i.e. the layout, the fields included and the styling) are defined by yourselves and your web team, so you can add choose what information you capture and include your own branding!
Setting up the Enquiry Form Plug-in
| Info |
|---|
Please note that AP does not integrate well with the ‘Country’ field if 2-letter country codes are being used (I.e. US - United States) |
If you do not yet have an enquiry form on your website, we recommend you first take a look at the available fields to connect to in accessplanit, and design your form with these in mind.
Get in touch with your accessplanit CSM with the website URLs that you intend to have the enquiry form on, so that we can whitelist them for use with the plug-in. Please ensure when providing the URL, that it is exact and contains https://
Once you have created your enquiry form on your website, use the accessplanit integration script and link the options in your form to the available fields in the accessplanit platform, i.e. link your ‘First Name' option to the 'Forename’ accessplanit field.
Test! Work with your training team to log a few test enquiries, to check that these feed into your accessplanit platform.
| Note |
|---|
Please Note: If you’re using Wix, some components of the HTML enquiry form might not be compatible. |
Enquiry fields
Once you have built the enquiry form on the website, link the options in your form to the relevant fields in accessplanit.
| Info |
|---|
Alongside the mapping of your enquiry form options to accessplanit fields, you must supply a valid OwnerID back alongside this information when submitting an enquiry. |
The following fields are available to be updated via the Enquiry Form plug-in:
User Based fields
Forename (mandatory)
Surname(mandatory)
Email
Phone
Mobile
Address
Town
County
Country
Postcode
MarketingOptIn (either true or false)
Company/Account Based Fields
CompanyName
CompanyEmail
CompanyPhone
CompanyAddress
CompanyTown
CompanyCounty
CompanyCountry
CompanyPostcode
CompanyGroupID
CompanyGroupName
IndustryName
Enquiry Based Fields
CourseTemplateID (the course that the customer is enquiring about)
Title (the name that will be given to the Opportunity)
AdditionalInformation (the text added into the description of the Opportunity)
| Info |
|---|
Please note that you can only pass one value for CourseTemplateID through to accessplanit at a time, the Enquiry Form Plug-in doesn't yet allow users to enquire about multiple courses in one submission. If this would be a useful enhancement to you, please log your interest on accessplanit’s product portal. |
Behind the scenes
When someone completes the enquiry form that you have built, the following events will happen in the linked accessplanit platform:
A new User is added within accessplanit
Unless this User already exists (based on their first name, last name and email address), a new user will be added in your accessplanit platform using the personal information supplied in the form.A new Account is added within accessplanit
If Account details have been supplied by the person making the enquiry, a new account will be added in your accessplanit platform using the 'Company' information supplied, unless this Account already exists (based on the Account Name).The newly-created User is linked to the newly created Account
The User created in step 1 will be given an employment record for the Account created in step 2.
If Account details are not supplied by the user, or you do not capture them in your form, the user will be added into your holding 'Guest Account'.The Account is linked to an Industry
If the person making the enquiry selected an Industry within the form, their new Account will be added to that IndustryAn new Opportunity is created:
The Opportunity will be owned by the 'Owner ID' company that you supply within the feed
The Opportunity will be given a standard label, such as “Online Enquiry”
The Opportunity will be mapped to the Account and User from steps 1 and 2
The 'Description' field against the Opportunity will be populated with the free-text supplied by the User for the 'Additional Information' field.
The selected Course Template is added as an item to the Opportunity.
If the user has selected a Course Template for their enquiry, a new Opportunity item for that specific course will be created and linked to the new Opportunity.
Integration script
Before you begin to build your enquiry form and link it to accessplanit using the below script, please get in touch with your Customer Success Manager to whitelist your website URL, otherwise you will not be able to successfully complete the below process.
Integration script
Code Block language xml <script src="https://yoursystemnamehere/accessplan/NetLibrary/ClientScripts/webintegration.js"></script>
This is used to reference the accessplanit JavaScript needed to build the table.
Please replace the yoursystemnamehere with the name of your accessplanit platform, i.e.
<script src="https://trainingRus.accessplanit.com/accessplan/NetLibrary/ClientScripts/webintegration.js"></script>Build Options object
In a <script> tag, build up an options object:
| Code Block | ||
|---|---|---|
| ||
var courseOptions = {
        ListID: 'courses',
        CourseIDs: [],
        CompanyID: "",
        CategoryIDs: []
       }

var opportunityOptions = {
        OwnerID: "",
        Title: "Online Enquiry",
        Forename: "",
        Surname: "",
        Email: "",
        Phone: "",
        Mobile: "",
        Address: "",
        Town: "",
        County: "",
        Country: "",
        Postcode: "",
        CompanyName: "",
        CompanyEmail: "",
        CompanyPhone: "",
        CompanyAddress: "",
        CompanyTown: "",
        CompanyCounty: "",
        CompanyCountry: "",
        CompanyPostcode: "",
        CompanyGroupID: "",
        CompanyGroupName: "",
        IndustryName: "",
        CourseTemplateID: ""
        AdditionalInformation: ""
        MarketingOptIn: ""
} |
Note: courseOptions is used to get courses and populate the List whose ID is passed in the ListID property.
opportunityOptions are the options which can be passed to the ‘EnquiryManager.createOpportunity’ function as below. These options can be populated by the values in your form elements.
3. Call EnquiryManager
To populate a list with all courses call the EnquiryManager function as below:
| Code Block |
|---|
EnquiryManager.getCourses(courseOptions); |
Now after the User has selected values on your form, the opportunityOptions options object needs to be passed in to the course manager object as below:
| Code Block |
|---|
EnquiryManager.createOpportunity (opportunityOptions, success, error); |
As this is an asynchronous process, success and error call backs can be used to monitor results. The example below shows how these callbacks can be used:
Example HTML
Please note that the CompanyID and OwnerID fields are the account ID of the training provider, please speak to an Administrator for a list of the Owner IDs in use in the accessplanit platform.
| Code Block | ||
|---|---|---|
| ||
<script src="https://yoursystemnamehere.accessplanit.com/accessplan/netlibrary/clientscripts/webintegration.js"/> |
| Code Block | ||
|---|---|---|
| ||
var courseOptions = { ListID: 'courses', CourseIDs: [], CompanyID: "TRAINIBVKH", CategoryIDs: [] } var opportunityOptions = { OwnerID: "TRAINIBVKH", Title: "Online Enquiry", Forename: "", Surname: "", Email: "", Phone: "", Mobile: "", Address: "", Town: "", County: "", Country: "", Postcode: "", CompanyName: "", CompanyEmail: "", CompanyPhone: "", CompanyAddress: "", CompanyTown: "", CompanyCounty: "", CompanyCountry: "", CompanyPostcode: "", CompanyGroupID: "", CompanyGroupName: "", IndustryName: "", CourseTemplateID: "", AdditionalInformation: "" } $(function () { $('#courses').on('change', function () { opportunityOptions. |
CourseTemplateID = this.options[this.selectedIndex].value; }); $( |
"#createEnquiry").on(' |
click', createEnquiry); $('#title').on('input', function () { opportunityOptions. |
Title = this.value; }); $(' |
#forename').on('input', function () { opportunityOptions. |
Forename = this.value; }); |
$('#surname').on('input', function () { |
opportunityOptions.Surname = this.value; } |
);
|
$('#cname').on('input', function |
() {
|
|
opportunityOptions. |
CompanyName = this.value; }); $('#email').on('input', function |
( |
) |
{ |
opportunityOptions.Email |
= this.value; }); $('#mobile').on('input', function |
( |
) |
{ |
|
|
opportunityOptions.Mobile = this.value; |
}); |
$('#phone').on('input', function () { |
opportunityOptions.Phone = this.value; }); $('#note').on('input', function ( |
) { opportunityOptions.AdditionalInformation = this.value; |
}); setTimeout(function () { |
EnquiryManager.getCourses(courseOptions) }, 1000); }); function createEnquiry( |
) {
|
if (isEmptyOrSpaces(opportunityOptions.Forename) || |
isEmptyOrSpaces(opportunityOptions.Surname) || |
isEmptyOrSpaces( |
Marketing Opt-In
The Marketing Opt-In field is a newer addition, and allows you to add in a Marketing Opt-In checkbox which, if ticked, will subscribe the user to marketing emails.
This text is fully customisable and the default state of the checkbox is up to you; however, for GDPR reasons, we recommend that this box is unchecked as default
opportunityOptions.Email)) {
            alert("Please enter all required values");
            return;
        }

        EnquiryManager.createOpportunity(opportunityOptions,
            function (data) {
                alert("Enquiry successfully sent.");
            },
            function (data) {
                alert(data.statusText);
            });

    }
    function isEmptyOrSpaces(str) {
        return str === null || str.match(/^ *$/) !== null;
    }
</script>

//Include the form fields here. If List ID is populated in courseOptions then the ID of the drop down will need to match that |
Marketing Opt-In
The Marketing Opt-In field allows you to add in a Marketing Opt-In checkbox which, if ticked, will subscribe the user to marketing emails.
The value for this field must be passed through to accessplanit as a boolean value; true or false.
This text is fully customisable and the default state of the checkbox is up to you; however, for GDPR reasons, we recommend that this box is unchecked as default.
Enquiry Form Plugin best practice
Here are some top tips to allow you to get the most out of Opportunities added via your Enquiry Form within your accessplanit platform!
Add a filter on your Opportunities DataGrid to see all of your online enquiries
To get quick access to the enquiries that you have received overnight, or over the weekend, we recommend setting up a standard Filter on your Opportunities DataGrid based on the standard title that your website enquiries are given.Build a Workflow to automatically notify a member of the admin team once an Opportunity has been generated
If you would prefer to be emailed when a new enquiry comes in, you can set up a Workflow to automatically notify you or another member of your team containing the information in the enquiry.Build a Workflow to automatically let your customer know that you have received their enquiry with some expected timelines for your feedback
This is particularly useful if you take a lot of enquiries over the weekend where your customers may not get a reply from you for a few days, an automated email gives them piece of mind that their enquiry has been logged, and sets their expectations for when you’ll be back in touch with them.
FAQs
I have entered the code into my web page, why is it not pulling the form through?
A common reason for the form not pulling through correctly is where Training Provider ID (Owner ID) has not been added correctly, please double check the CompanyID property in the courseOptions part of the script.
Another common reason is that the URL for the webpage has not been whitelisted at accessplanit, please get in touch with your Customer Success Manager to check that this has been set-up.
If both of the above are set-up correctly, please get in touch with a member of the accessplanit support team.