| Live Search | ||||||||
|---|---|---|---|---|---|---|---|---|
|
How to Add a Product to your basket
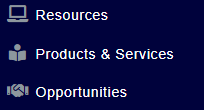
Navigate to the Products and Services DataGrid via the main left-hand menu:
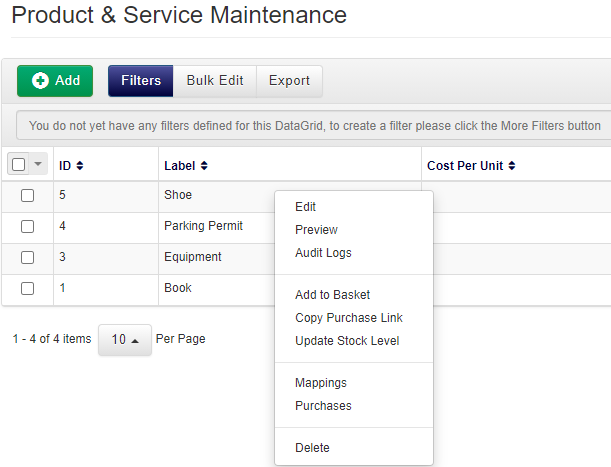
In the DataGrid, right-click the Product or Service you want to add to your Shopping Basket, and click Add to Basket:
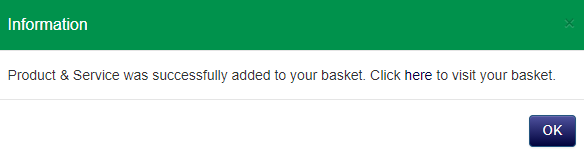
Navigate to your Shopping Basket by clicking here on the dialog box, or alternatively, close this box and click the Shopping Basket icon in the top-right of the interface and click Checkout.
Complete the Shopping Basket process to complete the purchase.
How to View the purchases related to a Product
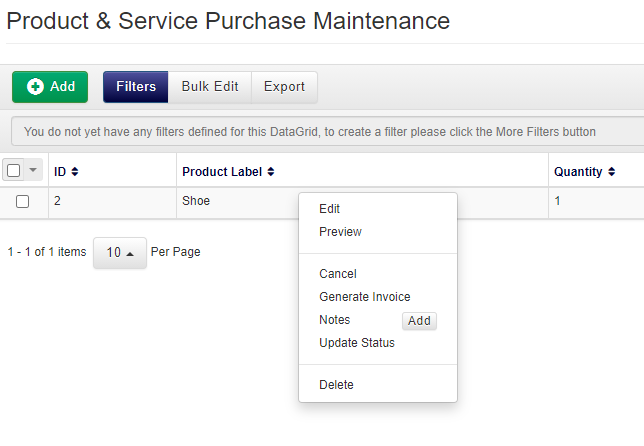
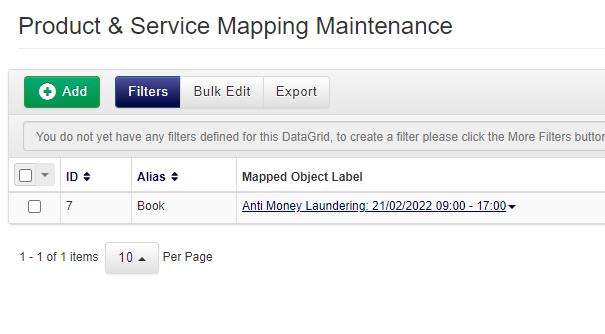
In the DataGrid for Products and Services, right-click the item you which to view the Purchases for and click Purchases:
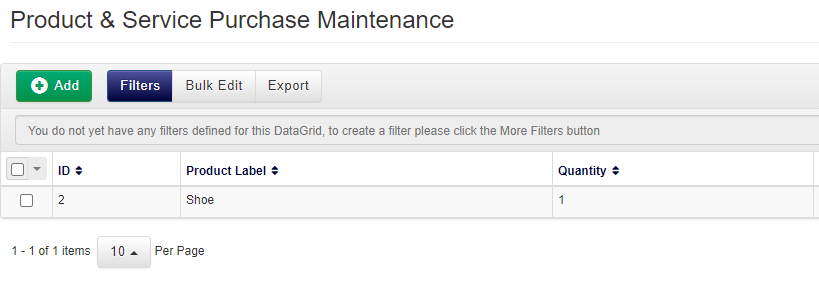
You will be taken to a DataGrid in which you can see all Purchases of the Product/Service:
There are several actions you can make against the Purchase by right-clicking on a row within the Purchases DataGrid:
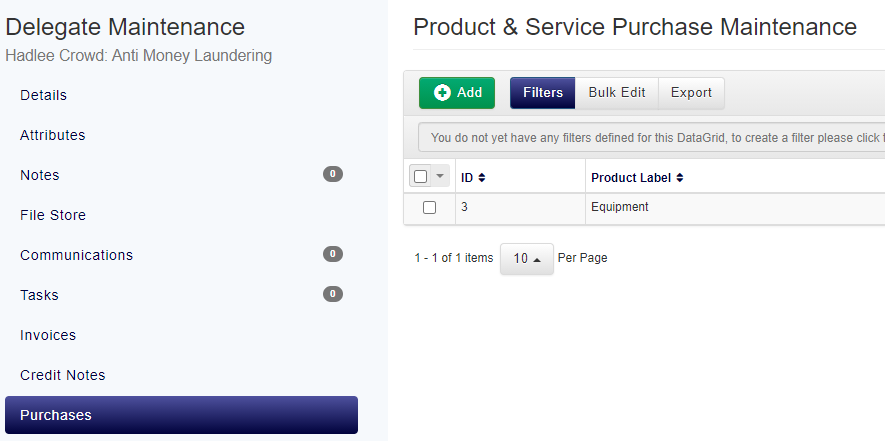
You can quickly lookup the purchases that are linked to each of your Delegates & Placeholders via the Purchases tab when viewing a Delegate on a course date that has associated products:
How to manually record Product & Service Purchases outside of your Shopping Basket
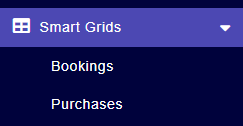
Navigate to the Purchases DataGrid (Products & Services DataGrid > right click on a Product or Service > Select Purchases).
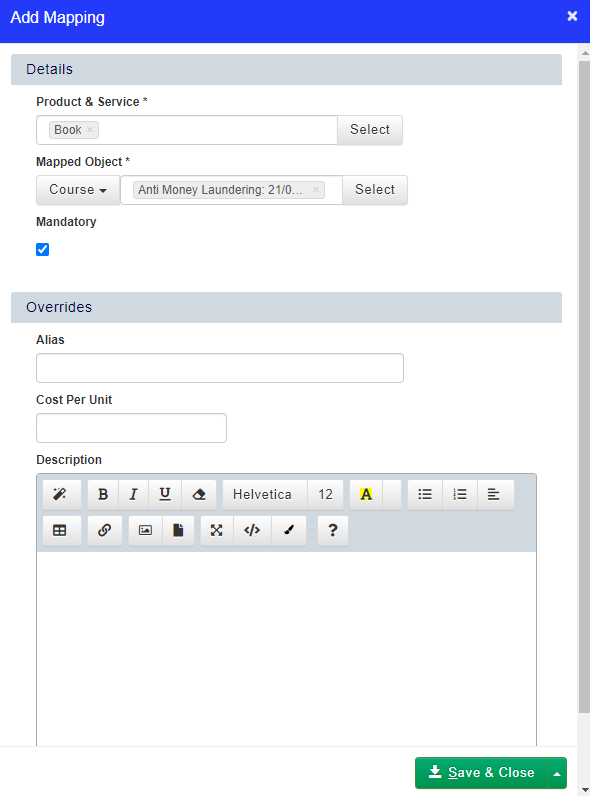
Click Add and select the Product or Service you want to add, choose the quantity and the Mapped Object (Delegate or Placeholder) .
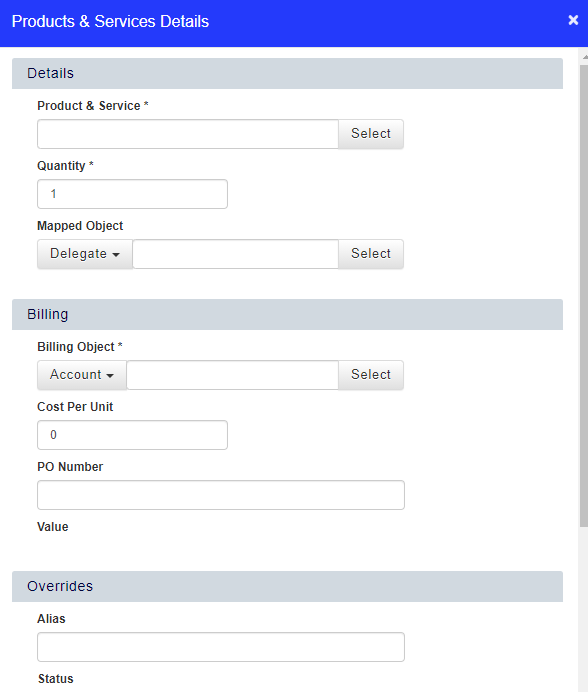
Fill in the billing details, Billing Object, Cost Per Unit and PO Number if required.
Click Save & Close.
How to generate a Purchase Link for a Product or Service
Navigate to the Products and Services DataGrid.
Right click Product or Service you wish to copy a Purchase Link for and select Copy Purchase Link from the context menu.
The Purchase Link will now be copied to your clipboard.
How to view and add Products and Services in the Shopping Basket
Add a Course Date to the Basket which has a Product and Service associated. To learn how to associate Products and Services with Courses, click here.
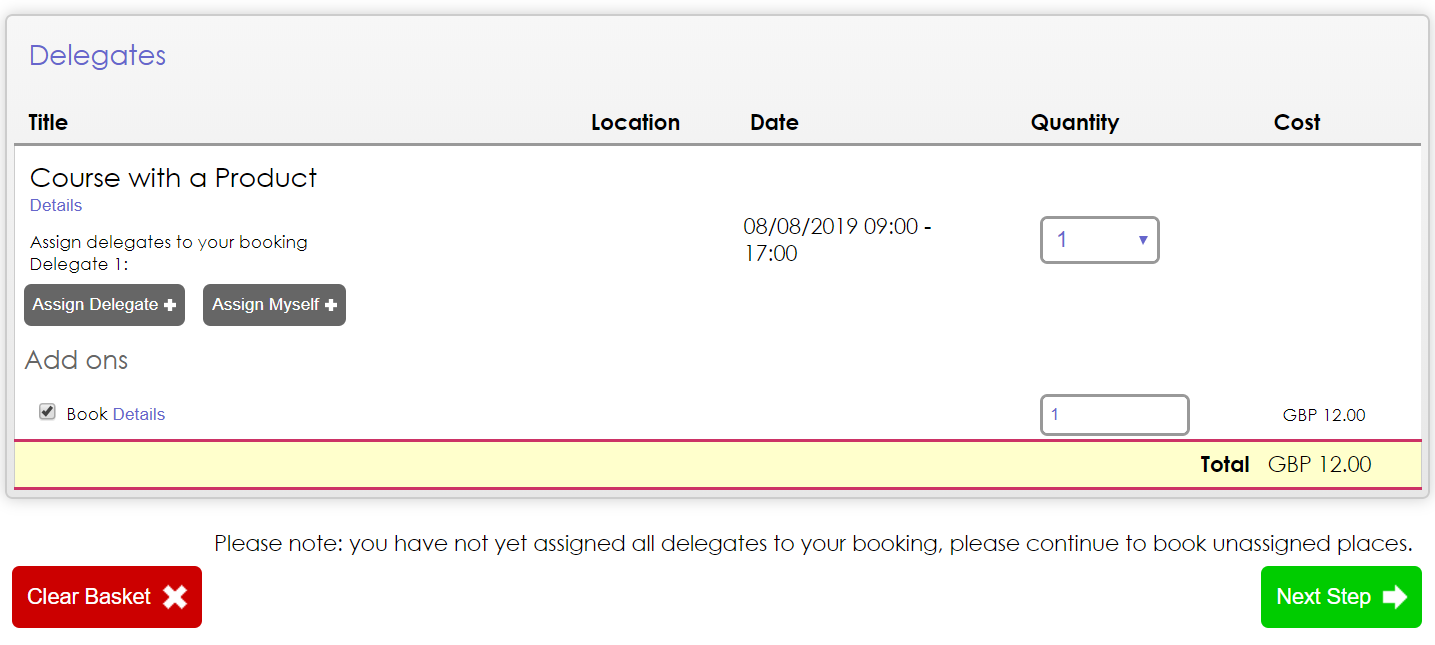
Continue through the Basket to the Delegates stage:

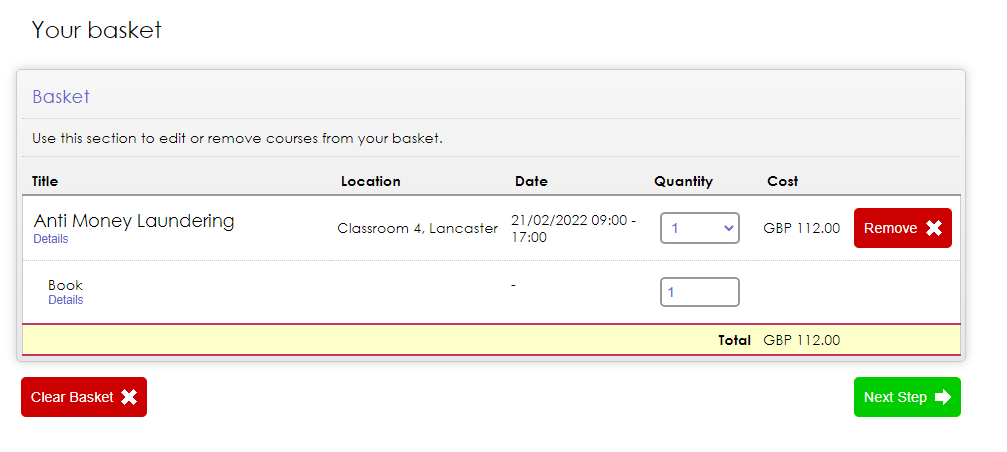
Tick the Product that is available under "Add ons".
Notice the cost of the Product is applied:
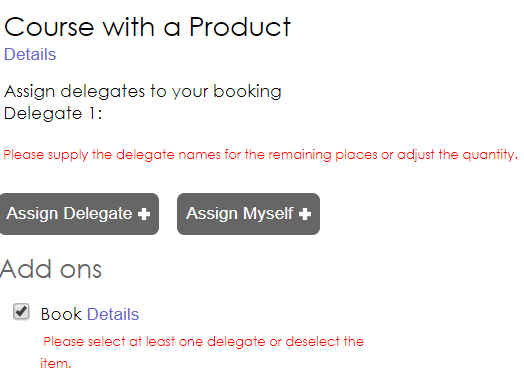
As this product must have a User linked to it, if you don't assign a Delegate to the course, you cannot proceed through the Basket:
Once you assign a Delegate, you will see that Delegate's name also apply against the Product:
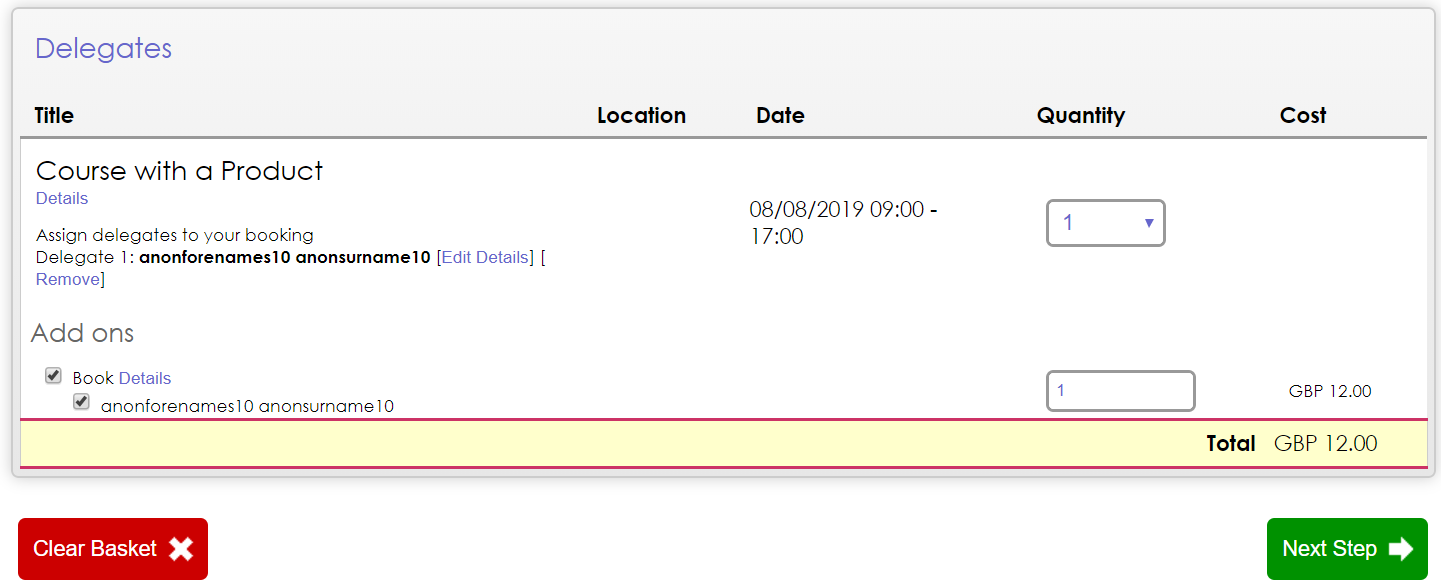
You will then be able to proceed through the Shopping Basket.
How to purchase Products and Services that are not related to the Courses in the Basket
Navigate to the Products and Services DataGrid.
Right-click on the Product you'd like to add to your Shopping Basket.
Select Add to basket.
Navigate to your Shopping Basket.
Click Next.
Assign a Booker.
Pay for your Product.
How to view and add a Course and a Product to the Basket
Ensure you have set up a Product.
Ensure you have set up a Course in the Future.
On the Course Date, go to the tab Products & Services:
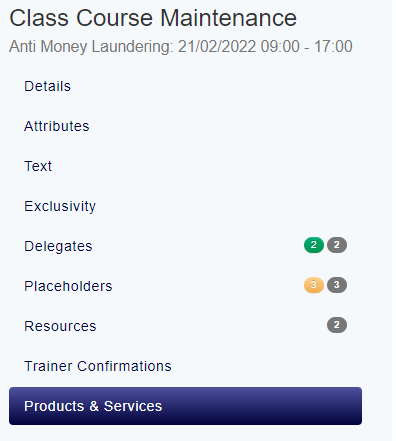
Click Add in the Products & Services DataGrid on the Course Date and select a Product:
Click Save & Close.
You'll see the Product/Service now appears in the Products & Services DataGrid within the Course Date:
Navigate back to Details of the Course and click Actions in the top right.
Click Add to basket.
Navigate to your Basket.
You'll notice the Product/Service appear when you get to the Delegates stage of the Basket:

Complete the Shopping Basket process and an Invoice will be Generated for this booking, including the Course and the Product/Service.
How to set up a Products and Services purchase summary email
Navigate to Workflow Templates via Administration.
Add a new Workflow by clicking Add.
Select the module Booking. To learn more about Workflows, click here.
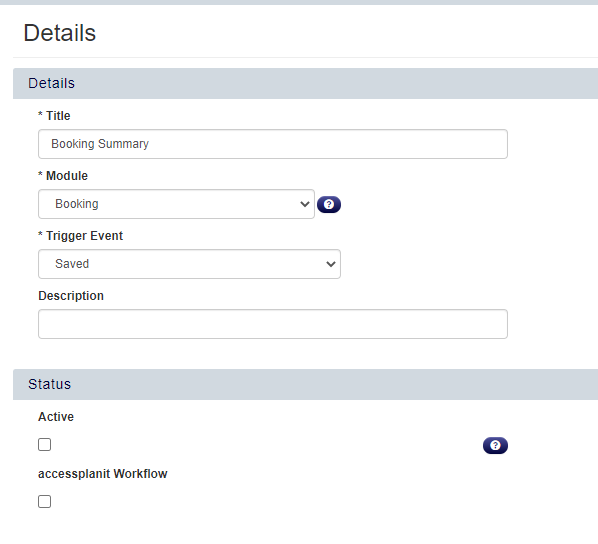
Give your Workflow a Label and click Save.
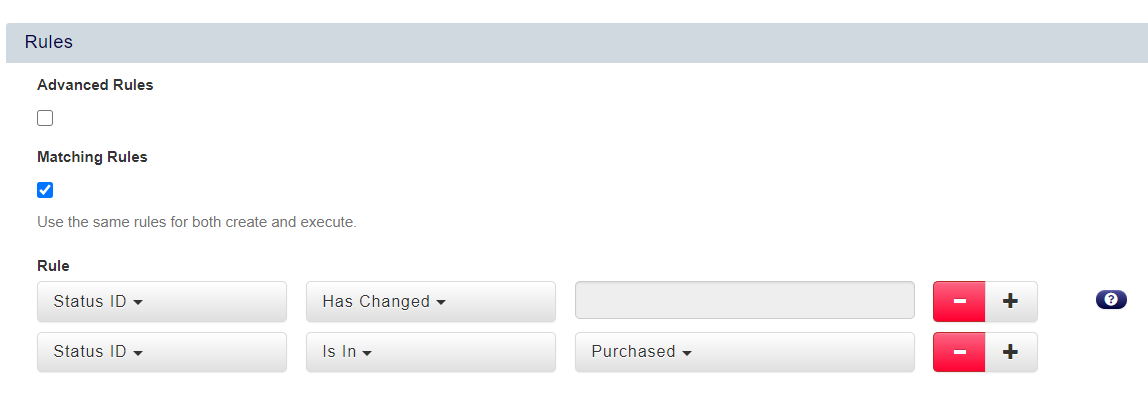
Go to Settings and add the following rule:


Click Save.
Go to Actions and click Add to add a new Email Action.
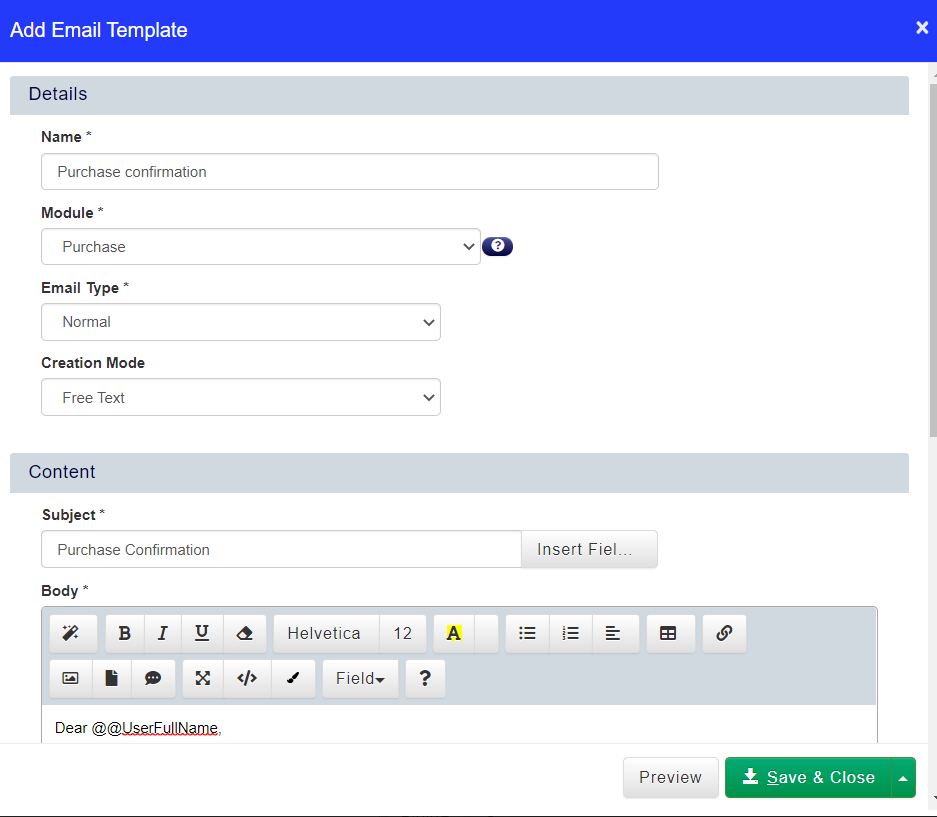
Here you can either use a Custom email or select an Email Template. To learn more about Email Templates click here. To learn more about Text Templates, click here.
In this example, we have gone to Email Templates and set an Email up as below:

Then, set up the Email Action as below:
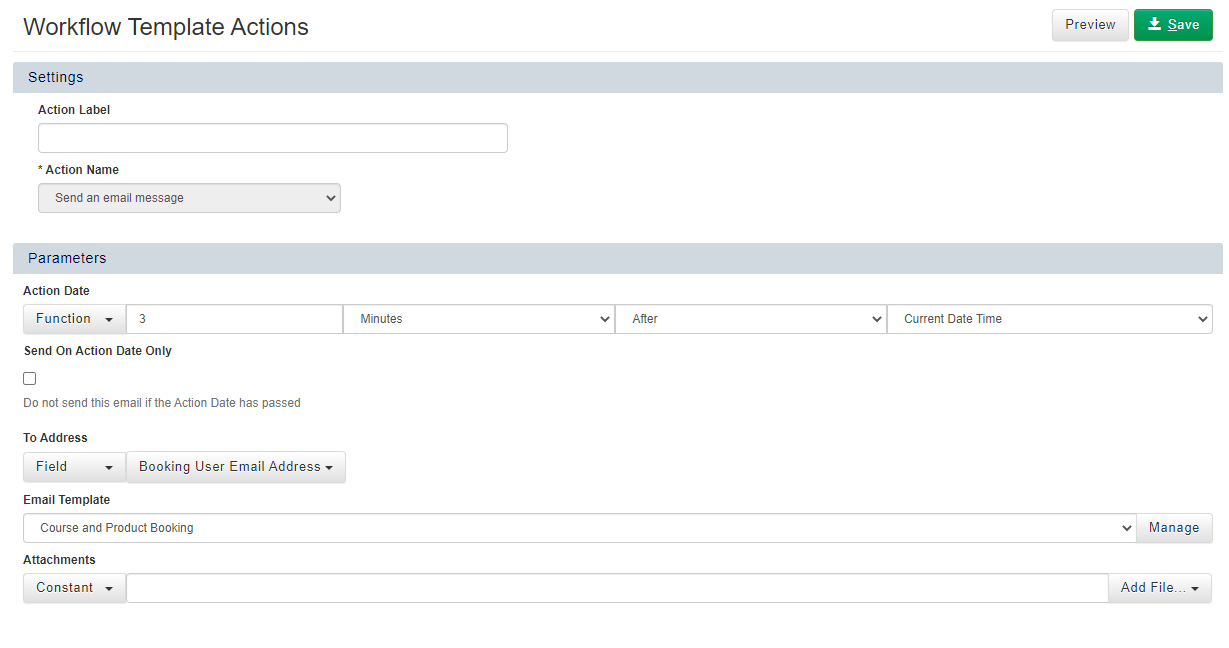
The above email will send 20 minutes after the Booking as been made, using the Email template created above, which will give a summary of the courses and/or Products that were purchased.
Click Save.
How to set up an email per Product and Service purchased
Navigate to Workflow Templates via Administration.
Add a new Workflow by clicking Add.
Select the Purchase Module. To learn more about Workflows, click here.
Give your Workflow a Label and click Save.
Go to Settings and add the following rules:
Click Save.
Go to Actions and click Add to add a new Email Action.
Here you can either use a Custom email or select an Email or Text Template. To learn more about Email Templates click here. To learn more about Text Templates, click here.
In this example, we have gone to Email Templates and set an Email up as below:

The Email Action is then set up as below:
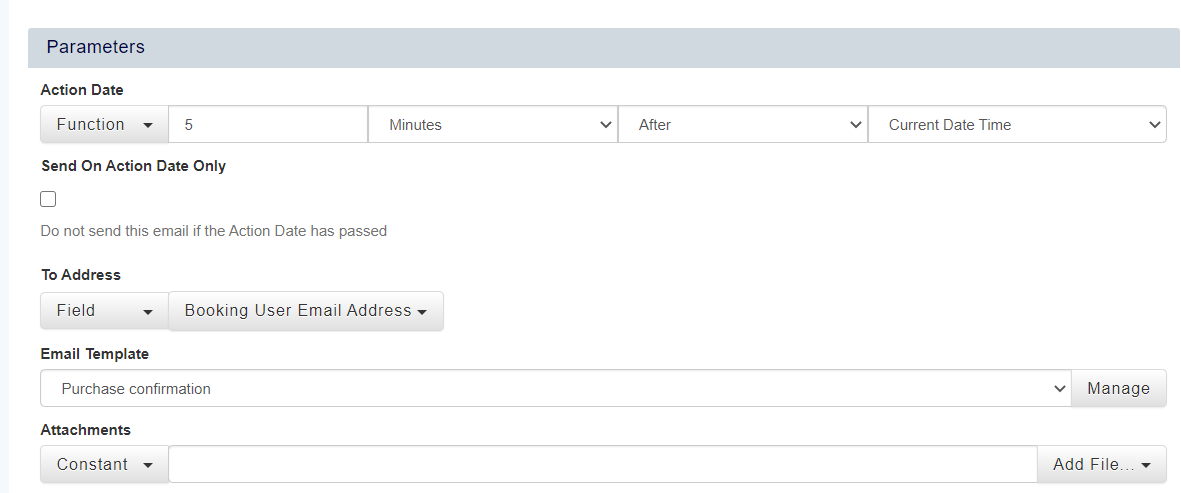
The above email will send 5 minutes after the Booking as been made, using the Email template created above, which will send an email for each Product/Service purchased in the booking.
Click Save.
FAQs
| Expand | ||
|---|---|---|
| ||
The maximum limit for purchases made via the shopping basket (when marked as Unlimited Stock) is 50 products/units per shopping basket. Currently, the only workaround for this is to go to the Purchases SmartGrid, Add New, set the quantity, and manually raise an invoice via the main generator or via the DataGrid. For more information about this, check out our Knowledgebase article on Invoice Generation, or get in touch with the support team via our Customer Portal. |
| Expand | ||
|---|---|---|
| ||
Steps to follow:
|
| Expand | ||
|---|---|---|
| ||
Steps to follow:
|
| Expand | ||
|---|---|---|
| ||
For Shopping Basket 3, it has a limit of 50. For Checkout Basket, it has a limit of 20. |