| Panel |
|---|
| panelIconId | atlassian-note |
|---|
| panelIcon | :note: |
|---|
| panelIconText | :note: |
|---|
| bgColor | #DEEBFF |
|---|
|
Learn how to book additional places on a Course for a customer who already has a Placeholder booked. |
Placeholder bookings on Courses are often made because the customer does not yet know who they will be sending on your Course. This does also mean that often, they do not know exactly how many people they will be sending either!
If your customer informs you that they need to send more people than they have places booked for, then you will need to first check that you have the spaces they need available on your Course. If you have the spaces, you will then either need to increase the places on your Placeholder, or (if their existing Placeholder has already been invoiced) process a new Placeholder booking for their additional places.
Follow this page to learn the steps to increase the number of Placeholder places for a customer on a Course where they have already had an invoice generated, and where they have not yet had an invoice generated.
 Check if there are enough spaces remaining on the Course
| Panel |
|---|
| panelIconId | 17657261-765d-4027-b044-d86a9501c52f |
|---|
| panelIcon | :accessplaniticon: |
|---|
| panelIconText | :accessplaniticon: |
|---|
| bgColor | #DEEBFF |
|---|
|
Before you can increase the Placeholder booking you must first check there is enough spaces available |
| Expand |
|---|
| title | Check if there are enough spaces remaining on the Course |
|---|
|
Depending on whether your Placeholder is on a Classroom or Webinar Course, open the relevant Courses DataGrid on the main menu on the left 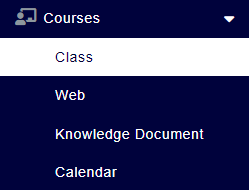 Once you have opened your Courses DataGrid, find the Course the Placeholder is assigned to by applying filters and/or searching the Courses DataGrid 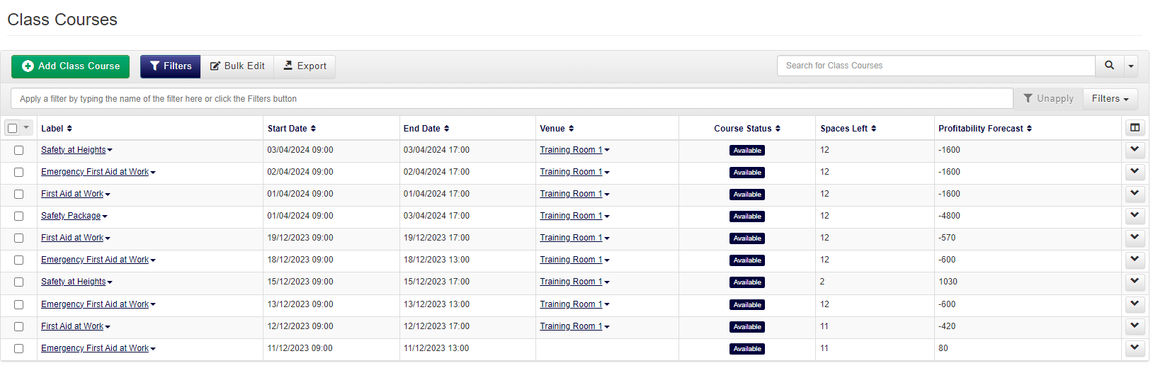 If you already have the ‘Spaces Left’ column included in your DataGrid, you can check this to know how many spaces there are available to know if you can increase the number of places held by your Placeholder 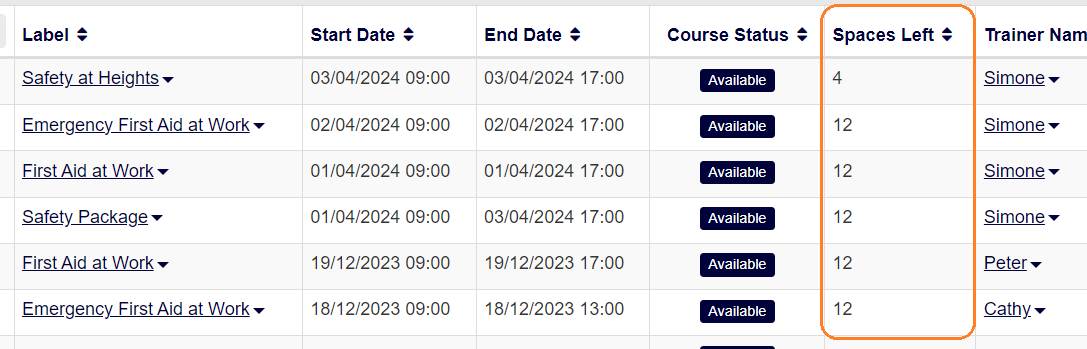 Image Modified Image ModifiedIf you do not yet have ‘Spaces Left’ included as a column in your DataGrid, please follow steps 5 - 8 to add this column
To add the ‘Spaces Left' column into your Courses DataGrid, click on the ‘Change Columns’ button at the top right of the DataGrid results 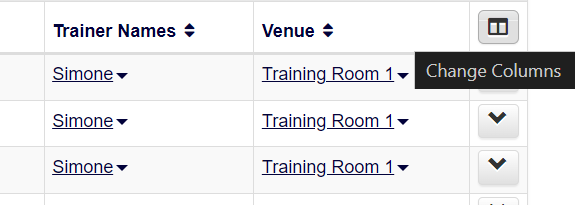 Image Modified Image Modified Use the ‘+' button to add a new column in, change the new column to ‘Spaces Left’ and click on the 'Apply’ button 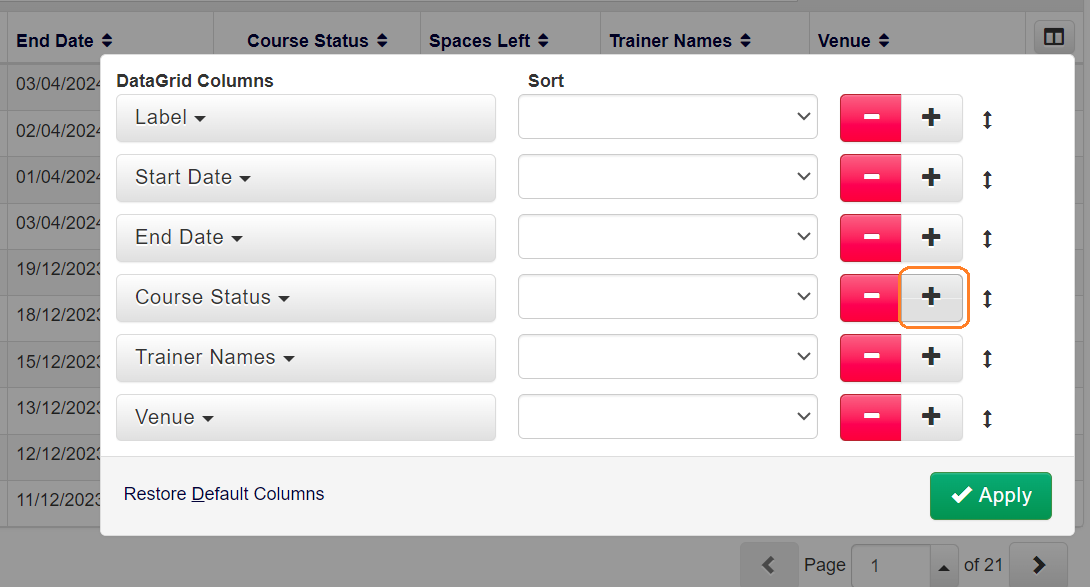 Image Modified Image Modified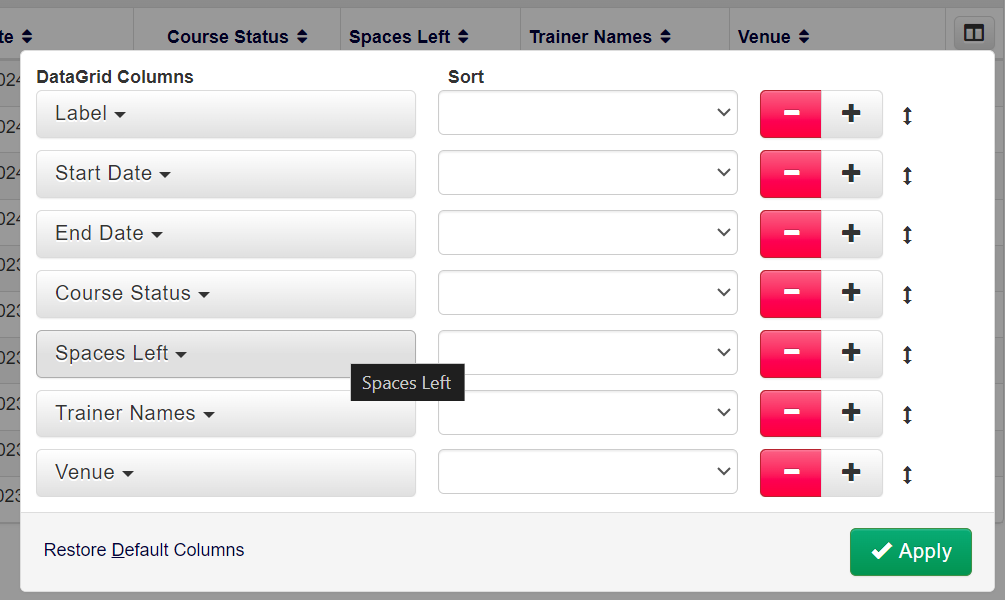 Image Modified Image ModifiedYou will now be able to see how many spaces are available on your Courses from your Courses DataGrid
|
💰 Check if the Placeholder has an Invoice
| Panel |
|---|
| panelIconId | 17657261-765d-4027-b044-d86a9501c52f |
|---|
| panelIcon | :accessplaniticon: |
|---|
| panelIconText | :accessplaniticon: |
|---|
| bgColor | #DEEBFF |
|---|
|
Once you have checked that there are spaces available on the Course, you will need to check if your Placeholder has an invoice or not. The steps below will outline whether there is an invoice or not. |
| Expand |
|---|
| title | Check if the Placeholder has an Invoice |
|---|
|
From the Courses DataGrid, right click on your Placeholder’s Course, this will show you the context menu options for this Course  Click on the ‘Placeholders’ context menu option  This will take you to the ‘Placeholder’ DataGrid for this Course  To identify if the Placeholder has an Invoice, first check if you have ‘Related Invoice ID’ column included in your DataGrid, if you do not have this column please follow steps 2 - 8 to add this column  Click the ‘Change Columns’ button in the top right hand side of the DataGrid  A pop up will appear with the list of current columns listed within your Placeholders DataGrid 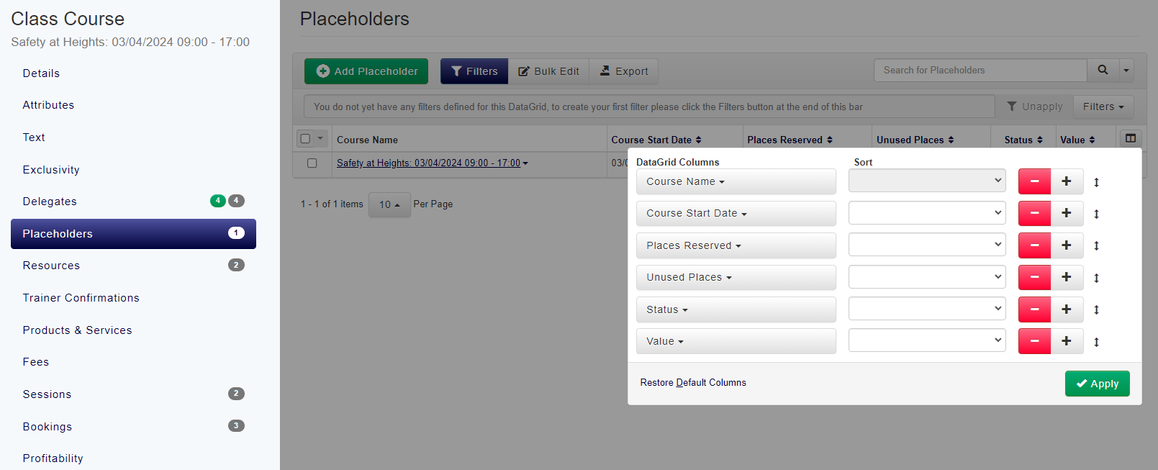 Click the '+' button to add a new column  Use the drop down to search for the column ‘Related Invoice ID’ 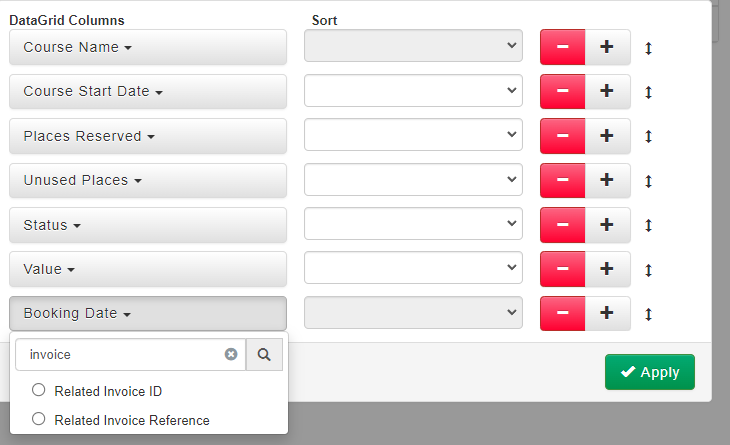 Select the column 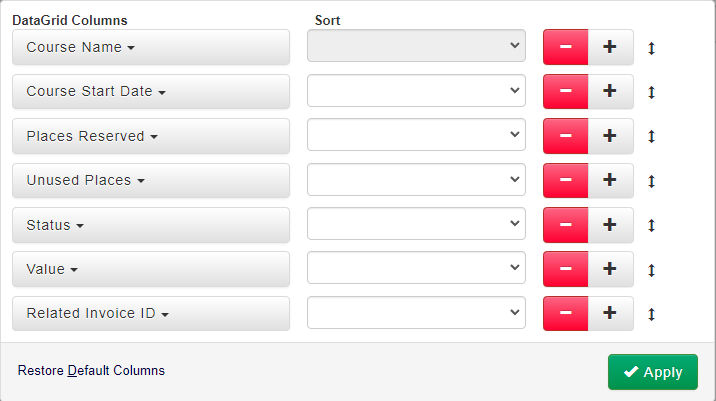 Click the ‘Apply’ button to add the column  This will now add the column to your Placeholders DataGrid 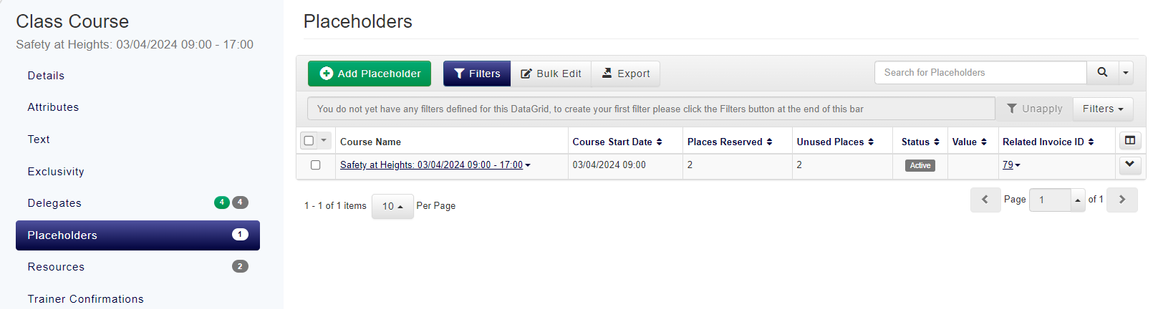 If the column has and ID number, then this Placeholder has an Invoice  If the column is empty, then this Placeholder does not have an Invoice 
|
⬆️ Update the number of Placeholder places
| Panel |
|---|
| panelIconId | 17657261-765d-4027-b044-d86a9501c52f |
|---|
| panelIcon | :accessplaniticon: |
|---|
| panelIconText | :accessplaniticon: |
|---|
| bgColor | #DEEBFF |
|---|
|
The steps that you will take to update the number of places the customer has booked on your Course will change depending on whether their Placeholder has had an Invoice generated. |
If your customer’s Placeholder is not linked to an Invoice, you will only need to complete the steps within “Option A: Increase the number of places held by the Placeholder”.
If your customer’s Placeholder is linked to an Invoice, please jump to the steps for “Option B: Process an additional Placeholder booking for this customer on this Course”.
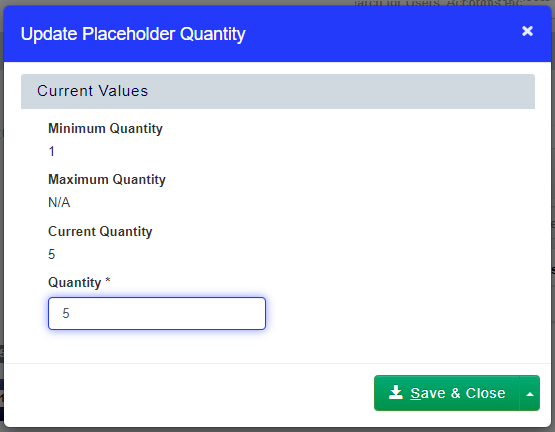
Option A: Increase the number of places held by the Placeholder
For non-invoiced placeholders only.
| Expand |
|---|
| title | Increase the number of places held by the Placeholder |
|---|
|
Right click on your Placeholder booking and click ‘Update Quantity’ 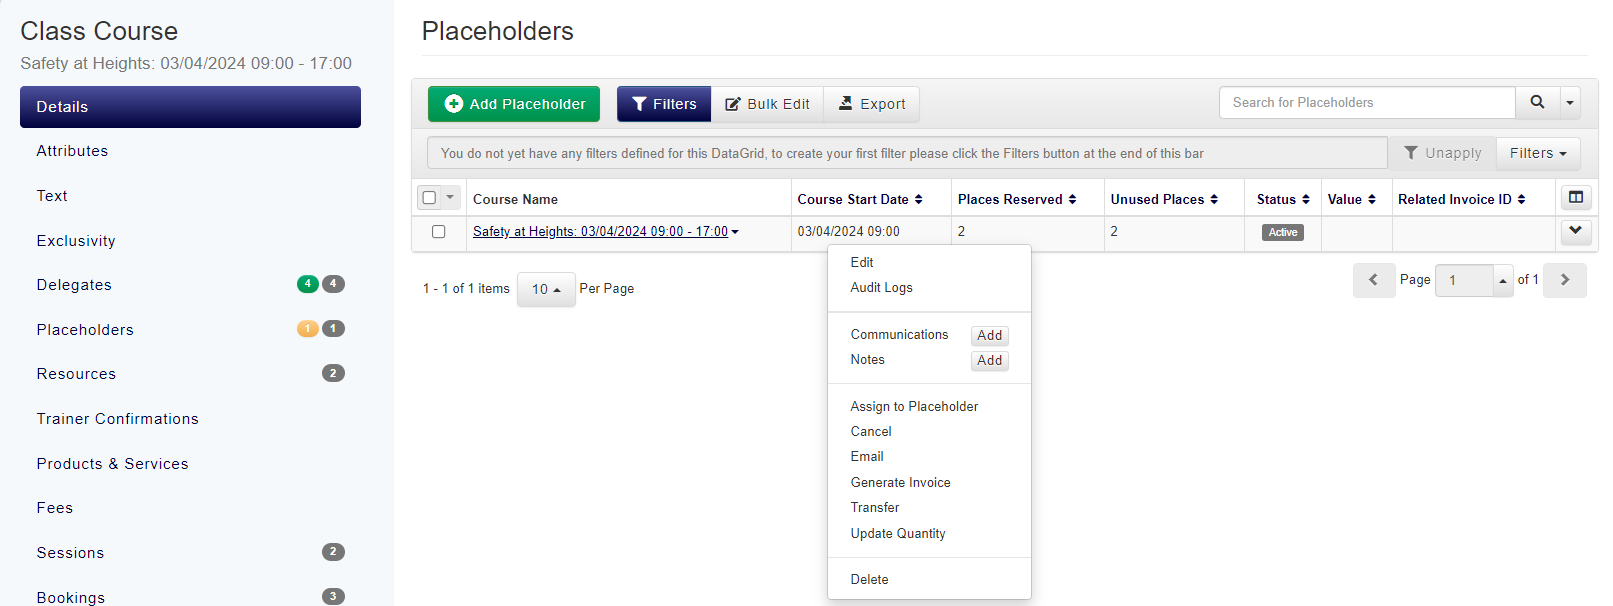 This will display a pop-up box showing the current quantity  Increase the quantity to the required amount 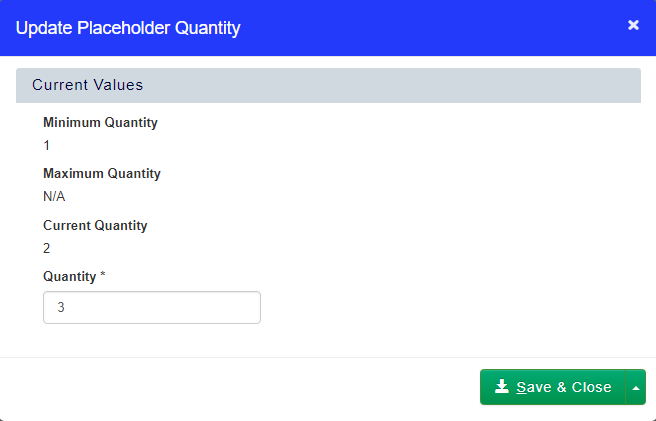 Click ‘Save & Close’  Your quantity of places has now increased 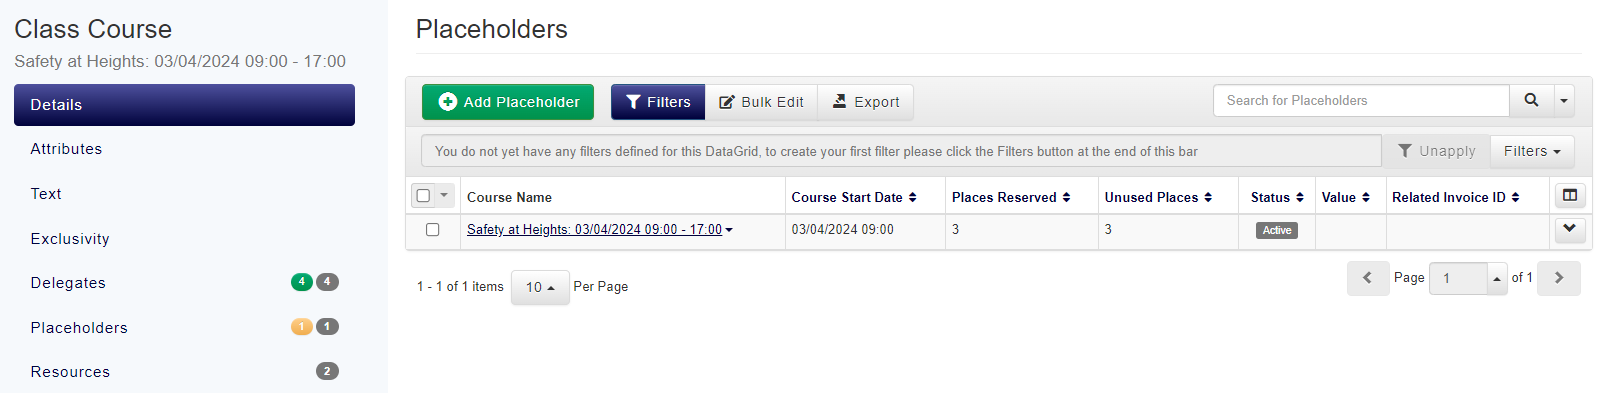
|
Option B: Process an additional Placeholder booking for this customer on this Course
When a Placeholder has already been invoiced, to book additional places on this Course for this customer please book an additional Placeholder.
Please note the below process covers manually adding another Placeholder to your Course, if you require all Placeholders to be booked through the basket to create a full booking record, please add the Course to your basket instead to process additional places for your customer.
| Expand |
|---|
| title | Process an additional Placeholder booking for this customer on this Course |
|---|
|
Click ‘Placeholders’ from the Course menu on the left-hand side  Click “Add Placeholder” 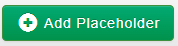 This will open the Placeholder Management page. 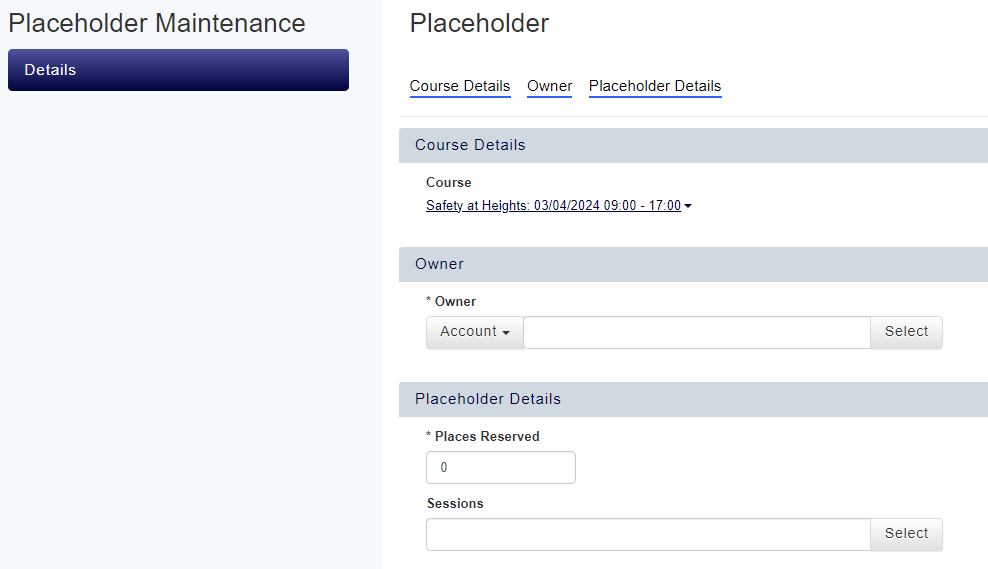 Add the Owner of the Placeholder. You have the option to select “Account” or “User 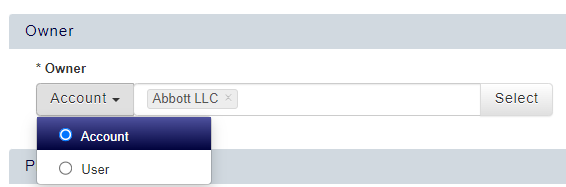 Provide the number of spaces your Customer wishes to reserve  You can select Sessions if required  Click “Save”  A pop up will appear to confirm that your Placeholder Places have now been saved successfully 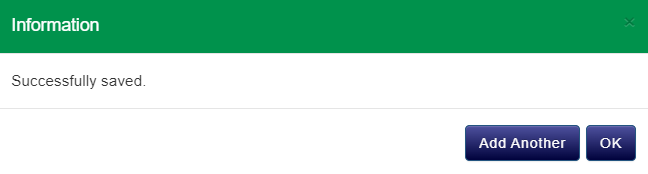 Your new Placeholder will be visible within the Placeholder DataGrid 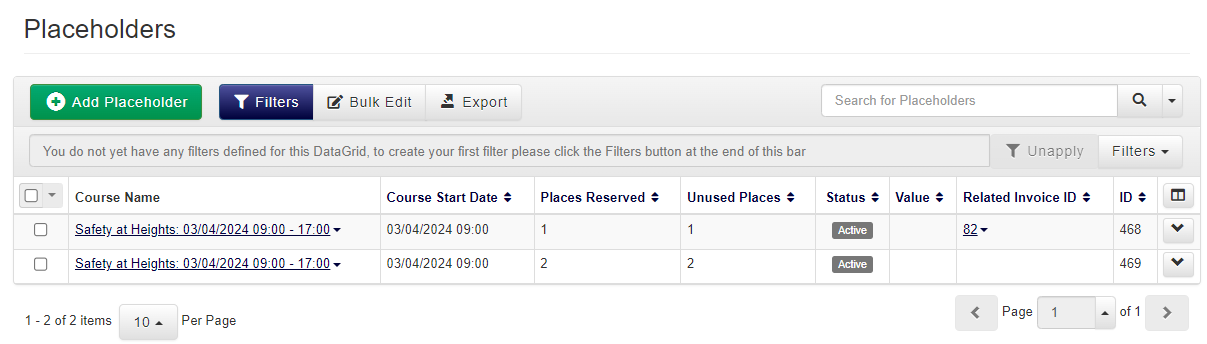
|