How To: Broadcasts
How to create a Broadcast Type
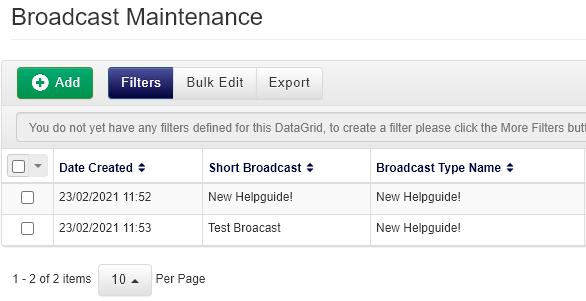
- Select Broadcast Types from the Administration menu. This will take you to the Broadcast Types DataGrid. To learn more about DataGrids, click here.
- Click Add to open the Broadcast Type dialog box.
- To set up a Broadcast Type, add a Label and select an Icon.
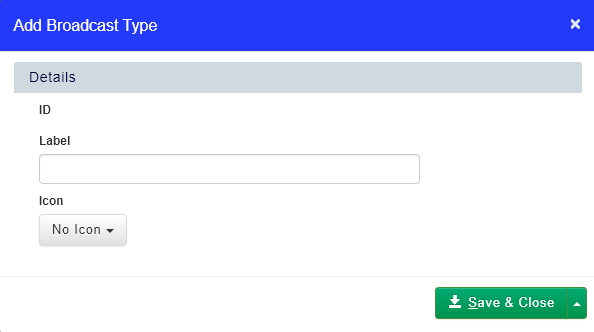
- Once you have created a Broadcast Type, click Save & Close.
How to create a Broadcast
- Select Broadcasts from the Administration menu. You will be taken to the Broadcast Maintenance DataGrid.
- Select the Add button. This will produce a dialog box that contains the following options:
- Broadcast Type
- Created By
- Start Date
- End Date
- Short Broadcast
- Full Broadcast
- Account Groups
- Accounts
- Job Roles
- Users
Using a combination of the above options will allow you to create custom messages and display them to anyone who uses your platform. You can choose what is broadcast, who it is broadcast to, and how long it should be available.
- Navigate to the Details area.
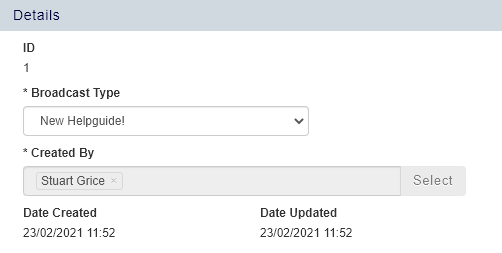
- Select a Broadcast Type from the drop-down list. You must have at least one Broadcast Type in order to create a Broadcast.
- After you have entered your Broadcasts details, enter the dates you want your Broadcast to be available for into the Start Date and End Date fields.
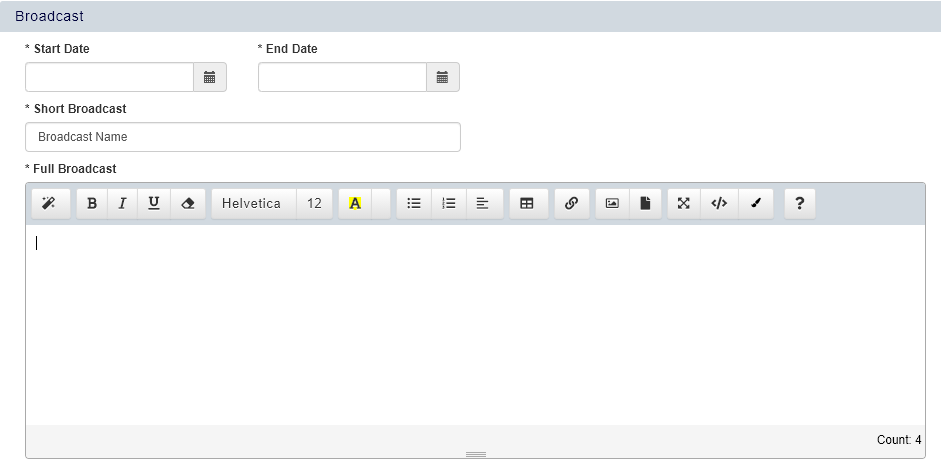
- Enter the Short Broadcast and the Full Broadcast.
Within the Full Broadcast you have a series of rich text editing tools. See the Rich Text Editor section of the Help Guide for a full breakdown of these options.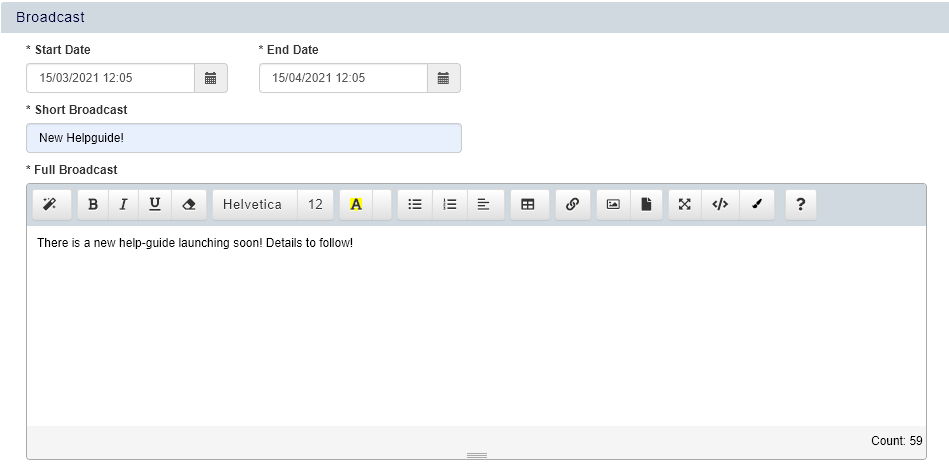
- Define who this Broadcast will be displayed to using the Broadcast To option.
- Once you have completed your Broadcast, select Save & Close.
How to view Broadcasts on your Dashboard
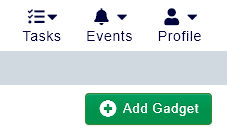
- Navigate to your Dashboard.
- Click Add Gadget at the top right-hand side of the Dashboard.
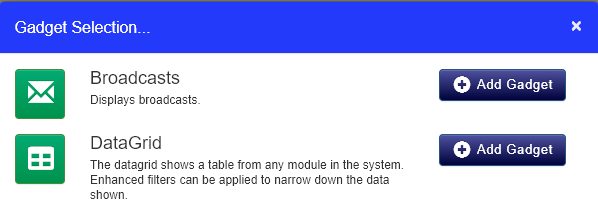
- Select the Broadcasts Gadget by clicking Add Gadget alongside it. This will add the Broadcasts Gadget to your Dashboard. For more information on Dashboards, click here.
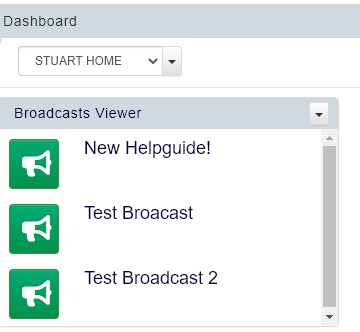
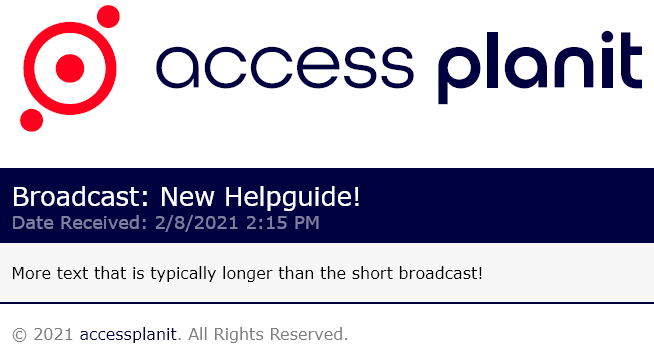
- The Short Broadcast displays in the Gadget. Click on the Broadcast to display the Full Broadcast.

How to view Broadcasts on your Learner Portal
- Select the Broadcasts tile in the Portal. If the Broadcasts tile is not visible on your Learner Portal, it will need to be enabled by a member of the Support Helpdesk.
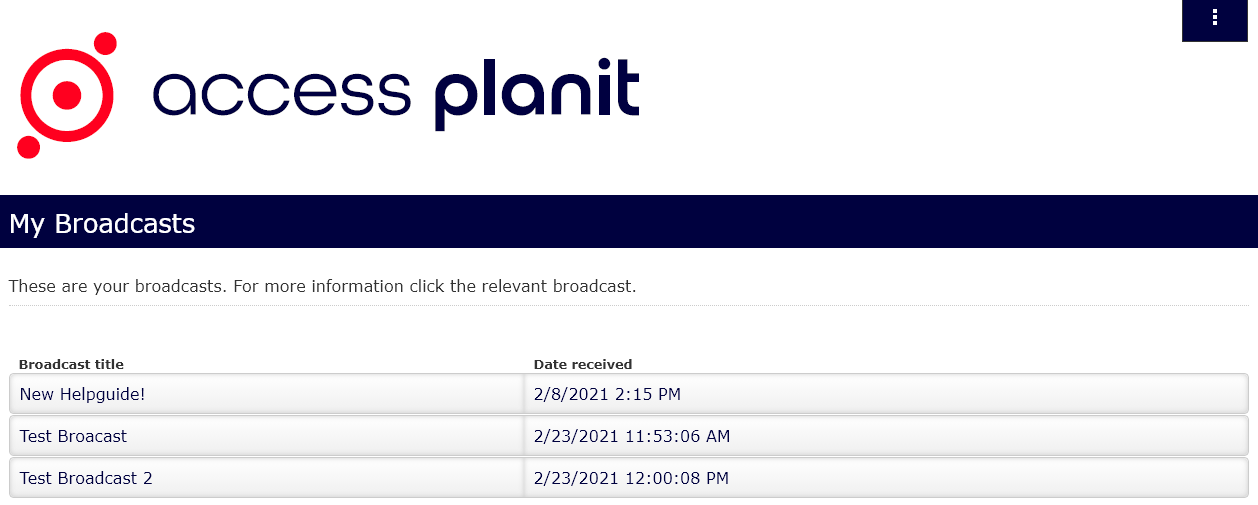
- To see the Full Broadcast, click the Broadcast's title. Broadcasts are listed in chronological order.
FAQs
Why do I need a Broadcast Type before I can create a Broadcast?
This is to separate all of the Broadcasts into different categories. For example, the Broadcast Type of 'Company Updates' would be selected when adding any company information that you want your own company to see. This allows you to manage your platform content effectively.
Do I have to create a full suite of Broadcast Types?
No, but you do need at least one Broadcast Type. If you prefer, you can create one Broadcast Type and place all Broadcasts under this one main type.
What kind of information can I put in a Broadcast?
You can enter anything from plain text for simple news, to images, links to websites, direct downloads, to documents, and even links to specific courses or dates from your platform.