How To: Report Writer
To learn about each section of building a report, click on the pages below:
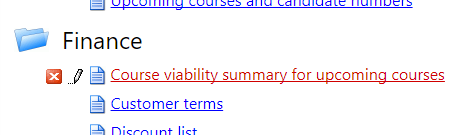
How to view an existing Report
- Navigate to Report > Report Writer.
- Click on the name of the Report that you are interested in viewing:
- You will be taken directly to the Report where you can change the Filters of your report (such as adjusting a date range) and export your Report in a variety of formats (such as csv or xls).

How to edit existing Reports
- Navigate to Report > Report Writer.
- Click the Design icon next to the Report that you are interested in editing.
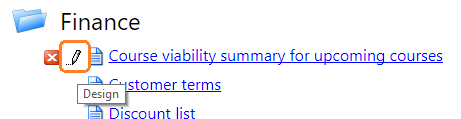
- Clicking this button will take you to the Fields step of the Report Writer.
- Here, you can remove, add, or edit the Columns displayed in your Report.
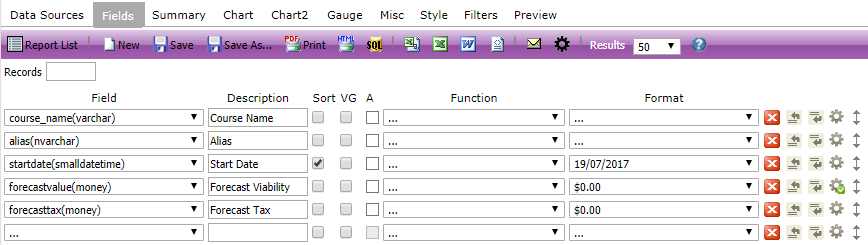
- From this page, you can access each stage of the Report Writer to make any changes such as adding additional Filters, or adding an extra Data Source by using the tabs along the top of the page. Select Preview to view any changes that you make.

- Once you have made your changes, you can then Save As to keep the original Report and create your own version.
- Please bear in mind that any changes you make will only be saved if you click Save or Save As before leaving the Reports
How to add Titles, Headers, Footers, and Descriptions to your Report
- Navigate to the Miscellaneous tab within your Report.
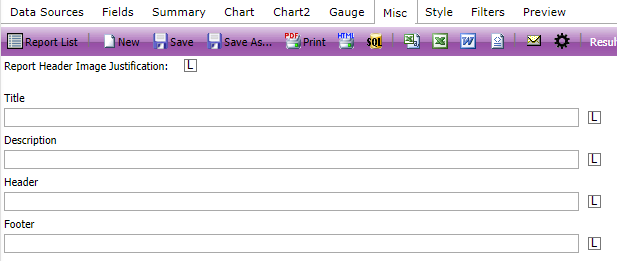
- Enter the text into the relevant box. You can then choose how to align the text by clicking the box to the left of the text box. You have three options for aligning your text:
L: left
M: middle
R: right
How to schedule Reports for sending
Private Reports
Please note that if a report is set to private (Locked), it will not schedule out to recipients, reports need to be set to Full Access. 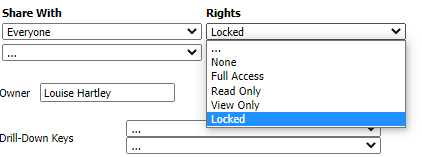
- To automatically email reports out from the system, use the Settings at the bottom of the Miscellaneous page.

- Set the Schedule date as the next date you wish for the Report to be sent, i.e. tomorrow. This date needs to be in the future.
- Select your Repeat type; there are various options here including every weekday, every week and every quarter.
- Select the format of which you would like to Report to be sent.
- Finally, enter the email address of the recipients of the Report.
- Please note that any email address entered above will receive the Report in the selected format. It does not matter if the Report is not shared.
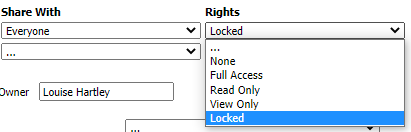
Report Rights and what they mean:
Full Access (anyone with RW viewer or designer access can see and edit these)
None (this means the report is private only to the owner)
Read Only (can still see the edit option but changes won’t save)
View Only (the pencil and delete icons disappear but they can edit filters)
Locked (no pencil/delete icons & filters are locked)
Each of these option needs to be tested with incognito browsers and logging in as users (impersonating users does not work with report writer - it will cache)
How do I add a Custom Field into a report?
The correct data sources to use for the different types of custom fields can be found here.