Resources are items that a Training Provider has access to for assigning to courses. Typical Resources include Venues, Trainers, equipment, and catering options.
To learn how to add and use Resources, click here.
To learn how to use the Resource Calendar, click here.
For Trainers wanting to learn how to use their area of the platform, click here.
Where to find Resources
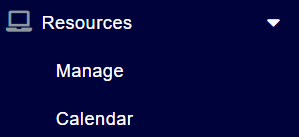
You can find Resources from the main menu on the left hand side of your accessplanit interface:
Setting up a Resource
Before you create a new Resource, you'll need fill in a few fields first. Here's and overview of what they all are:
Account
This is the Training Provider that the Resource belongs to. You can select the Account you wish this Resource to be assigned to from the drop-down.
Label
The label is the name of the Resource. For example, if this Resource is a Trainer, you would enter the Trainer's name.
Resource Type
This is a drop-down box allows you to select what type of Resource this is, such as a Trainer or a Venue.
Cost Type
The Cost Type field determines how the Resource charges for its use. A Resoruce may, for example for example, charge by Delegate or session.
Cost
The Cost of the Resource is how much the Resource charges to be used.
Quantity
This field determines how many of the Resource is available at a given time.
Colour:
You may also choose a colour to associate with the Resource so it can be viewed easily from the Resource Calendar.
You should ensure the Enabled option is ticked so that it can be seen when choosing Resources for a Course Template or Date, otherwise your Resource isn't marked as active on accessplanit and therefore cannot be attached to courses.
Additional Trainer Options
If the Resource you are adding is a Trainer then you will be presented with some additional options:
- Internal Trainer – you will be able to select the internal User to link their Resource profile to
- External Trainer – you will be prompted to enter further information such as their full name, telephone number etc.
- Both Trainer types have the option to access the Trainer Access - My Teaching area. You can configure the level of access the Resource should have.
Tip!
If you would like your Trainer to have access to the Calendar, they will need to have 'Set Unavailability' ticked as an option in the My Teaching access list.
Internal and External Trainers
As you have seen above you have the ability to add either an Internal or External Trainer to your platform. See below for the differences between the two.
Internal Trainer
When you add an Internal Trainer you must link this to a User that already exists within the platform first.
External Trainer
When you create an External Trainer you must ensure that the User record dies not already exist as creating the External Trainer will automatically create the mapped User.
Additional Venue Options
If the Resource you are adding is a Venue:
Adding Venue information here will enable you to pull the data through to Workflows, assign them to courses, stop clashes, and report on utilisation. There are additional Venue options to add such as contact details, capacity, and specific access information.
Other information stored against a Resource
Attributes
This tab provides you information relating to the Resource such as its ID and Label.
Calendar
The Calendar tab allows you to see which course the Resource is currently allocated to within a calendar view.
Availability and Unavailability
In these tabs, you can determine the hours and days which the Resource is available for use, and when it is unavailable. Setting Resource availability is ideal for registering set working hours against a particular Resource to help prevent clashes or unavailability. For instance, if there is a Trainer who works Monday, Wednesday and Friday you can define this within this tab.
Course Templates and Courses
Here, you can assign Course Template exclusivity to a Resource, or view the courses that the Resource is currently assigned to in a DataGrid view.
Resources and Categories
In these tabs, you can view and manage the associated Resources and Categories of this Resource.
Notes and File Store
In the Notes and File Store tabs, you can view and manage Notes or Files that are stored against this Resource.
Communications and Tasks
Within these tabs, you can view any Communications or Tasks associated with this Resource.
Sharing
The Sharing tab allows you to share this Resource across multiple Accounts or Account Groups.
When you share a Resource with another Training Provider they will not automatically show within the Resource Calendar under the shared providers. In order to ensure they show under the shared providers you will need to navigate to Advanced, check the box that is named Include shared resources in selection list, select Apply Options and then Save Options.
Exchange Integration
If your Resource is a Trainer, you can sync their Outlook calendar with their accessplanit calendar by configuring their account settings within this page. To find out more about Exchange Integration, please click here.
Workflow Errors and Instances
These tabs allow you to view any Workflows that have triggered in relation to this Resource, as well as any Workflow errors that relate to the Resource.
Troubleshooting Resources
This can happen if a resource, in this case a Trainer resource is mapped to a user, but the user is also mapped to another Trainer resource
Trainer resources are named as the Trainers themselves, but they are not actual users, they link to a user.
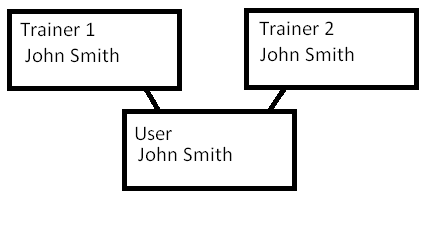
In the example above, the same resource has been created twice, then linked to the same user, when the user logs in, the My Teaching will not display correctly.
Below is an example ticket of this happening: https://accessplanit.atlassian.net/jira/servicedesk/projects/HLP/queues/custom/11/HLP-26401