| Live Search | ||||||||
|---|---|---|---|---|---|---|---|---|
|
Sessional Courses are a type of multi-part course that are available within your accessplanit platform.
To learn how to use Sessional Courses, click here.
For a video tutorial - click the icon below…
What is a Sessional Course?
A Sessional Course is a type of course that is made up of various parts, and typically runs over multiple days. Each day would become a session within the Sessional Course, enabling you to mark attendance and send correspondence based on each one session.
Example:
You are running a 3 day course for 'First Aid At Work' that is sessional so that you can manage different Trainers and Venues per day.
The course is set-up as follows:
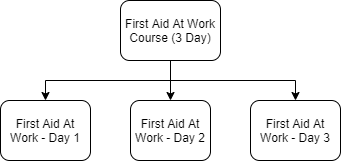
First Aid At Work (3 Day) - Parent course
First Aid At Work Day 1 - Child session
First Aid At Work Day 2 - Child session
First Aid At Work Day 3 - Child session
This set-up would enable Delegates to only attend certain days and for each day to be at a different Venue, if needed.
Considerations
Whilst Sessional Courses are great for offering a greater level of granularity to your courses, there are also some downsides to using them.
Pros | Cons |
|---|---|
You can easily build blended learning packages including eLearning, Classroom, and Webinar courses in one package. | Delegate and Placeholder transfers become more complicated and therefore the accessplanit transfer wizard cannot be used. |
You can include mandatory and/or optional child sessions, allowing flexible learning for your customers. | Each session booked is counted as a booking, so if your accessplanit contract is based on the number of bookings you process, you should double-check that using Sessional Courses will not cause you to go over your booking limit. |
You can set override costs on child sessions if booked as part of a package, allowing bundle discounted costs. | |
You can track attendance within each session, especially useful for longer courses as you can track if and when Delegates are dropping out of the course. | |
You can have separate Trainers or Venues for separate aspects of a course - more accurate resource utilisation for working hours and calendar plotting |
How do I set up a Sessional Course?
Sessional Courses are set up in the same way as non-sessional courses – they also rely on a Course Template being built first and then a Course Date being scheduled.
If you use the Sessional Plan area at the Course Template level, when you scheduled the parent Course Date, all of the child sessions will automatically be created too, saving time.
Setting up a full Sessional Course can be split into three actions:
Build the Parent and Child Course Templates
Link the Course Templates together
Schedule the Course Date
1) Build the Course Templates
To make your Parent Course Template sessional, tick the Is Course Sessional by Default box.
This will allow you to access the following additional fields:
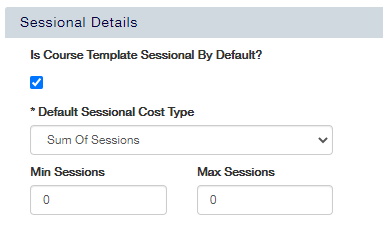
Default Sessional Cost Type
This field determines how the the cost of the course should be calculated for each Delegate. There are a few options here:
Sum of Sessions - the Delegates will pay the total cost of each session that they are attending, not the cost of the head course.
Course Cost - the Delegates will pay the cost of the head course (the one that you are currently setting up!) and will not pay anything extra for each session they select.
Course Cost Plus Optional Sessions - the Delegates will pay the cost of the head course plus the cost of any sessions which are not mandatory.
Course Cost Plus Sessions - the Delegates will pay the cost of the head course plus the cost of every session.
Minimum and Maximum Sessions
Here, you can designate how many sessions a Delegate must select in order to book the course.
You then need to create a Course Template for each Child Course, however if each session has the same format, duration, etc., then you will only need to create the one Child Course Template.
2) Link the Course Templates together
To link the Session Plan together, you go to the Session Plan Items section for the Parent Course Template:
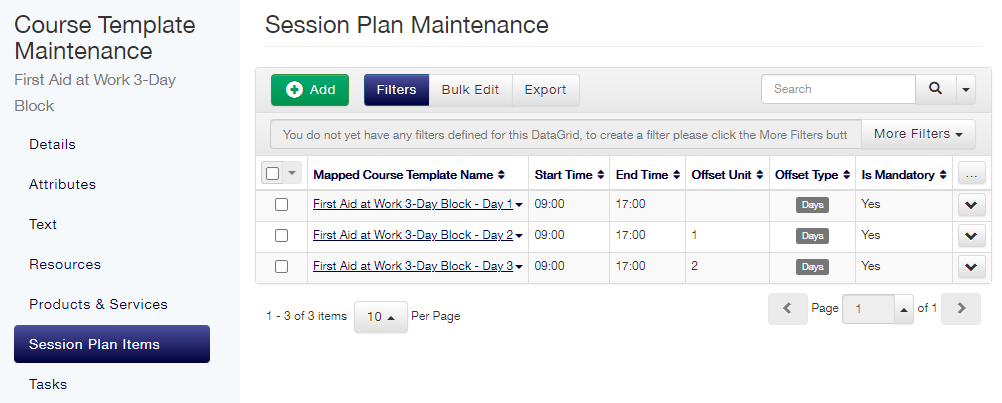
When you click Add in this DataGrid, there are a few details that you'll need to fill in before you can add your session:
Mapped Course Template
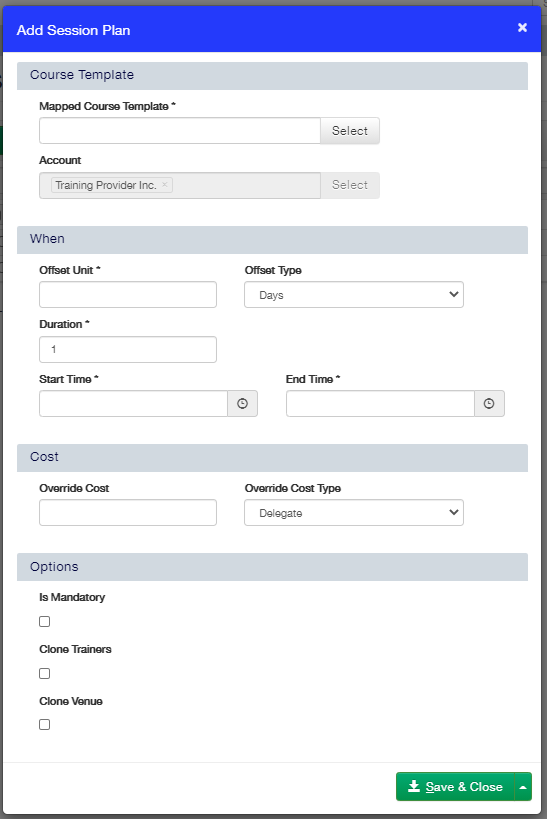
This is the Course Template that your sub-session will use as its template. This course will need to be a normal, non-sessional course.
Offset Type and Unit
The Offset Type allows you to mark the time distance between the head course and the session.
Typically, the Offset Unit for the first session is 0 days/hours, as session one will start at the same time as the start date/time of the course.
Bear in mind that the Offset is always based on the start date of the course (not the previous session), therefore a session running on day 3 of your course would have an offset of 2 (running 2 days after the start date).
Duration
This field allows you to designate how long the session lasts.
Start Time and End Time
Here, you can input the start and end time of the session.
Override Cost and Type
Here, you can enter the cost information for the session. If you are using the Sessional Course cost option of 'Course Cost', you do not need to add anything in here.
Options
Here, you can define whether the course session is mandatory for Delegates when they are booking the head course, and set whether or not the assigned Trainer and Venue for the head course should be applied to this session automatically.
Repeat this process for each Child session you are including in this course.
3) Schedule the Course Date
Once all of the sessions have been added as Session Plan Items, you can schedule your Course Date.
You can schedule this Course Date from either the Class or Web DataGrid, depending on which Type you have selected for your Parent Course Template, by clicking the Add button.
When adding the sessional course, you can make changes to the Sessional Cost Type, Minimum Sessions, etc. if this should be different from the Course Template values.
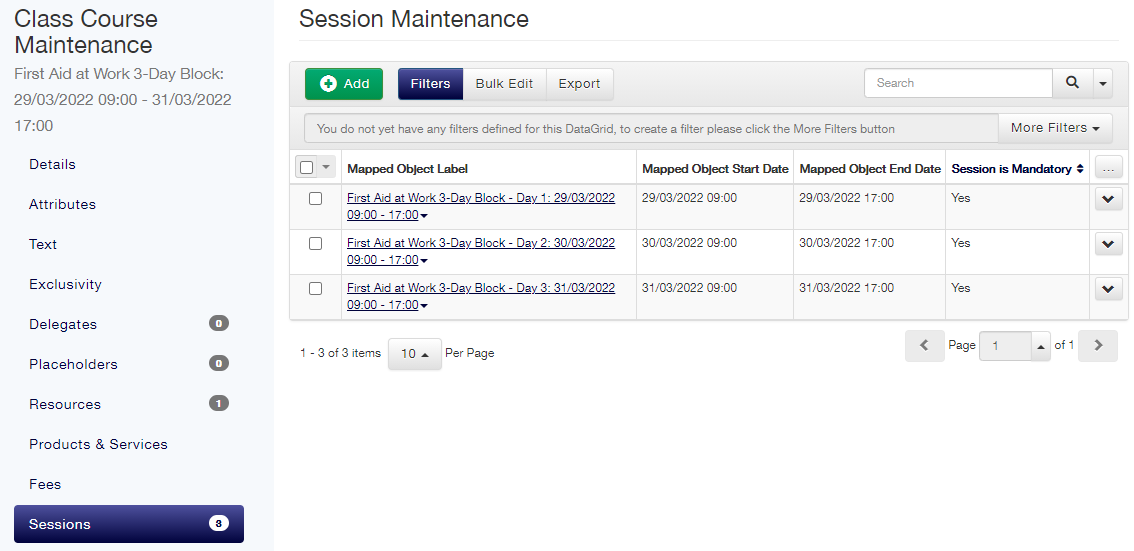
Once saved, all of the Child Course Dates will be created automatically by the platform, which you can check from the Sessions tab:
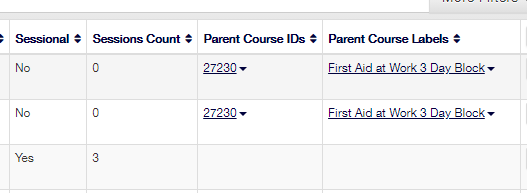
You can also quickly view which of your Courses are Parent Courses and which ones are Child Sessions from the Class/Web DataGrids by exposing the below columns:
Booking on a Sessional Course
Sessional Course bookings work in exactly the same way as normal course bookings, to ensure consistency for yourselves and your customers.
The only difference is an additional step in the Shopping Basket where the booking User can view dates/times and Venue for each session, and if any sessions are optional, they can select and deselect the ones they want to book.
There are instructions for booking sessional courses through the Shopping Basket here.
FAQs
Can a user book onto a session only, rather than booking onto the entire Sessional Course?
Yes, any course can be marked as Advertise by an Administrator, even if it is part of Sessional Course.
In most cases 'sessions' are not set to advertise because they are intended to be booked as part of the Sessional Course bundle. To advertise an individual course, visit the Course Template and make sure that the Course Template for the session is set to Advertise, then check that the Course Date itself is not set to Hide From Web.
When updating the status of a head (parent) session, will this automatically update the status of its sessions?
No, the status of the session will need to be updated manually.