| Live Search | ||||||||
|---|---|---|---|---|---|---|---|---|
|
Workflow Templates are used to automate communications to your Delegates, their managers, your Trainers, and your platform Administrators.They can be used to communicate booking confirmations, joining instructions, course reminders, invoice notifications, course viability statistics, and more.
You must be within the Advanced band or higher to use Workflow Tasks as this is a chargeable module/integration. Please speak to your CSM if you are unsure whether you should have access to this feature.
If you are having issues with a Workflow Template you have made, or Workflows in general, please visit this related Troubleshooting page.
For a video tutorial on Workflows, click here!
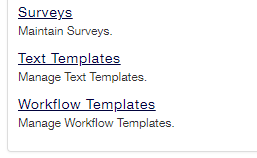
Where to find Workflow Templates
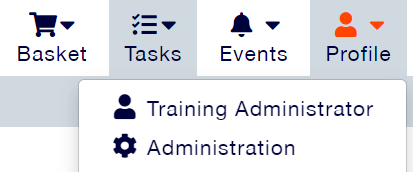
Click on the User Icon at the top right hand side of the platform and select Administration:
Title
This is the name of your Workflow. We recommend that you stick to a naming convention for all of your Workflow Templates, as this will make it easier in the long run to search through your Workflow Templates. A popular format for Workflow Template titles is 'Recipient Type - Name of Communication', so for example 'Delegate - Booking Confirmation', or 'Administrators - Course Date Statistics'.
Module
The module indicates where you will be getting your information from for your Workflow Actions. It's important to pick the right module for your Workflow, as this will determine what information you can pull through from the platform, what rules you can apply to the Workflow, and who can receive Workflow Actions.
There are a lot of possible modules for you to include in your Workflows. If you would like to know which modules are available and which one you should use, please click here.
Trigger Event
Your Workflow Template can either be generated based on a 'Save' event or a 'Delete' event. The majority of Workflow Templates are generated when an object is saved, so if you're unsure opt for the 'Save' option. The Save option covers scenarios where you want to trigger an email based on a creation in the platform (such as a new course booking), and an update in the platform (such as a delegate status change), and any timed emails (such as a course date reminder). The Delete option covers the deletion of objects only, for example a User or course is deleted.
Description
The description field is optional and allows you to add some further information about what your Workflow Template is for, and when your Workflow Template will send
Workflow Settings
Settings are a key part of nearly every Workflow Template. They are your way of telling accessplanit when the communication should or shouldn’t send. You can have more than one rule on each Workflow Template, or you can have no rules.
Using Rules
There are two types of ways that you can apply rules to your Workflow Template. You can either take the Standard approach and use the drop-down boxes to define your rule, or you can opt for the Advanced approach and type out your rule. We recommend that you stick to the Standard approach until you are really confident with the Workflow Template options available in the platform.
Standard:

Advanced:

You can toggle the Advanced Rules tick box to display your Workflow Template rules in the Advanced approach.
The advanced approach has the benefit of you being able to group your filters together and use the operator of 'or', as standard Workflows will trigger based on all of your rules being met, in the example above the Workflow will trigger when the delegate's status has changed and their status is now 'No Attend'. With Advanced Rules you can set up rules such as course start date is 'in the past' or course status is 'cancelled'.
To use an 'or', simply use a double pipe separator || instead of a double ampersand && in the rule.

Common Rules
The rules available to you are dependent on the module that you have selected. For example, if you have selected the Invoice module you'll be able to apply a rule to your Workflow Template to only send when the Invoice is outstanding, but you wouldn't be able to apply a rule to this Workflow Template to only send when the Delegate is booked as this information isn't stored against the Invoice.
- Delegate Status Rules
These are the most common rules used within Workflow Templates. They are used on Workflow Templates that communicate to Delegates and their managers when their status on a course date has been updated (i.e. when a Delegate is marked as cancelled, or when a Delegate is marked as completed).
There are two rules used, one to ensure the Workflow Template only sends when the status has been changed, and another to indicate which status it has been changed to. You can use these rules using the User Course Date modules, such as User Course Date Class.
- Course Status Rule
Course status is often used within delegate cancellation Workflow Templates, as the communication that is sent when a delegate is cancelled is very different to the communication that is sent when the course is cancelled. In both scenarios the Delegate is given the status of cancelled, however the course status rule allows you to define which communication they receive. These would be rules used in a User Course Date Workflow Template if the delegate had cancelled, but the course was still running:
You would also use the status of a course as a rule within your admin communications such as Course Stats, as you wouldn't want your Administrators to receive notifications about courses which are cancelled or on hold, here is an example using the Course Date module:
You can use this rule using the User Course Date module, and the Course Date module.
- Sessional Delegate Rule
If you use sessional courses you may be interested in using the 'Is Session Delegate' field from the User Course Date modules in your rules. This allows you to define whether a delegate receives or does not receive the communication if their place is on a session.
When a Delegate is booked onto a sessional course, they are actually being booked onto many courses in one, they will be booked onto the parent course, and any subsequent child courses (sessions), so if for example you have a booking confirmation Workflow which does not filter out 'session candidates', they will receive a booking confirmation email for the parent course, and additional booking confirmation emails for each session, which might be a little over the top! To filter out 'session candidates', use this rule:
This will stop the Delegate receiving booking confirmations for each session they are booked onto, but they would still receive it for the parent course.
This rule only stops your Workflow from sending when the delegate is booked through a sessions plan, if a Delegate is directly booked onto a single session (without the parent course), or if a Delegate is booked onto a standard, non-sessional course, the Workflow will still send.
- Communicating with Trainers Rule
Trainers and Delegates are both stored within the User Course Date modules, therefore you will use these modules when communicating with both in your Workflow Templates. With Delegate communications you do not typically need to have a rule to say 'only send to Delegates', as having a Delegate status rule in place (see above) ensures the communication only sends to Delegates.
However for Trainer communications you'll need to apply the following rule:
Using Advanced Rules
Above the list of rules within the Settings page you will see an ‘Advanced Rules’ tick box, ticking this will change your list of rules into an advanced rule format in one line. This does look much more complicated. You can do even more with the advanced rules such as:
- OR instead of AND
If you would like to filter your communications based on one rule OR another rule, instead of one rule AND another rule, you can convert to the advanced rule format and change the && text into ||
Workflow Actions
In this tab, you can add an action to Workflows. There are three standard Actions available: Create Note, Create Task, and Send an email message. If you have the Moodle module enabled on your platform, you will also have a few additional Workflow Actions: Sync this course to Moodle, Sync this Delegate to Moodle, and Update this course on Moodle.
To find out more about Moodle integration, click here.
If you would like to learn more about Workflows with Email Actions, Workflows with Note Actions, or Workflows with Task Actions, please follow the respective links.
Workflow Errors
Here, you can have a look at any of your Workflow Errors. This tab can be useful for troubleshooting Workflow issues. Enabling full logs within the Workflow's Setting page will allow you to see every instance on your platform triggers your Workflow but fails to meet its rules, which can be very useful for finding out which Workflow rules need correcting.
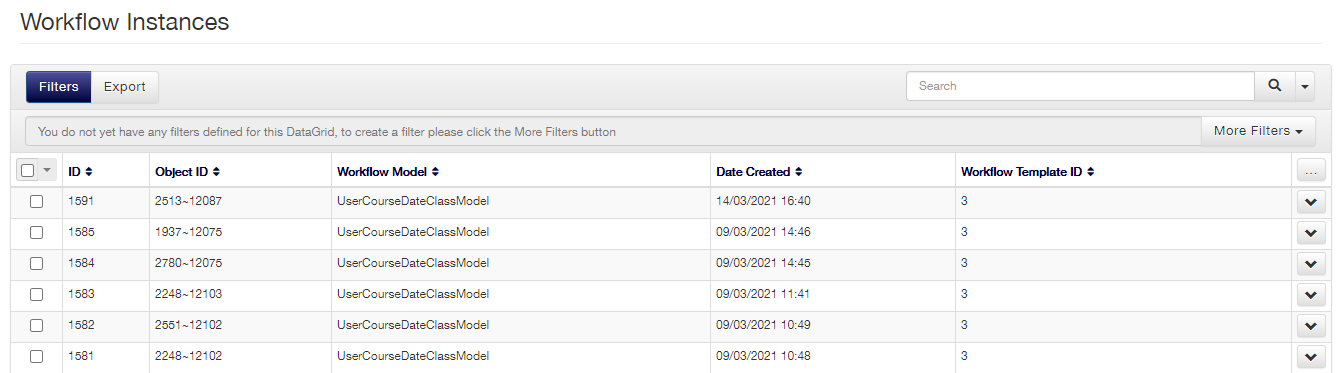
Workflow Instances
In this tab, you can see all of the Instances of your Workflow that have triggered. From here, you can view the Instance's details and re-execute the Instance if necessary.
When right clicking on an instance, you are able to view all of the instance actions. Within here are two date columns.
Action Date
This is the date and time that the email is due to send.
Date Completed
This is the date and time that the email did send.
There are times when these fields would have different date stamps. This would usually be because of one of the following reasons:
- There is an error message attached to the instance action
- If the Course Date changes
| Info | ||
|---|---|---|
| ||
If the Recipient changes before the Action Date, the email will be sent to the updated Recipient. |
Workflow Audit Logs
The Workflow Audit Logs allow you to see any changes made to the Workflow.
Creation and Execution Rules
Creation Rules
A creation rule is processed when a record of the type selected in Module is updated/deleted, depending on your selected Trigger Type.
Creation rules can include checks on whether a field’s value has changed. This is because at that moment in time we have the original value for that field, and the current/updated value if it has changed.
It’s important to note that using the Trigger Type of “Saved” means the creation rules will be checked the moment any record of the relevant type is updated. This may well be caused by background processes in the platform that recalculate dynamic fields, such as Communications Count in the User Course Date module, which is updated every time a new communication for that record is created.
As a result of this, it is recommended that your creation rules include at least one “Has Changed” check, such as “Status has changed” on the User Course Date module, so a Workflow instance is only created if you have actively made a key change to the record. Without this check, an update of the record by a background process may cause a Workflow instance to be created if that record matches all the other defined creation rules, even for records in the past.
Worked example
As a worked example, consider the following User Course Date Workflow:
Workflow Name: Delegate booking confirmation
Creation Rules: 1. Status = “Booked”
2. Course = “Course A”
If a new Delegate was booked onto “Course A”, they would satisfy all these rules and a new Workflow Instance would be created.
Unfortunately, if an existing Delegate of “Course A” with the status of “Booked” is updated for any reason other than to change their status to a different value, they would also create a Workflow Instance, even if the Workflow was created after that record was first created.
Worked example - alternative approach
The creation rules can be modified slightly to only create a Workflow instance when a new delegate record is created (under normal circumstances):
Workflow Name: Delegate booking confirmation
Creation Rules:
1. Status has changed
2. Status = “Booked”
3. Course = “Course A”
The addition of the “Status has changed” rule means that when a new delegate record is created, and its status changes from effectively “nothing” to “Booked” (as they didn’t previously exist), that rule is satisfied and the rest of the rules can be checked.
If an existing delegate of “Course A” with the status of “Booked” is simply updated, their status has not changed and no new Workflow instance will be created.
The only time where this won’t work is if a User is for some reason changed from another status, to “Booked”. As the status has changed and the rest of the rules now match, a Workflow instance will be created. It is unlikely this would be a problem in normal operation, as the User has indeed been changed to “Booked”, so a booking confirmation would be appropriate.
Execution Rules
Execution rules are fundamentally the same thing as creation rules, but this time they are checked when a Workflow instance’s “Action Date” value is in the past.
The key difference with execution rules is that we can’t check if any values in the record have changed, as the update has been completed either a few seconds or potentially many days in the past.
Execution rules are most important when building Workflows that won’t be executed until sometime in the future, where the record’s values may have changed in some significant way between the Workflow instance’s creation and when the actions of that Workflow are due to execute.
Using the Matching Rules option will automatically ignore any “has changed” rules when processing execution rules.
Worked example
A good example of when execution rules are important would be setting up a pre-course reminder:
Workflow Name: Delegate pre-course reminder
Creation Rules:
1. Status has changed
2. Status = “Booked”
3. Course = “Course A”
Execution Rules:
1. Status = “Booked”
2. Course = “Course A”
Matching Rules: On
Action Date: 1 day before course start date
The creation rules for this Workflow are the same as the example in the Creation Rules section, as we know we want to send a pre-course reminder to any Delegates that book onto “Course A”.
The execution rules become important in this Workflow, as we only want to send a pre-course reminder to Delegates that are still marked as “Booked” when we reach the action date. In this case, that is one day before the course is due to start.
We set up the execution rules this way because between the time of the Delegate being created and one day before the course is due to start, they may well have cancelled or been transferred to another course. In this event we don’t want to send them a pre-course reminder for a course they’re not going to attend, and the execution rules prevent us from doing that by checking the Delegate’s status before we perform any actions.
Warning: If you opt to use Advanced Rules, the “has changed” rules will not be automatically be removed from the execution rules if you include them in your core rules and choose Matching Rules, or explicitly define them in the Execution Rules option.
A Workflow set up in this way will always fail.
Backfilling Workflows
As Workflows only send for events that were made after the Workflow was turned on, the Backfill Instances option allows you to force accessplanit to send the Workflow for events prior to the Workflow being created.
Backfilling instances can send out past emails that may not be applicable now. It's best to add a date-based rule (eg. Course Start Date > Period > Future) to the Workflow before performing a Backfill to ensure that no unwanted emails are sent out.
Furthermore, you need to remove any rules relating to status changes (e.g. Course Status > Has Changed) as this will exclude a lot of the objects you would want to be included by the backfill.