| Live Search | ||||||||
|---|---|---|---|---|---|---|---|---|
|
'Going Live' Launching is completely controlled by you. You are able to choose when and how you launch your systemplatform, the only thing you need to do is keep accessplanit updated with your approach and your date/time so that we can ensure everything is in place and your emails are enabled.
There are three main approaches to launching the systemplatform:
- Basic launch: Ensures basic functions are all available and launch without website integration or customer communications.
- Soft launch: Begin to run new system new platform for internal Users on planned launch date, run existing system platform parallel for external Users.
- Trial launch: Begin to use the new system platform for a specific group of Users, or one customer, or department.
- Hard launch: Do not go live launh until all items are complete.
You also need to consider how you will provide access to any existing Users in the systemplatform, while new registrants will define their own log in details. The existing Users in your system your platform will not know how to log in and what details to use when they first access your new systemplatform.
Basic Launch
This requires you to identify what the ‘bare minimum’ for launching on the target date would be. This could include ability to book courses and manage Delegates, but not send any automated Communications or allow access to the systemplatform. Everything else is still progressed/trained but resources are more focused on ensuring the bare minimum is covered. Everything which is complete by the launch date is launched, and the rest is added to when ready. The benefit of this approach is that the go-live launch date is met.
Soft Launch
The system The platform is launched as an internal admin tool only. All bookings processed by Administrators are processed through the system the platform whilst bookings made by external Users continue through their existing route but are also added into the new system new platform by Administrators. This ensures that the new system new platform is kept up to date during this time period. Customers do not need to know that there is a new system new platform in place, even if they are receiving automated Communications from it. The benefit of this approach is that Administrators can become fully fluent in the system the platform before customers begin to make their own bookings. This also means that only Delegate Communications need to be confirmed as fully tested as everything else can be improved through experience before the customers begin to log in.
Trial Launch
The system The platform is launched to a specific group of Users. This could be one customer, one department, selected key contacts, or managers only. This allows you to gain their feedback on the system the platform and provides you with opportunity to make changes before a full launch to your entire customer base. The length of the trial is up to yourselves, but it is important that you have everything completed beforehand as if you were running the hard launch approach, to test this accurately.
Hard Launch
The launch of the system the platform is not completed until the entire system platform is signed off. This is the most challenging approach and includes fully tested payment gateway, website integration, customer communications and extensive process testing. The benefit of this approach is that there is a clear implementation end date and customers can begin to make their own bookings and log into the Learner Portal as soon as everything is ready.
This approach is ideal for those who do have a required launch date, and will be marketing the launch well ahead of time.
Providing Access to Users
There are several ways that you can provide log in details to users through the system
- You can send users their log in details via the Users DataGrid
To do this, access the DataGrid and select each user that you would like to send their credentials to, then select the Send Credentials Reset Password Link option from the top of the page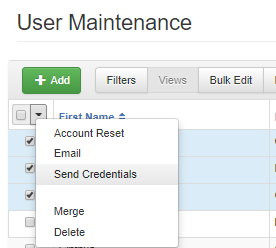
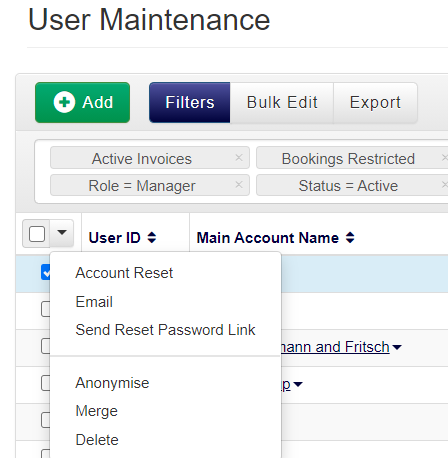
This will issue the user with a system a platform standard email containing their log in details and the system URL, you are not able to customise the content of this emailYou can design your own Email Template and send this out via the Users DataGrid
This option is very similar to the above, the difference is that you can define the wording and the design of the email
You will first need to create your own Email Template using the Users model, using your choice of fonts, colours and contentExample Content
Dear @@Forenames,
Following our recent communication about our investment into a new Learner Portal. Here are your new log in details for access to the portal.Username: @@ID (or use your email address: @@Email)Please use your username to reset your password for the portal by clicking here.
To access your portal page thereafter, please use the following website link:
https://systemname.accessplanit.com/accessplan
If you have any questions or issues accessing your portal please email admin@trainingprovider.com
Many thanks,
You will then be able to send this out from the Users DataGrid by selecting the users and choosing the Email option
Both options 1 and 2 are commonly used for communicating log in details to trainers, key contacts or trial Users.
Please note this method only allows you to send 50 emails at a time unless you have the eCampaigns module.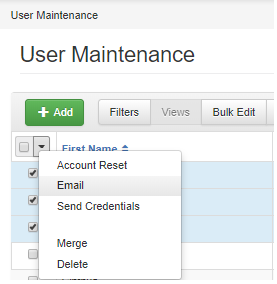
Using an external system
As there is a limit to the number of emails that you can send out from the Users DataGrid, you may choose to use an external system to communicate out log in information to your customers if there are a lot to manage.
While you cannot export out the passwords for Users, you can use the technique used in the Email Template above and direct users to the password reset page in order to receive a separate email with their password.
You need to ensure that you include the following information:
- The system URL.
- Their username or alternatively instruct to use email address if you have email address log in enabled.
- The URL for resetting their password.
- An email address or phone number for them to contact if they have any problems.