| Live Search | ||||||||
|---|---|---|---|---|---|---|---|---|
|
How to Add a Product to your basket
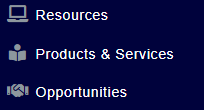
- Navigate to the Products and Services DataGrid via the main left-hand menu:

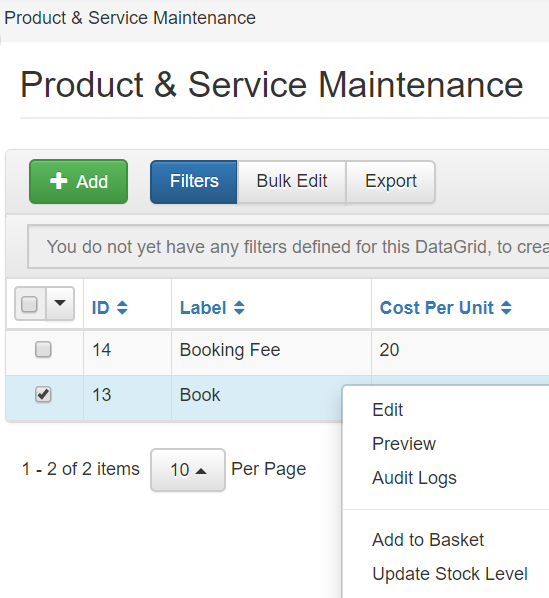
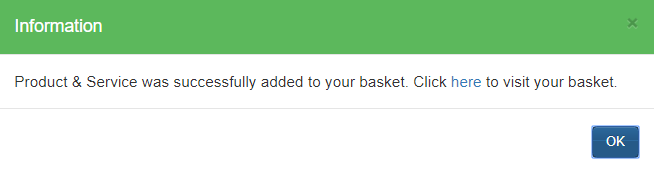
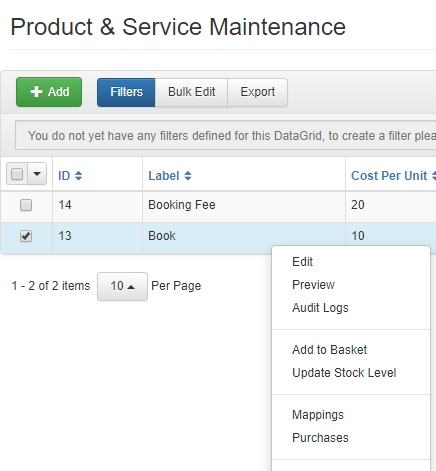
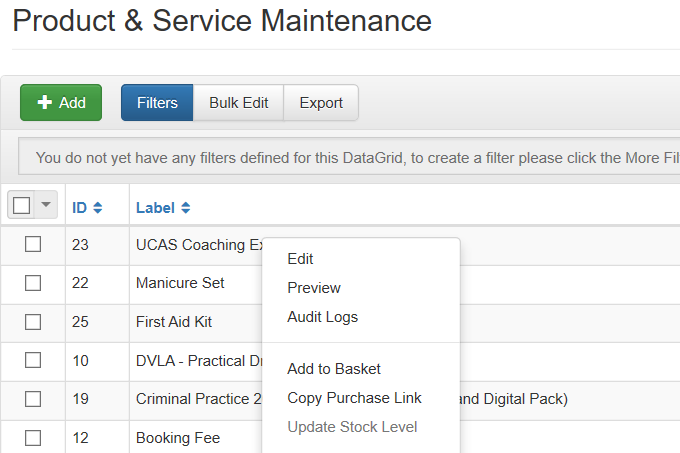
- In the DataGrid, right-click the Product or Service you want to add to your Shopping Basket, and click Add to Basket:
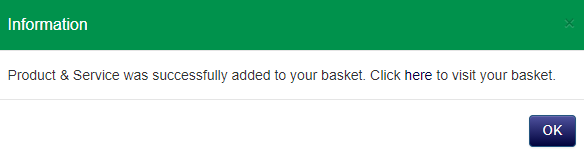
- Navigate to your Shopping Basket by clicking here on the dialog box, or alternatively, close this box and click the Shopping Basket icon in the top-right of the interface and click Checkout.
- Complete the Shopping Basket process to complete the purchase.
How to View the purchases related to a Product
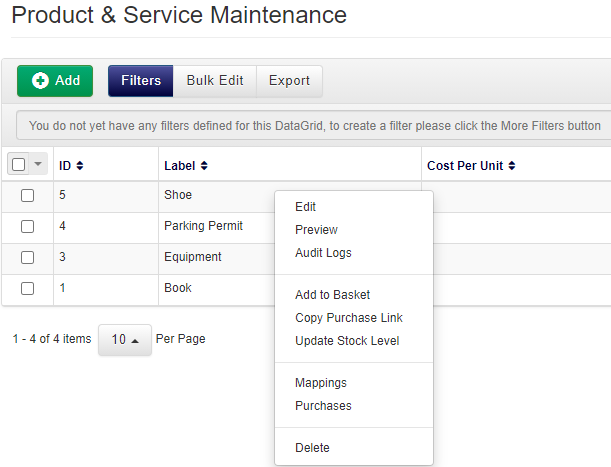
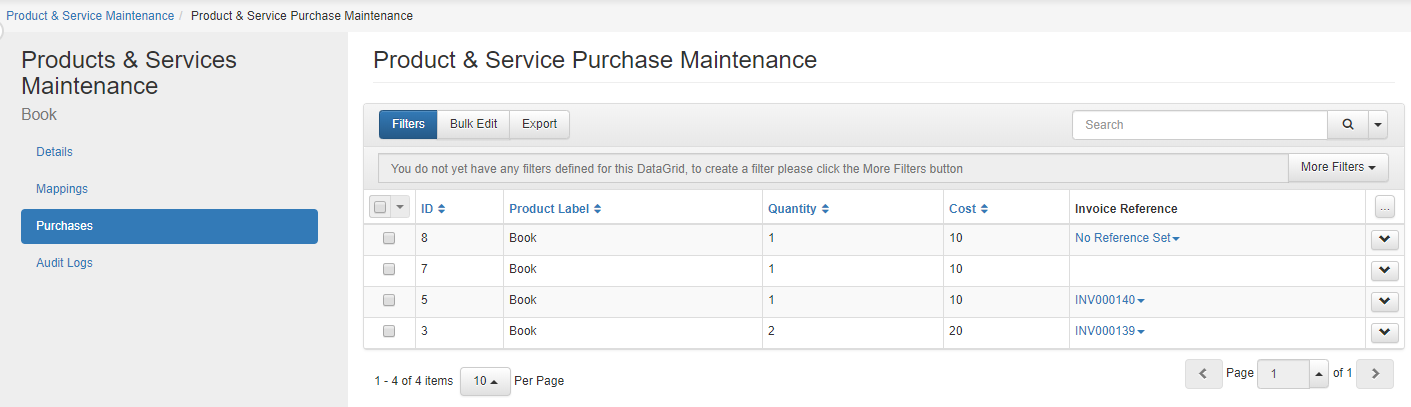
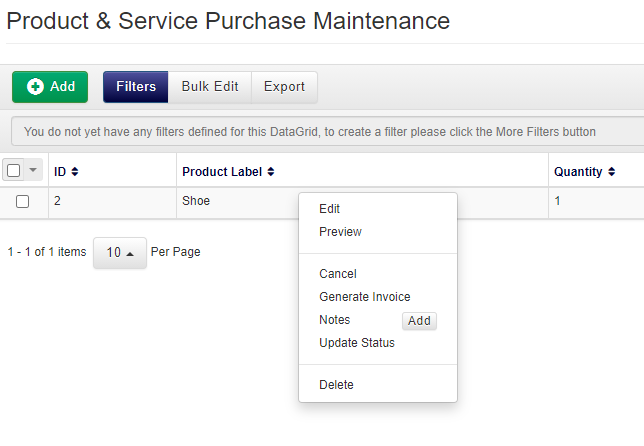
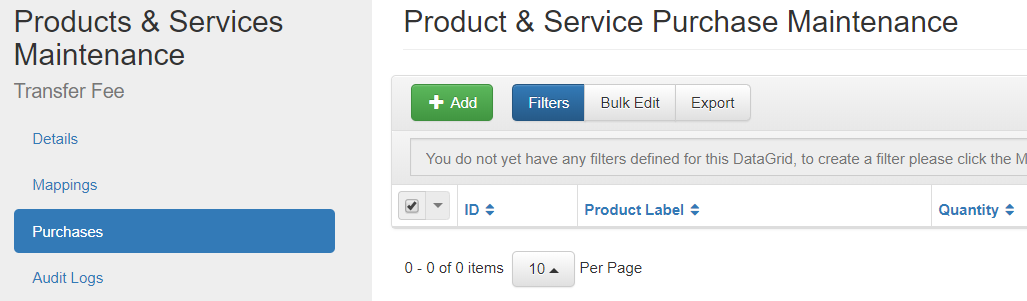
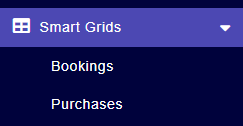
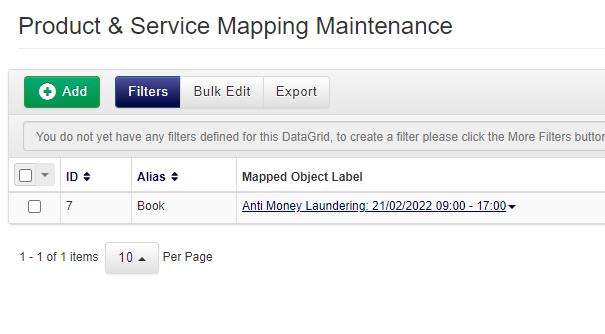
- In the DataGrid for Products and Services, right-click the item you which to view the Purchases for and click Purchases:
- You will be taken to a DataGrid in which you can see all Purchases of the Product/Service:
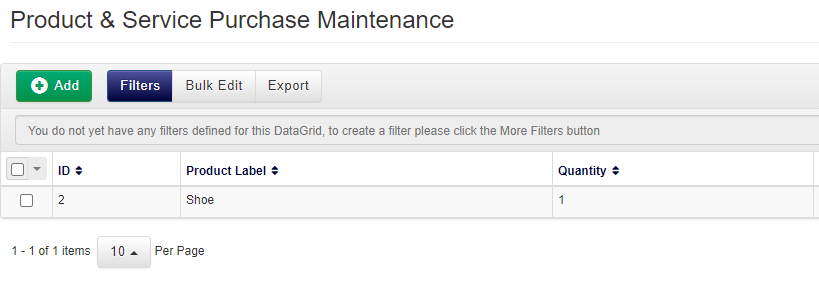
- There are several actions you can make against the Purchase by right-clicking on a row within the Purchases DataGrid:

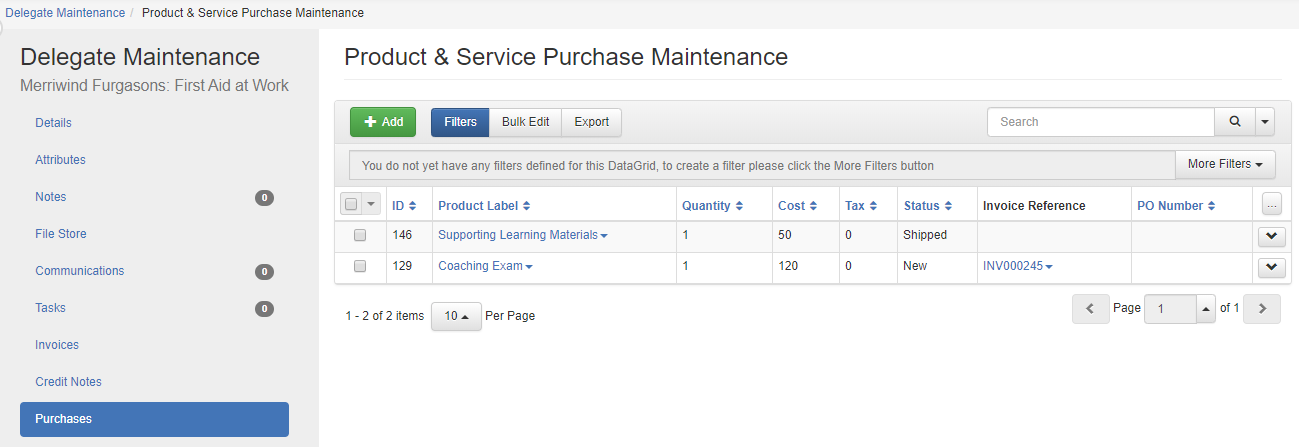
- You can quickly lookup the purchases that are linked to each of your Delegates & Placeholders via the Purchases tab when viewing a Delegate on a course date that has associated products:
How to manually record Product & Service Purchases outside of your Shopping Basket
- Navigate to the Purchases DataGrid (Products & Services DataGrid > right click on a Product or Service > Select Purchases).
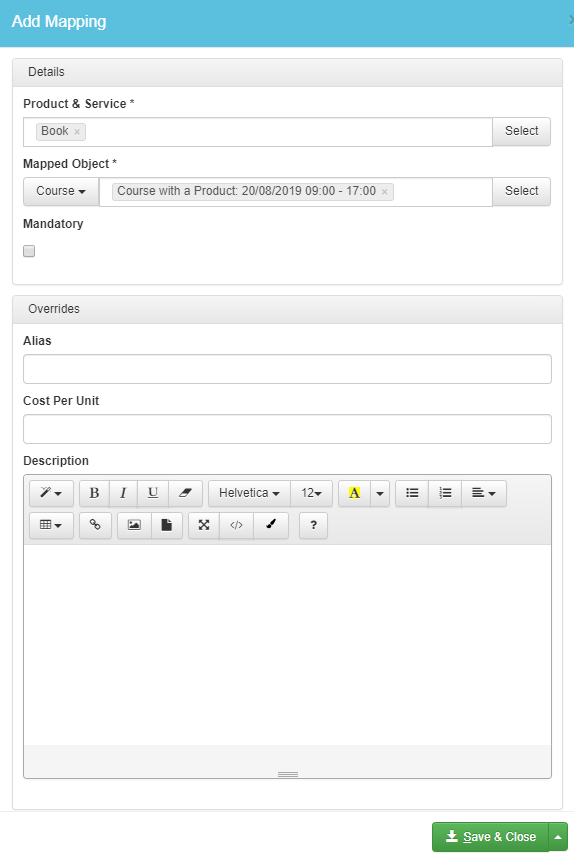
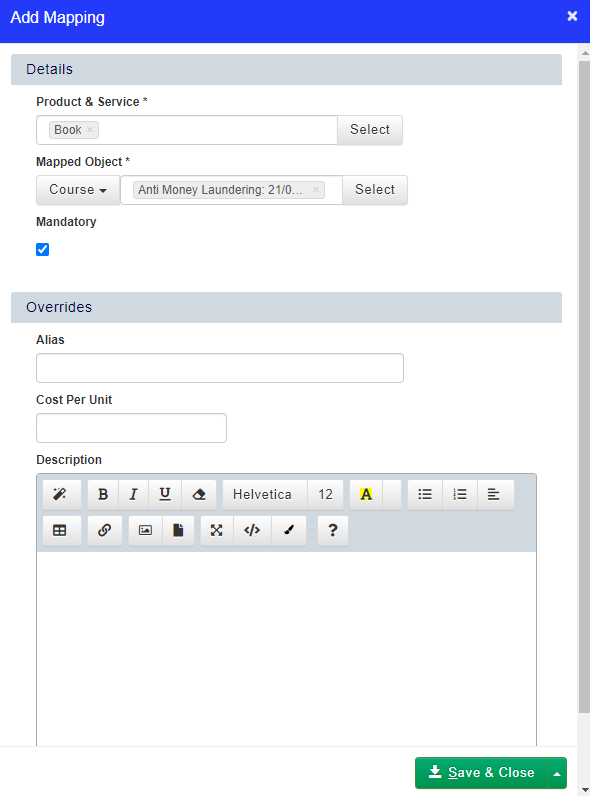
- Click Add and select the Product or Service you want to add, choose the quantity and the Mapped Object (Delegate or Placeholder) .
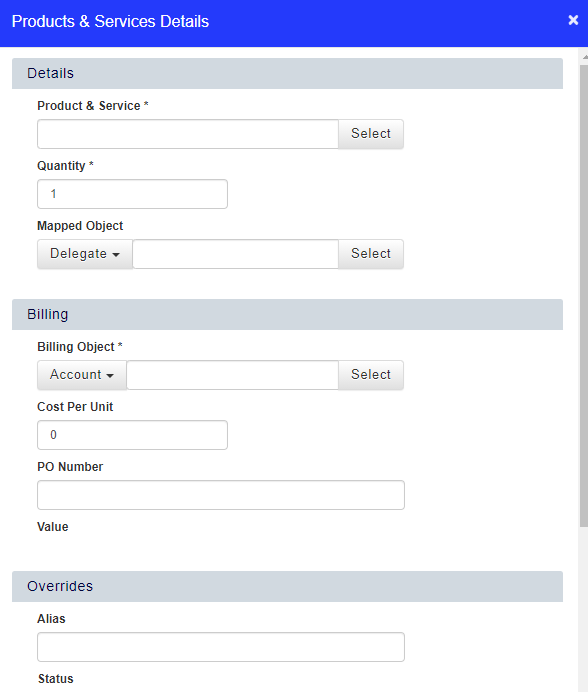
- Fill in the billing details, Billing Object, Cost Per Unit and PO Number if required.
- Click Save & Close.
How to generate a Purchase Link for a Product or Service
- Navigate to the Products and Services DataGrid.
- Right click Product or Service you wish to copy a Purchase Link for and select Copy Purchase Link from the context menu.
- The Purchase Link will now be copied to your clipboard.
How to view and add Products and Services in the Shopping Basket
- Add a Course Date to the Basket which has a Product and Service associated. To learn how to associate Products and Services with Courses, click here.
- Continue through the Basket to the Delegates stage:

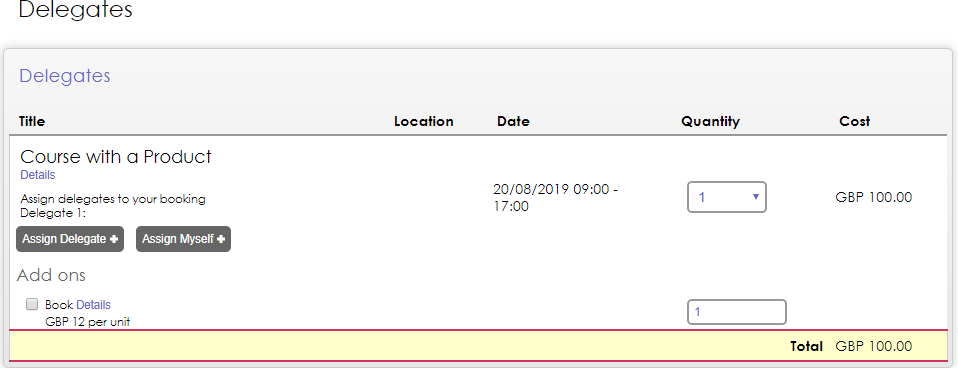
- Tick the Product that is available under "Add ons".
- Notice the cost of the Product is applied:
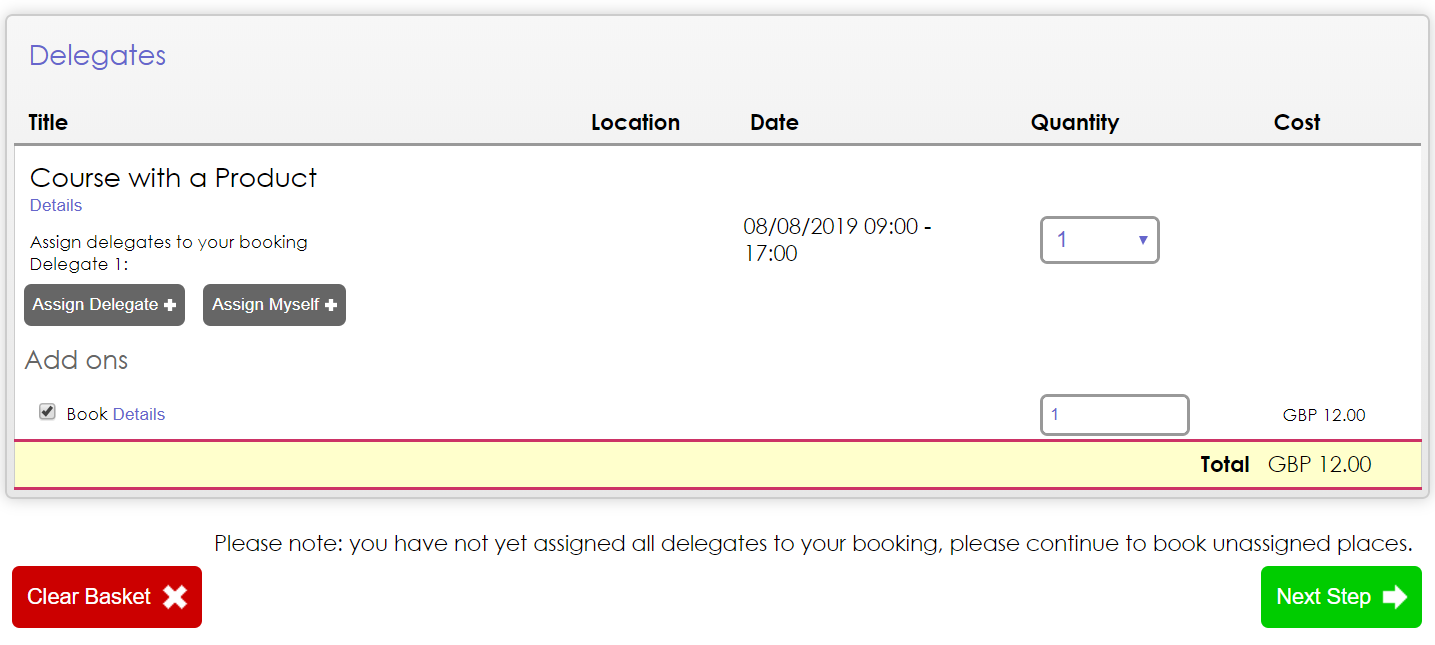
- As this product must have a User linked to it, if you don't assign a Delegate to the course, you cannot proceed through the Basket:
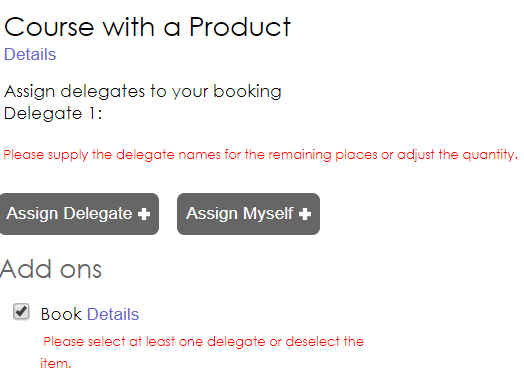
- Once you assign a Delegate, you will see that Delegate's name also apply against the Product:
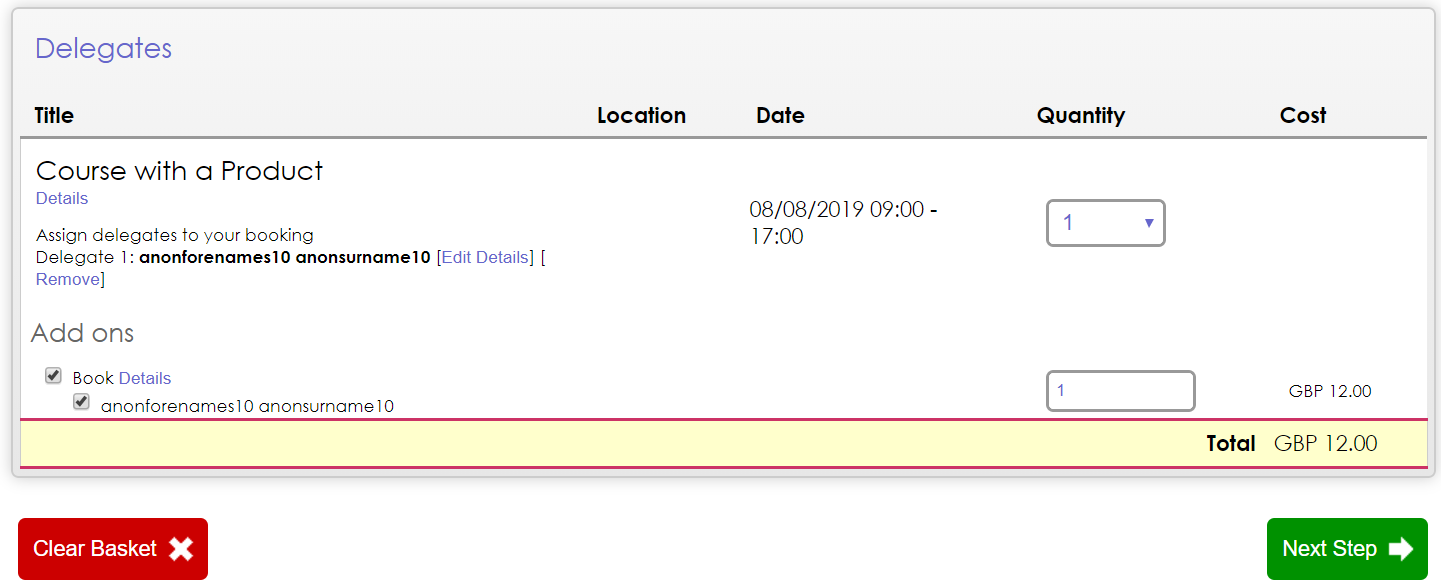
- You will then be able to proceed through the Shopping Basket.
How to purchase Products and Services that are not related to the Courses in the Basket
- Navigate to the Products and Services DataGrid.
- Right-click on the Product you'd like to add to your Shopping Basket.
- Select Add to basket.
- Navigate to your Shopping Basket.
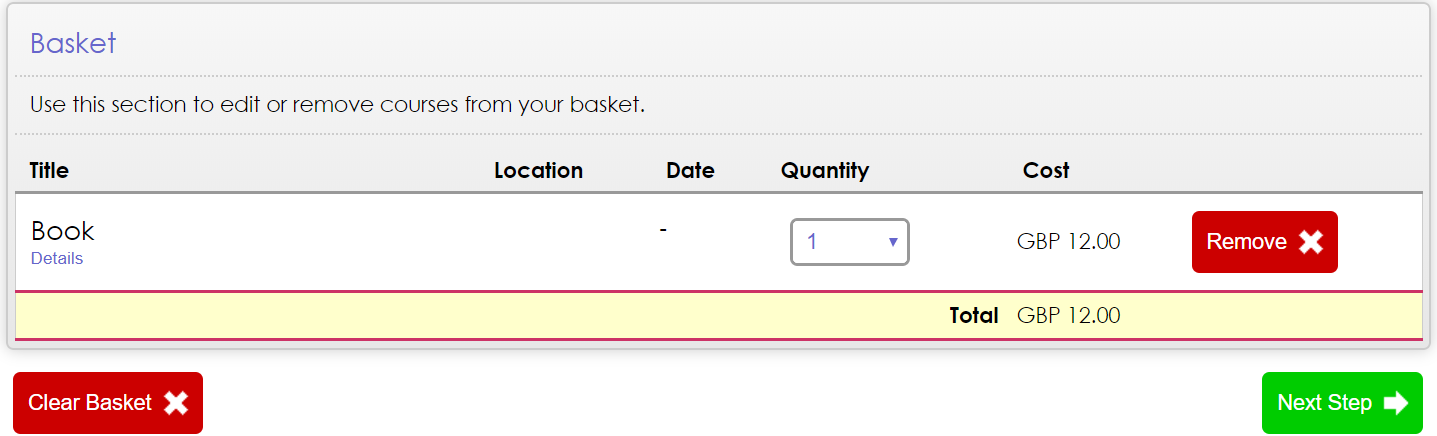
- Click Next.
- Assign a Booker.
- Pay for your Product.
How to view and add a Course and a Product to the Basket
- Ensure you have set up a Product.
- Ensure you have set up a Course in the Future.
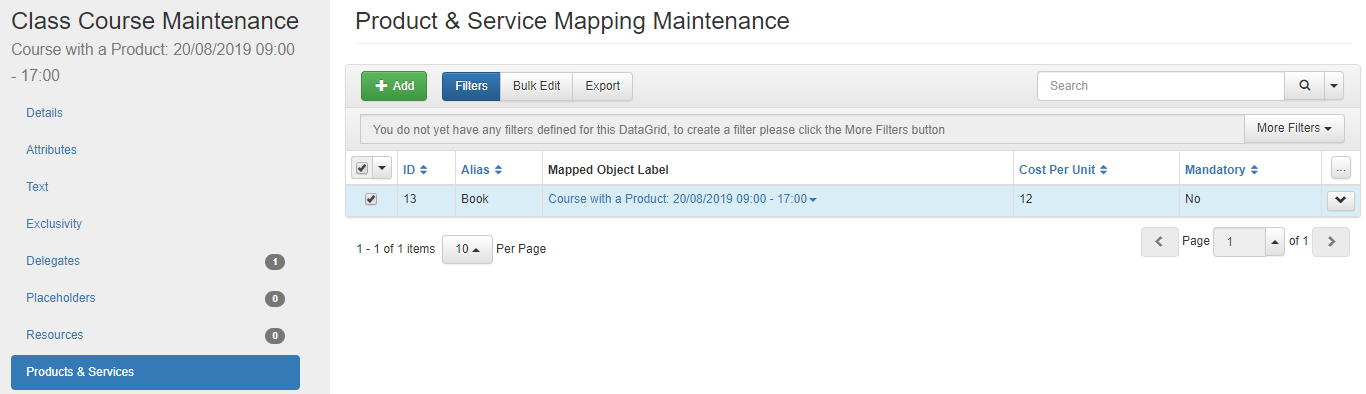
- On the Course Date, go to the tab Products & Services:
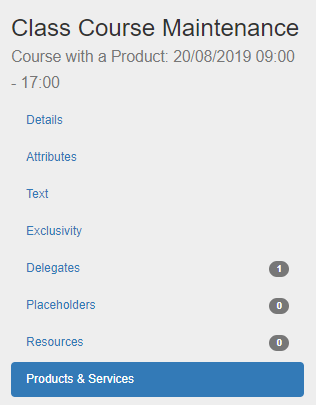
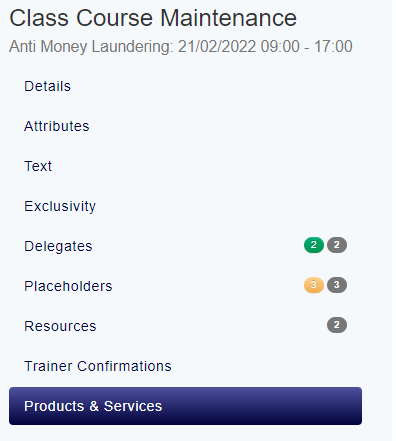
- Click Add in the Products & Services DataGrid on the Course Date and select a Product:
- Click Save & Close.
- You'll see the Product/Service now appears in the Products & Services DataGrid within the Course Date:
- Navigate back to Details of the Course and click Actions in the top right.
- Click Add to basket.
- Navigate to your Basket.
- You'll notice the Product/Service appear when you get to the Delegates stage of the Basket:
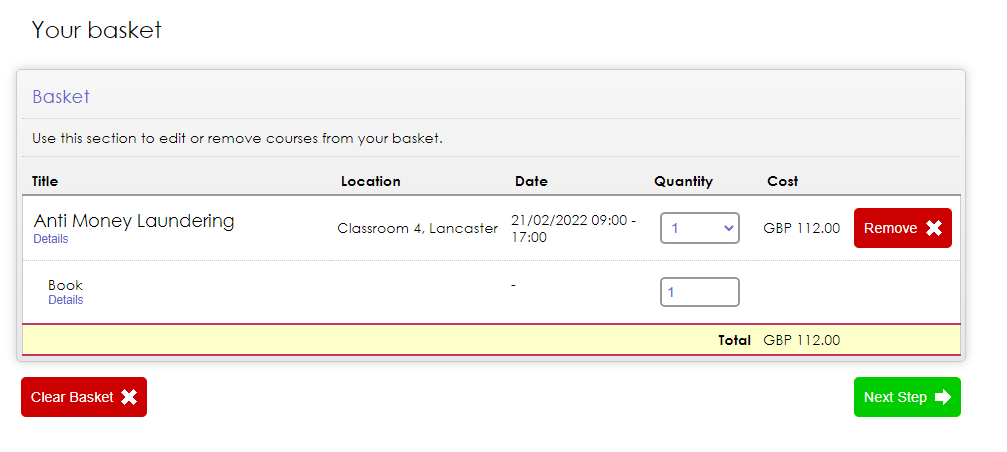
- Complete the Shopping Basket process and an Invoice will be Generated for this booking, including the Course and the Product/Service.
How to set up a Products and Services purchase summary email
- Navigate to Workflow Templates via Administration.
- Add a new Workflow by clicking Add.
- Select the module Course Date Booking Booking. To learn more about Workflows, click here.
- Give your Workflow a Label and click Save.
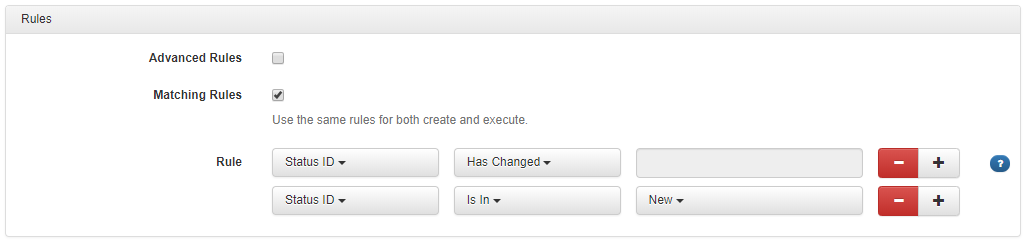
- Go to Settings and add the following rule:


- Click Save.
- Go to Actions and click Add to add a new Email Action.
- Here you can either use a Custom email or select an Email Template. To learn more about Email Templates click here. To learn more about Text Templates, click here.
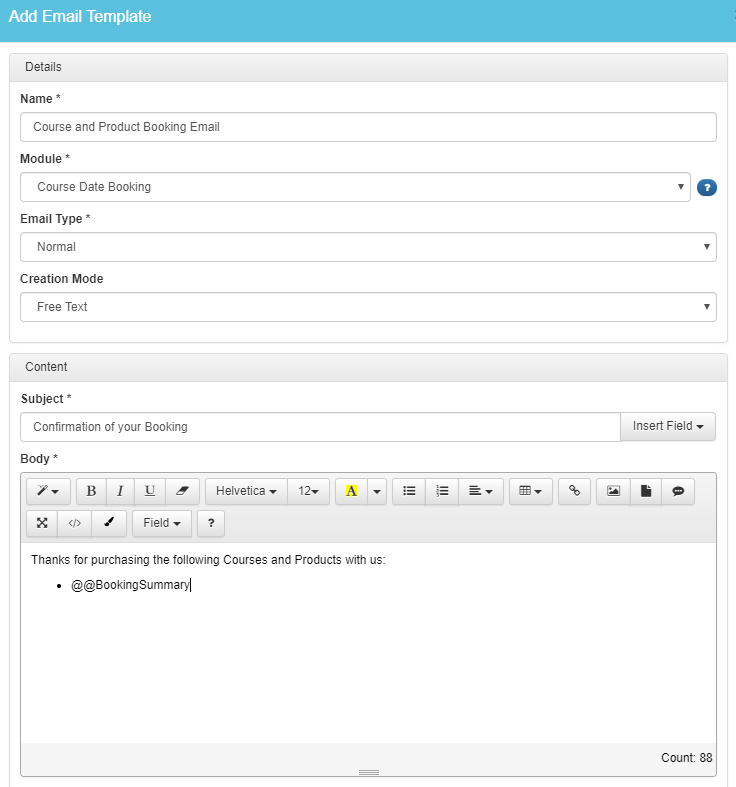
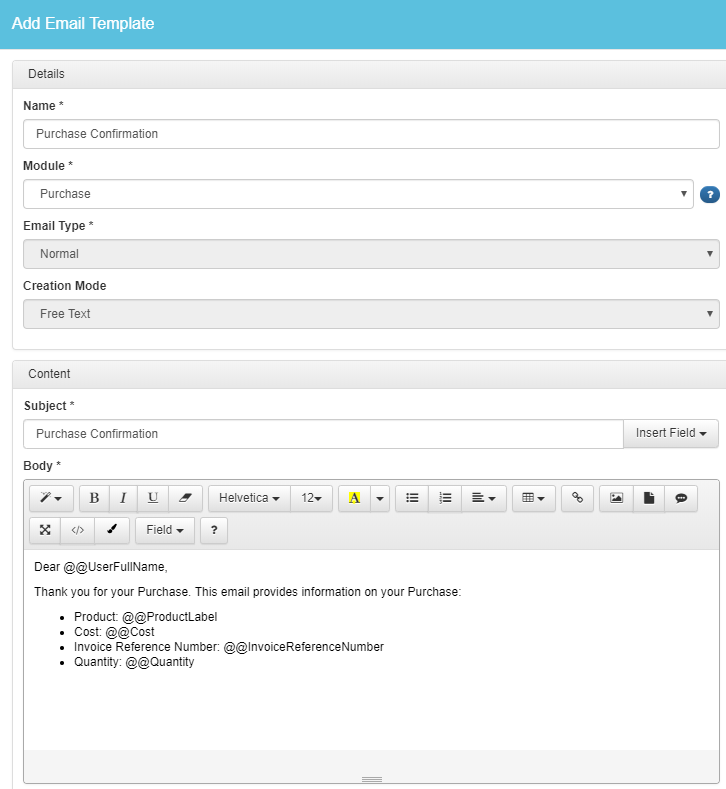
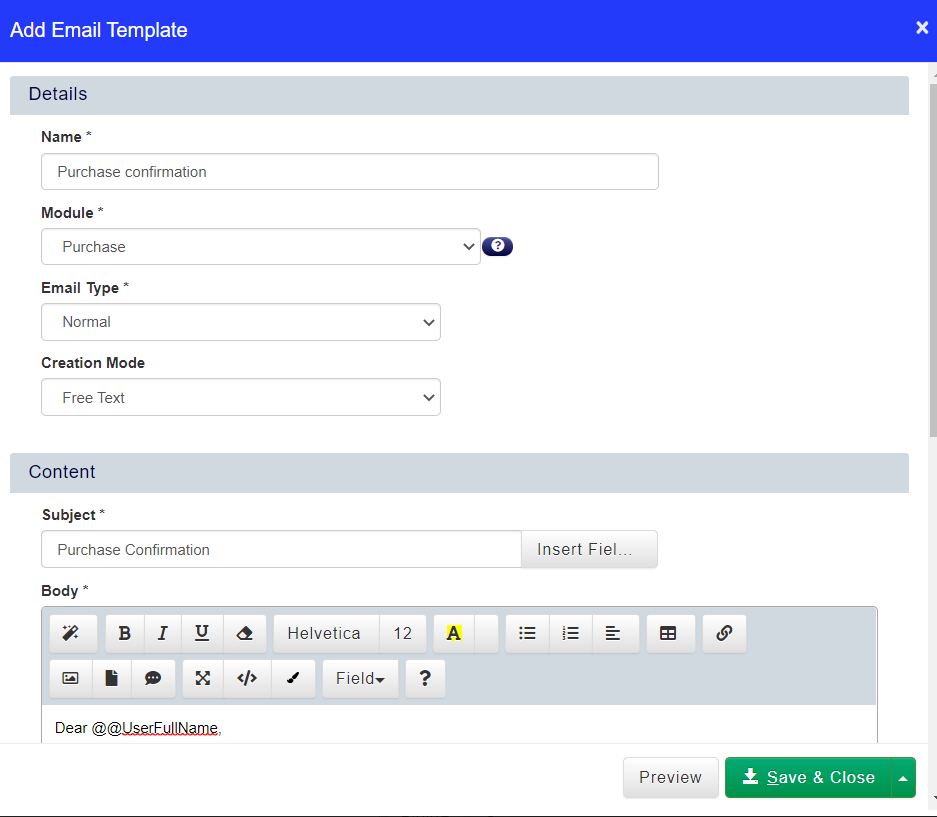
- In this example, we have gone to Email Templates and set an Email up as below:

- Then, set up the Email Action as below:
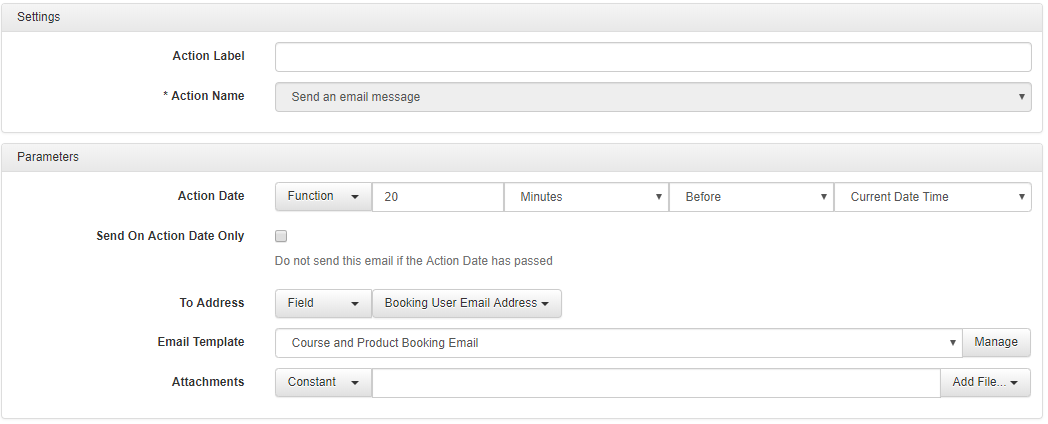
- The above email will send 20 minutes after the Booking as been made, using the Email template created above, which will give a summary of the courses and/or Products that were purchased.
- Click Save.
How to set up an email per Product and Service purchased
- Navigate to Workflow Templates via Administration.
- Add a new Workflow by clicking Add.
- Select the Purchase Module. To learn more about Workflows, click here.
- Give your Workflow a Label and click Save.
- Go to Settings and add the following rules:
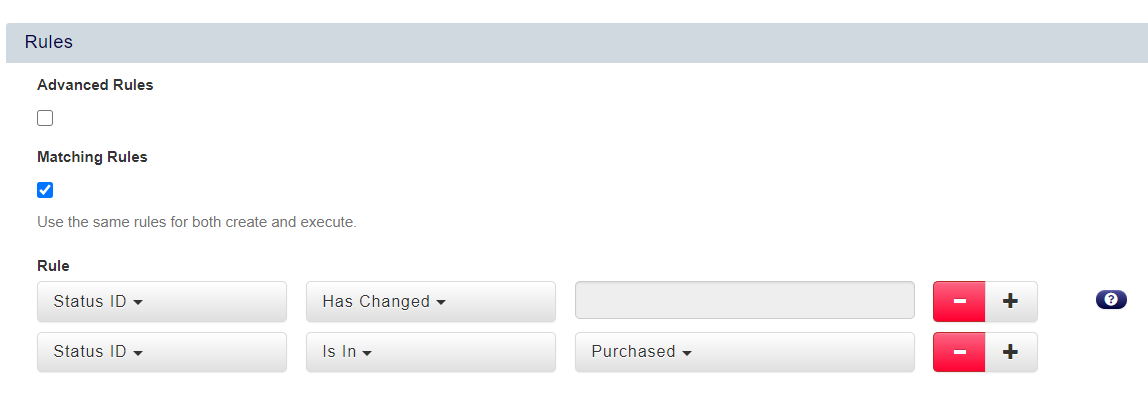
- Click Save.
- Go to Actions and click Add to add a new Email Action.
- Here you can either use a Custom email or select an Email or Text Template. To learn more about Email Templates click here. To learn more about Text Templates, click here.
- In this example, we have gone to Email Templates and set an Email up as below:
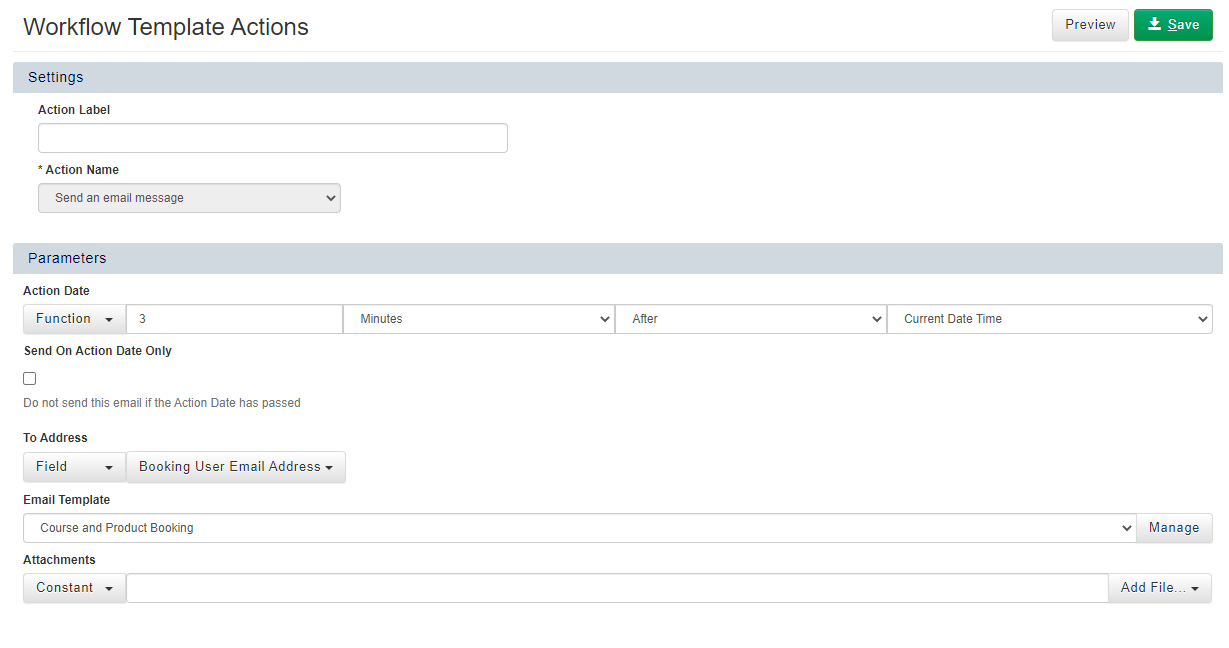
- The Email Action is then set up as below:
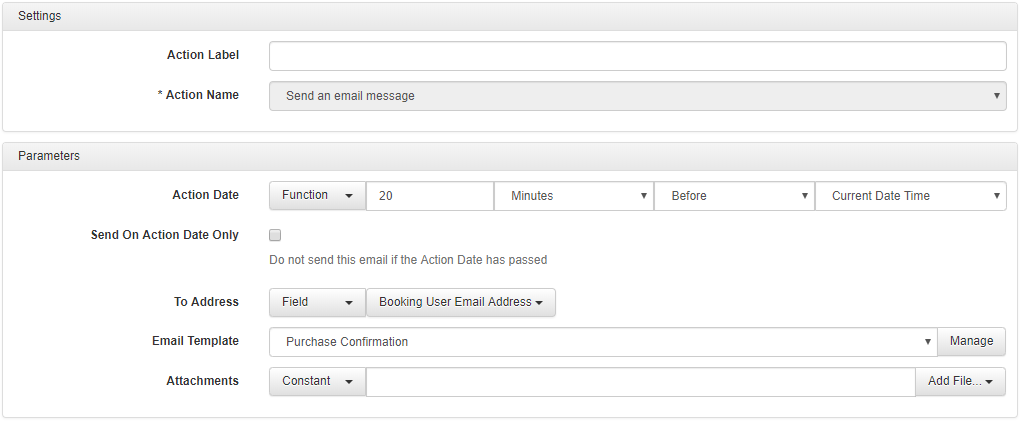
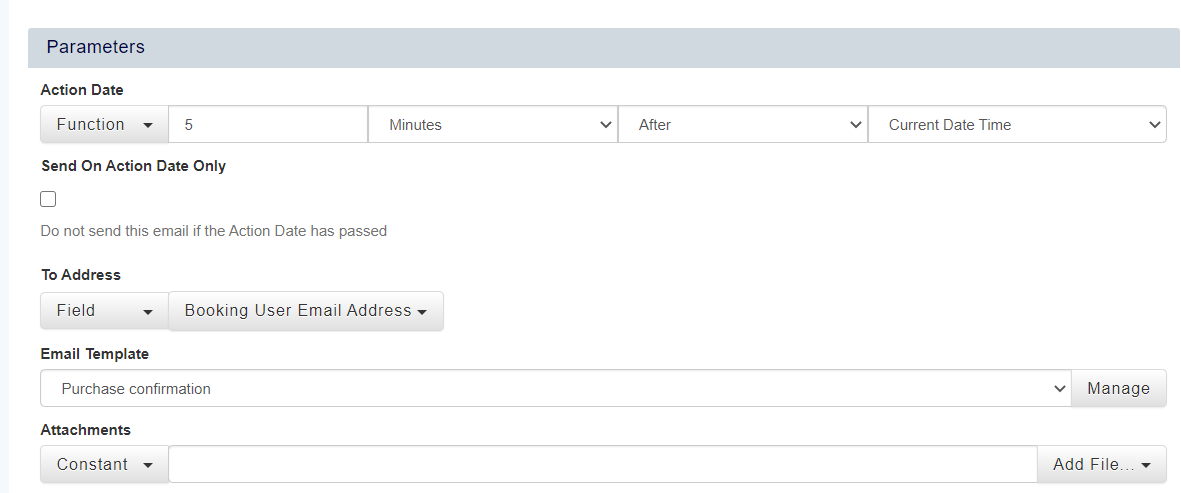
- The above email will send 20 5 minutes after the Booking as been made, using the Email template created above, which will send an email for each Product/Service purchased in the booking.
- Click Save.