| Live Search | ||||||||
|---|---|---|---|---|---|---|---|---|
|
This page explains for your Trainers how they can use the systemplatform. They can refer to the Getting Started guide to learn the basics of DataGrids and other accessplanit fundamentals by clicking here.
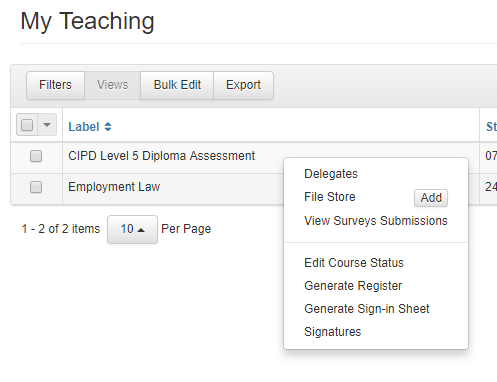
How to view and manage upcoming Course dates
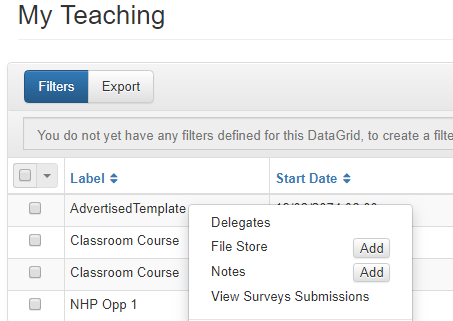
- Drop down the My Teaching area and select Courses. You will be taken to a DataGrid showing all future Course dates you are assigned to.
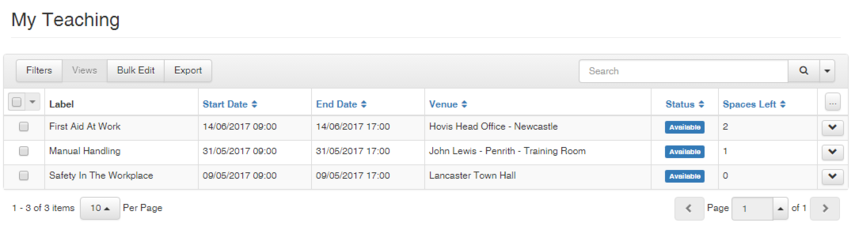
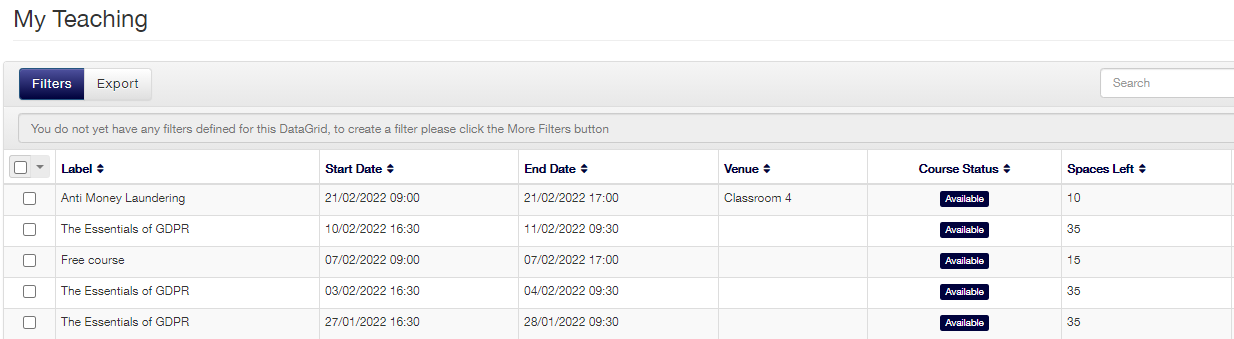
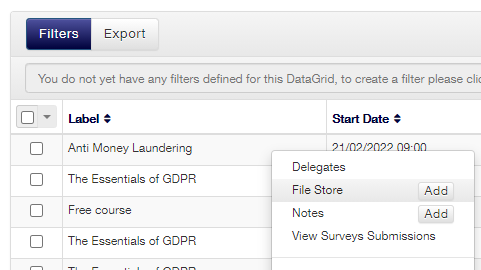
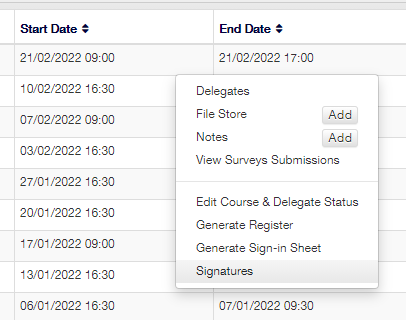
- Right click on the course date that you are interested in to bring up a context menu with further options. From here, you can view or add any Files stored against the date, view Delegate responses to pre-training questionnaires, generate documents such as sign in sheets and registers, and edit Course statuses:

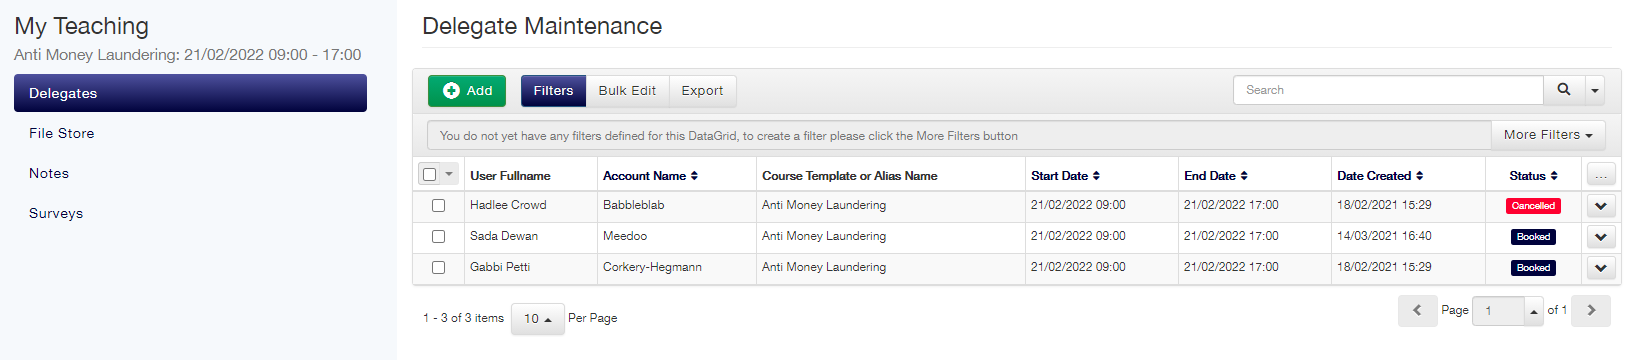
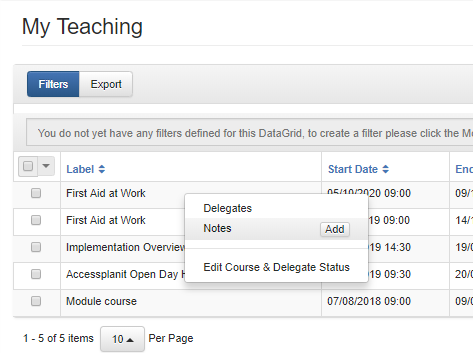
How to view Delegates on a Course date
- Click the My Teaching area and select Courses. You will be taken to a DataGrid showing all future Course dates you are assigned to.
- Right click the Course date that you wish to view the Delegates for and select Delegates from the context menu.

- You will be taken to a DataGrid showing all Delegates on the Course date. In this area, you can update contact information, mark attendance, and view and add Notes for each Delegate. Please note that all Notes within the system platform can be viewed by Administrators.
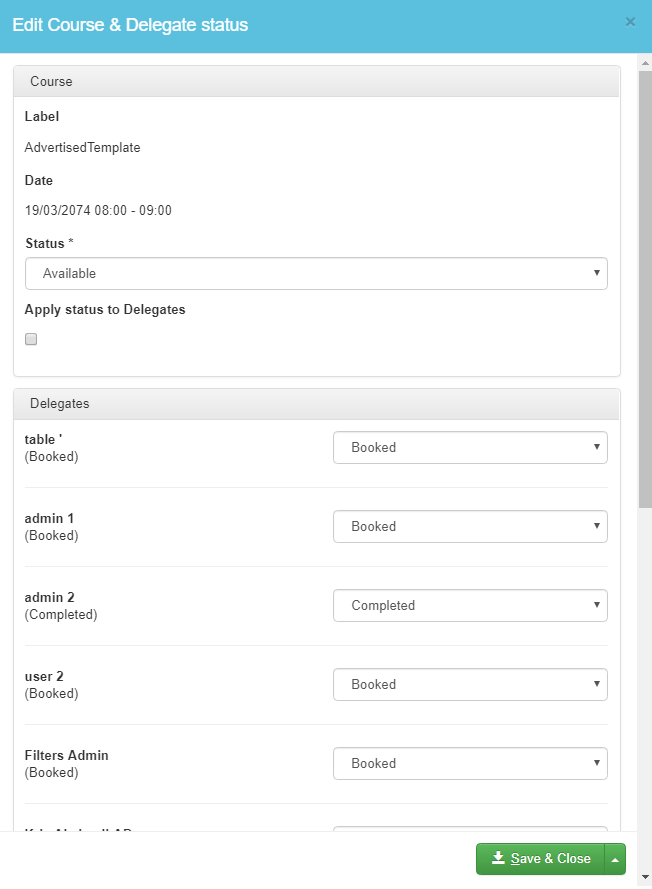
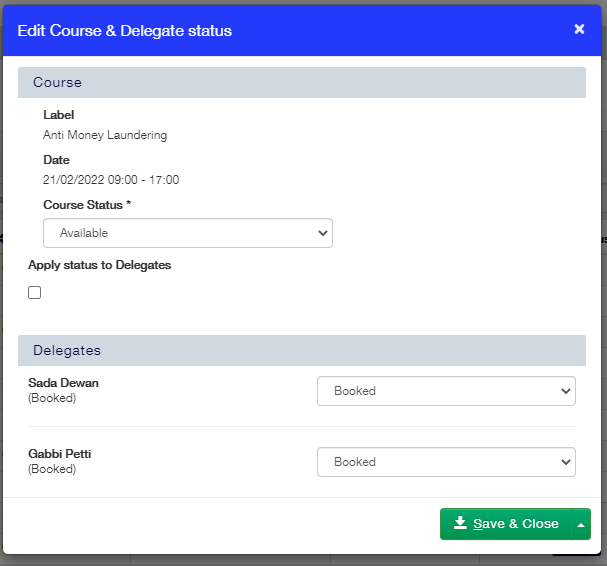
How to mark Course & Delegate Status
- Click the My Teaching area and select Courses. You will be taken to a DataGrid showing all future Course dates you are assigned to.
- Right click the course you'd like to edit the Course and/or Delegate statuses for, and select Edit Course & Delegate Status from the context menu.
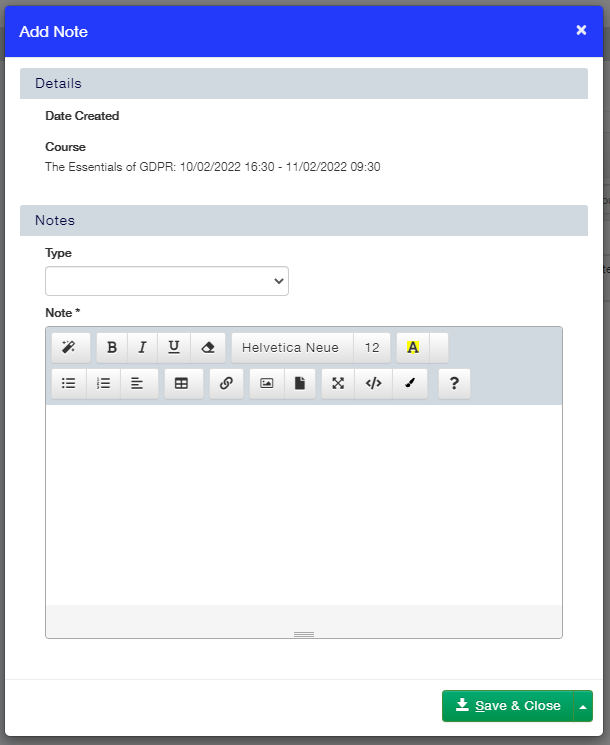
How to access Notes
- Click the My Teaching area and select Courses. You will be taken to a DataGrid showing all future Course course dates you are assigned to.
Right click the Course you'd like to view Notes for, and select Notes from the context menu to see any Notes mapped to the Course.
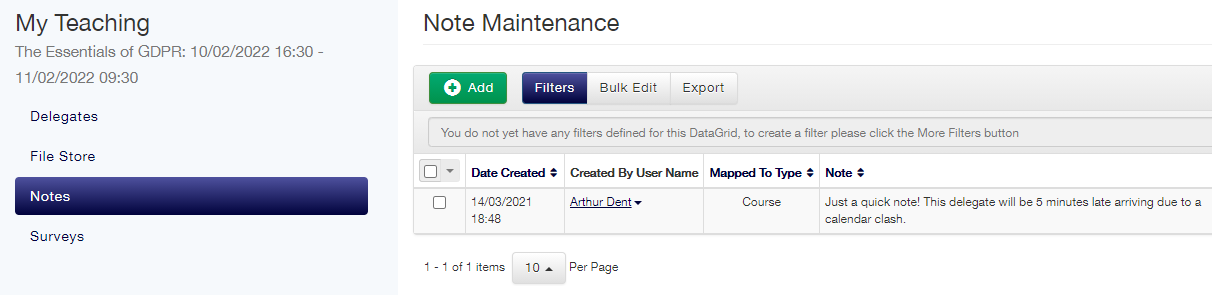
- Training Administrators can choose per Note if the Trainer should be able to access it by ticking the Trainer can access this note on the Notes at the Course date, or the Delegate level.

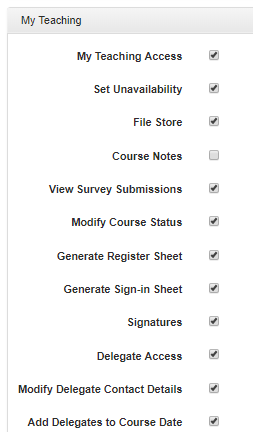
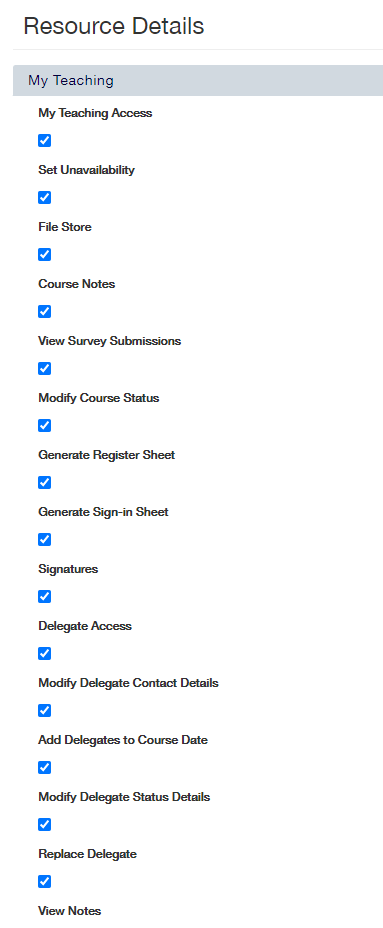
- For a Trainer to view Notes made by Training Administrator, you'll need to enable this option under My Teaching at the Resource level. If you are a Training Administrator and would like to learn more about how to set up your Trainers, click here.
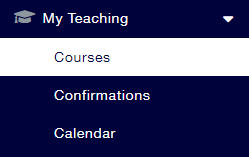
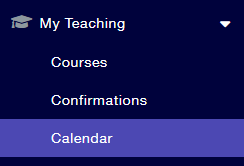
How to access the Trainer Calendar
- The Trainer Calendar is separate to any other calendar in the systemplatform. In this calendar, you can view which courses you are teaching as well as set the days and times you are unavailable.
- Drop down the My Teaching area and select Calendar.

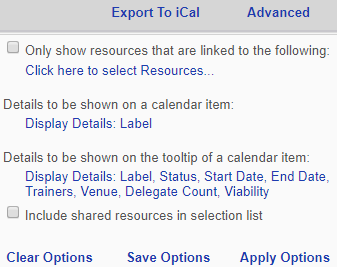
How to manage Trainer Calendar Settings
- Drop down the My Teaching area and select Calendar.
- Click Advanced at the top of the calendar. From here, you can modify the settings of your calendar, including what it displays, and how it displays items.
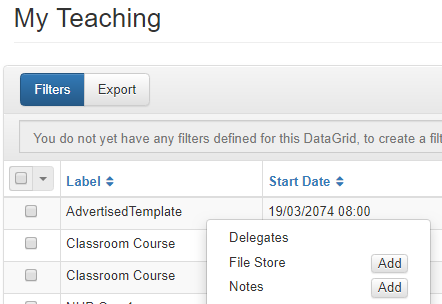
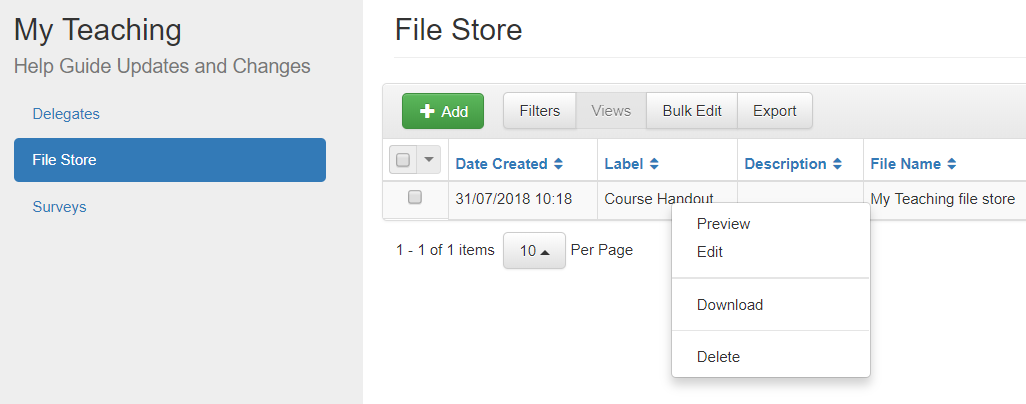
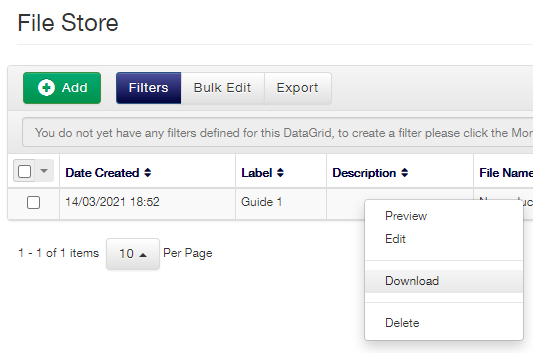
How to download and upload Files against a Course date
- Click the My Teaching area and select Courses. You will be taken to a DataGrid showing all future Course dates you are assigned to.
- Right click you wish to manage the Files for, and select File Store from the context menu.
- Select Add on the top left of the of the Files DataGrid.
- Complete the form with the details of the file you are uploading and upload the file
. - Create the File by selecting Save & Close.
- Download existing files by right clicking on the File and selecting Download from the context menu.
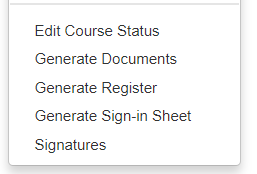
How to generate Registers and Sign-in Sheets
- Click the My Teaching area and select Courses. You will be taken to a DataGrid showing all future Course dates you are assigned to.
- Right click the Course date you wish to generate a Register or Sign-in Sheet for, and select either Generate Register or Generate Sign-in Sheet from the context menu.
- This will generate the required document in another tab of your browser, or otherwise download the sheet as a Word Document or PDF. From here, you can save or print the document.

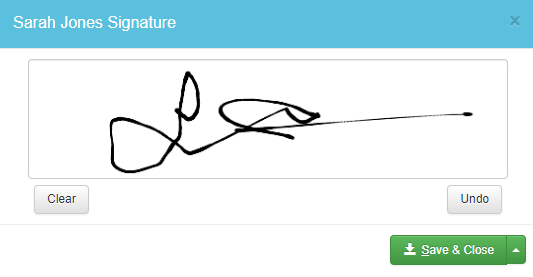
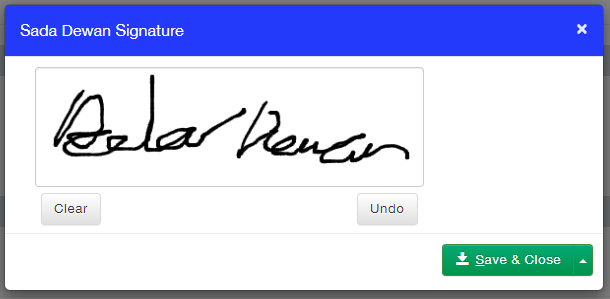
How to use Signatures for Delegate sign in
- You can allow Delegates to sign themselves into their Courses using Signatures. To do this, all your Trainers need to do is access your system platform via a tablet or a phone.
- Click the My Teaching area and select Courses. You will be taken to a DataGrid showing all future Course dates you are assigned to.
- Right click the Course date you would like to record attendance for using Signatures in and select Signatures from the context menu.
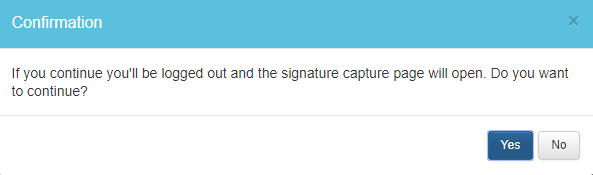
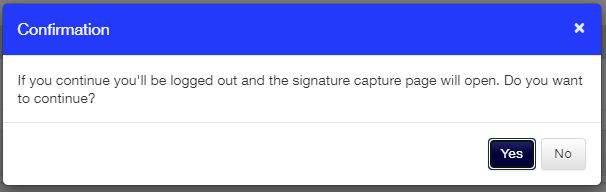
- A warning message will be displayed informing you that you will be logged out of the system platform and the Signature capture page will open. To continue, select Yes.
- Upon selecting Yes, a new page will open with the Course details and a list of Delegates.
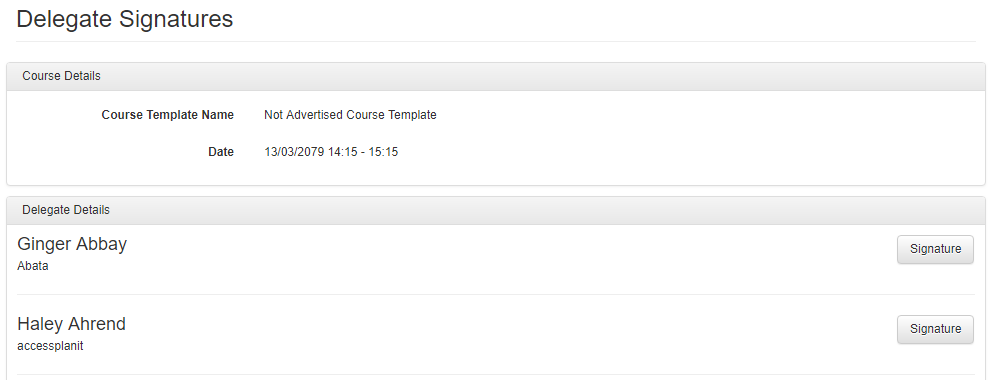
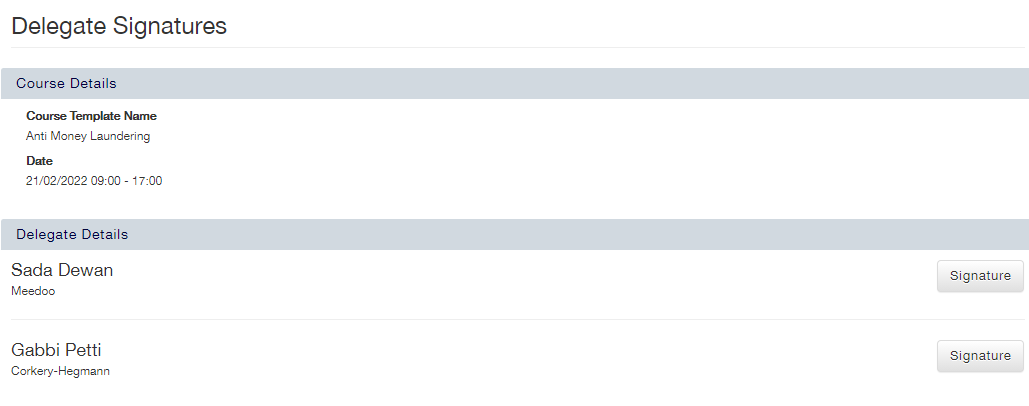
- To add a signature, each Delegate should select the Signature button next to their name, add their signature and then save the entry by selecting Save & Close.
How to update Delegate contact information
- Select the My Teaching area and select Courses.
- You will be taken to a DataGrid showing all future course dates you are assigned to.Right click the course date you are interested in and select Delegates from the context menu.
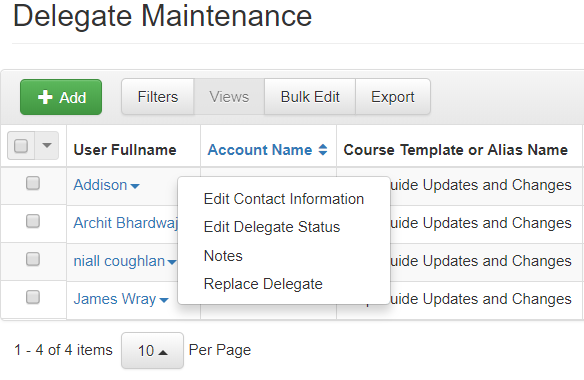
- Right click on the Delegate whose information you want to update and select Edit Contact Information from the context menu.
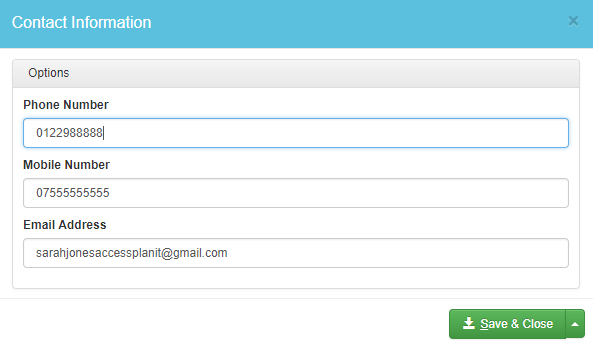

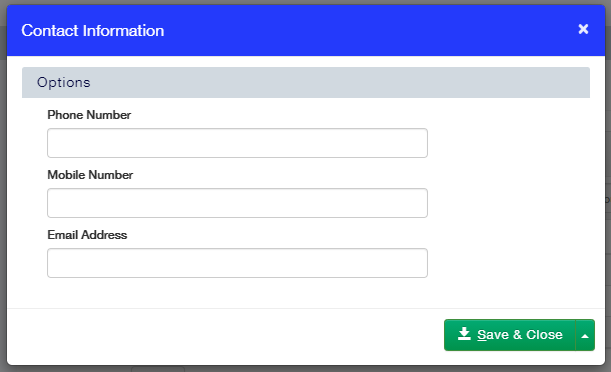
- Once you have updated the required information, select Save and Close.
How to mark Delegate attendance
- To mark individual Delegate attendance, click the My Teaching area and select Courses. You will be taken to a DataGrid showing all future Course dates you are assigned to.
- Right click the Course date you wish to mark attendance for and select Delegates from the context menu. You will be taken to a DataGrid showing all Delegates.

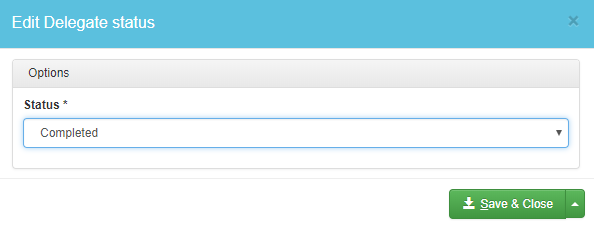
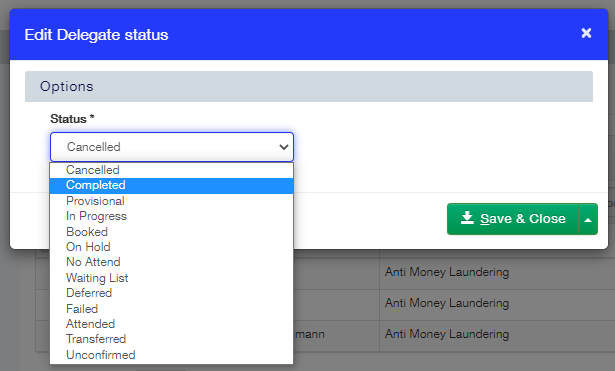
- Right click on the relevant Delegate and select Edit Delegate Status from the context menu.
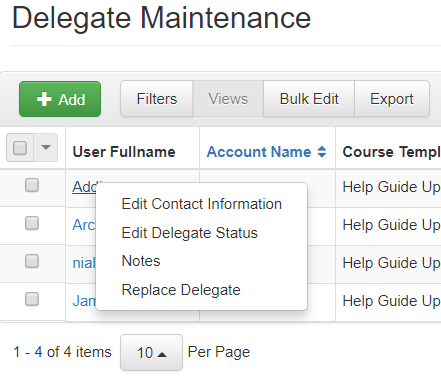
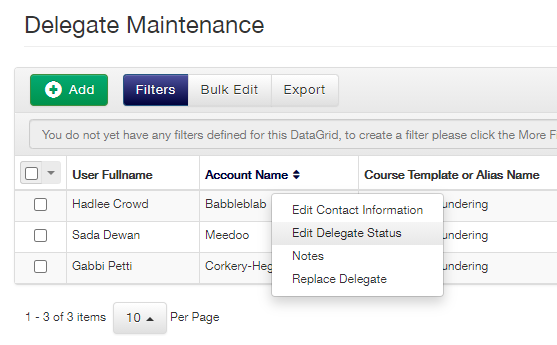
- Use the drop-down box to select the appropriate status and select Save and Close.
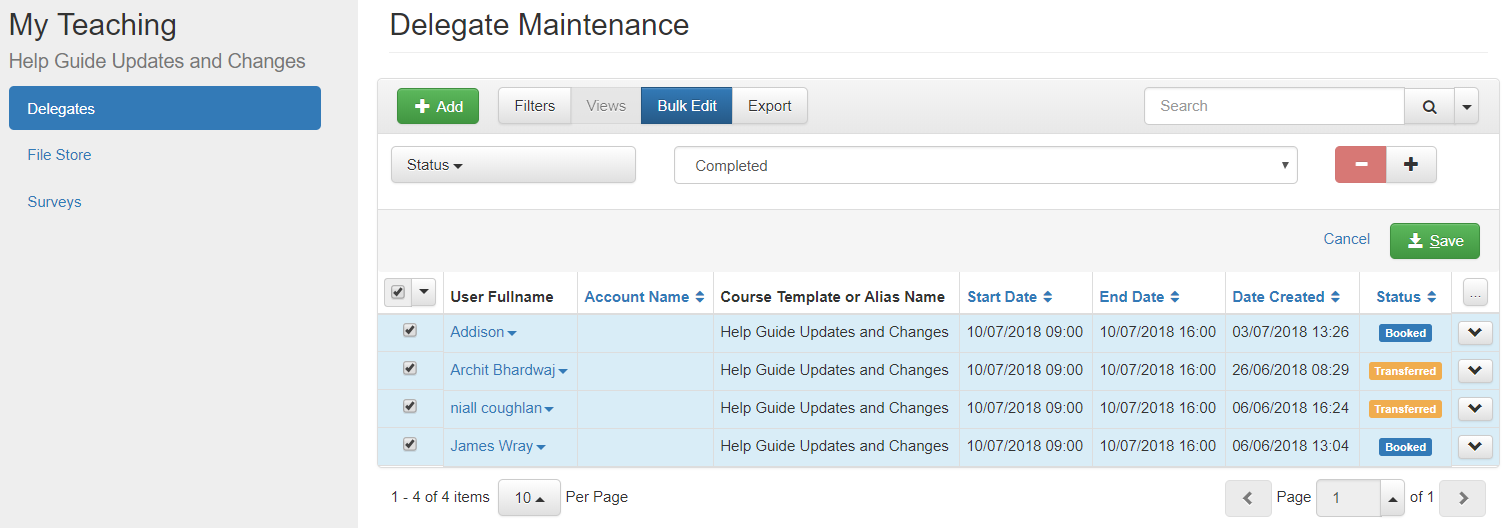
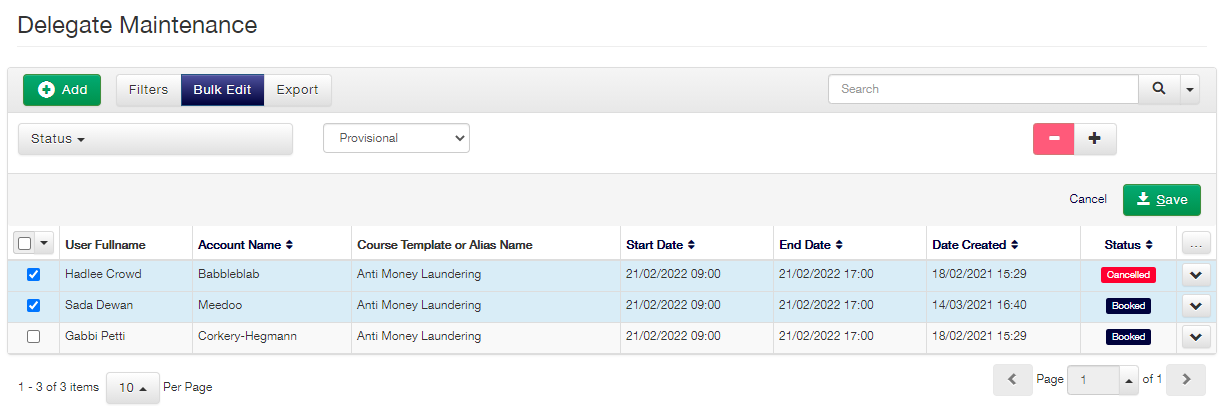
How to Bulk Edit Delegate Attendance
- To bulk update Delegate attendance, click the My Teaching area and select Courses. You will be taken to a DataGrid showing all future Course dates you are assigned to.
- Right click the Course date you wish to bulk edit Delegate status for and select Delegates from the context menu. You will be taken to a DataGrid showing all Delegates.
- Select the Delegates you wish to update the statuses of using the tick boxes on the left hand side, or select all by using the tick box on the header of the DataGrid.
- When you are happy with your selections, choose the Bulk Edit option at the top of the DataGrid and select the appropriate status.
- Update the status by selecting Save.
How to view Delegate Survey submissions
- Click the My Teaching area and select Courses. You will be taken to a DataGrid showing all future Course dates you are assigned to.
- Right click the Course date you wish to view Survey submissions for and select View Surveys Submissions from the context menu.
- You will be taken to a DataGrid showing all Survey submissions for that Course.
- Right click on the Delegate that you are interested in and select View to access the responses.
How to update the status of a Course date
- To update an individual Course statuses, click the My Teaching area and select Courses. You will be taken to a DataGrid showing all future Course dates you are assigned to.
Right click the Course date you wish to change the status for Edit Course Status from the context menu.
Use the drop-down box to select the appropriate status and select Save and Close.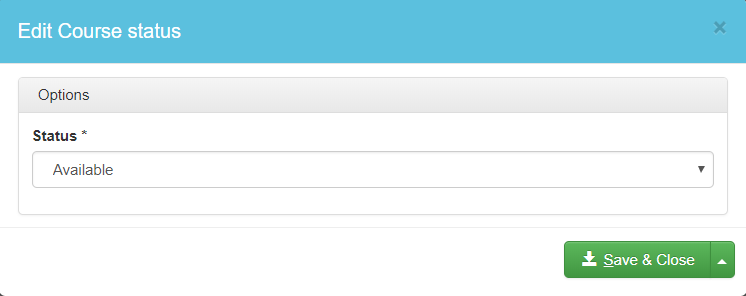
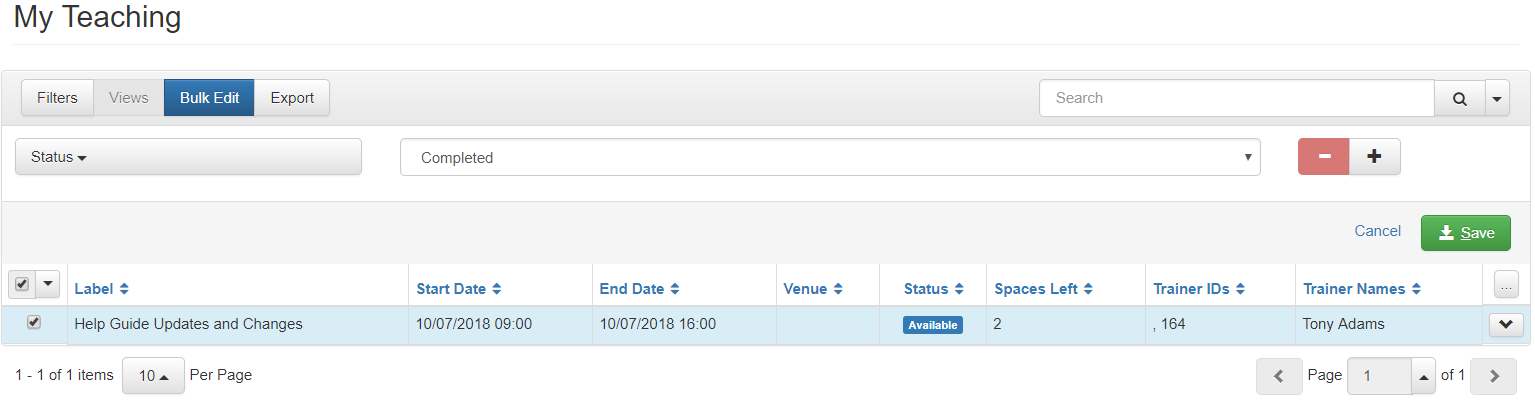
How
to Bulk Edit Course statusesTo bulk update Course statuses, click the My Teaching area and select Courses. You will be takento
a DataGrid showing all future Course dates you are assigned to.Select the courses you wish to update the statuses of using the tick boxes on the left or select all by using the tick box on the header of the DataGrid.
When you are happy with your selections, choose the Bulk Edit option at the top of the DataGrid and select the appropriate status.
Update the status by selecting Save.
How to manage training requests and confirmations
- Click the My Teaching area and select Confirmations. You will be taken to a DataGrid showing all requests you have been sent.
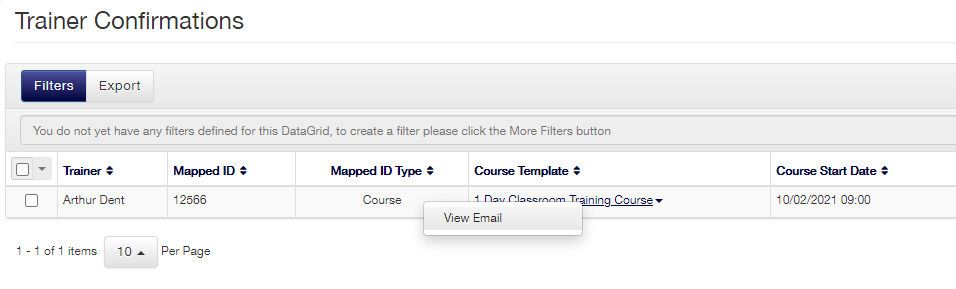
- The original request email will open in a separate tab containing accept or decline links.
- Select the relevant link to update your request.
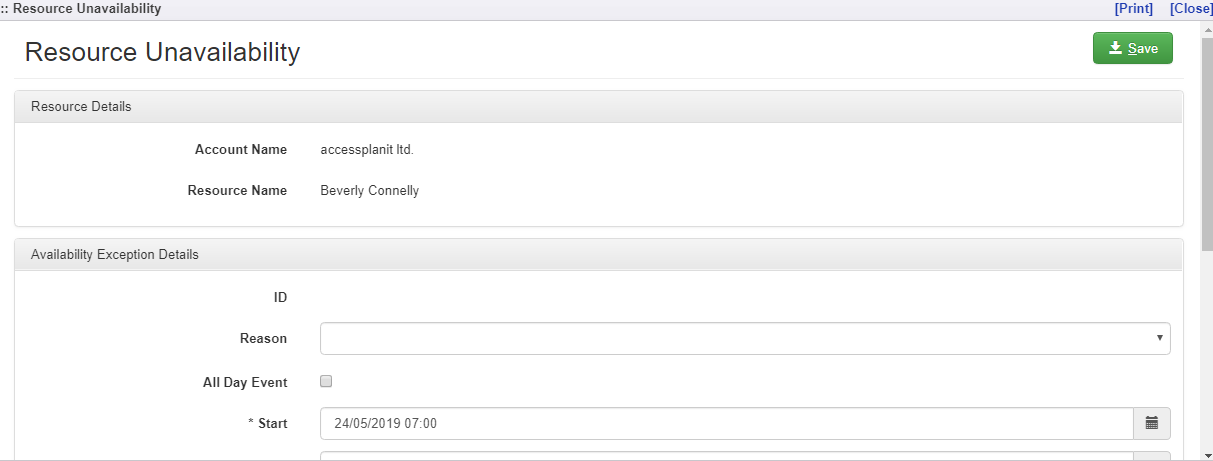
How to mark or amend Trainer unavailability
- Click the My Teaching area and select Confirmations. You will be taken to the Trainer Calendar.
- Select the period in the calendar when you will be unavailable and select Unavailability from the context menu.
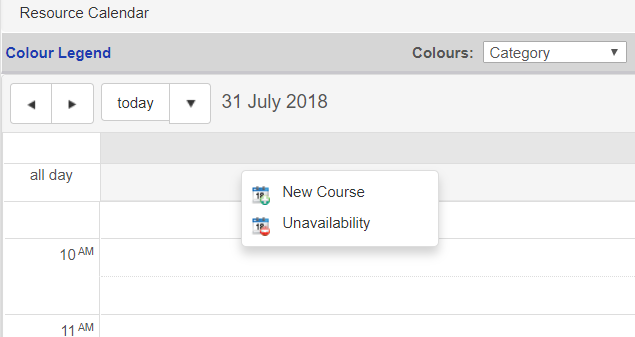
- A window will open where you can specify further details about the reason for the unavailability, its duration, and any further details.
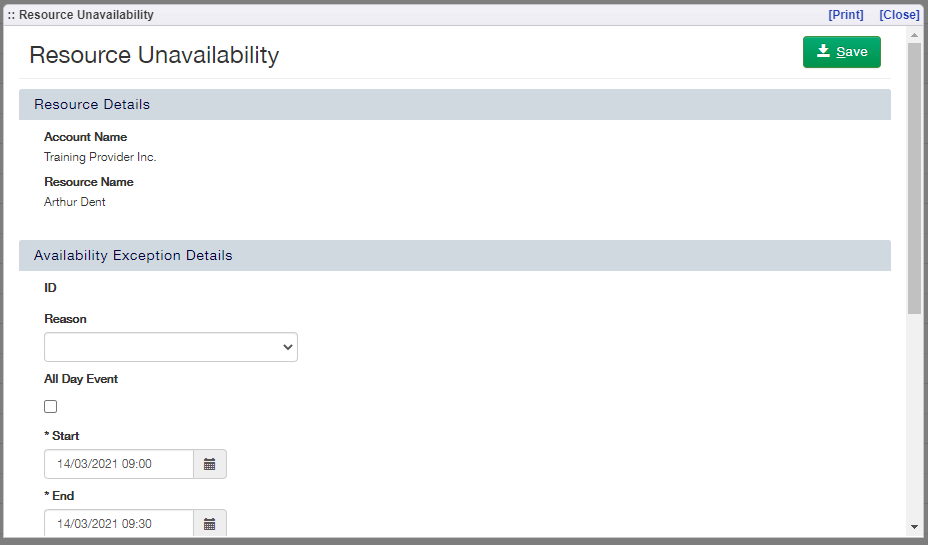
- After completing the form, select Save.
- To amend your unavailability, right click on the relevant calendar entry and select Edit from the context menu. This will display the same form as above.
- Once you have amended the entry, select Save.