| Live Search | ||||||||
|---|---|---|---|---|---|---|---|---|
|
How to add a Course Date on your Course Calendar
- Navigate to the Courses - Calendar view.
- Find the date and time you want to schedule the Course Date for.
- Right-click and you will get the choice to schedule either a Class or Web Course
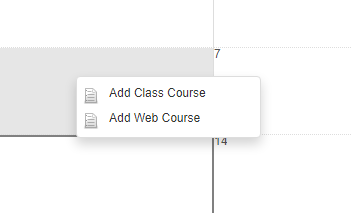
- Click which type of Course Date you want to add. You will then be taken to the course Details page to fill in all of the information about your course, the same way you would do if adding from a DataGrid.
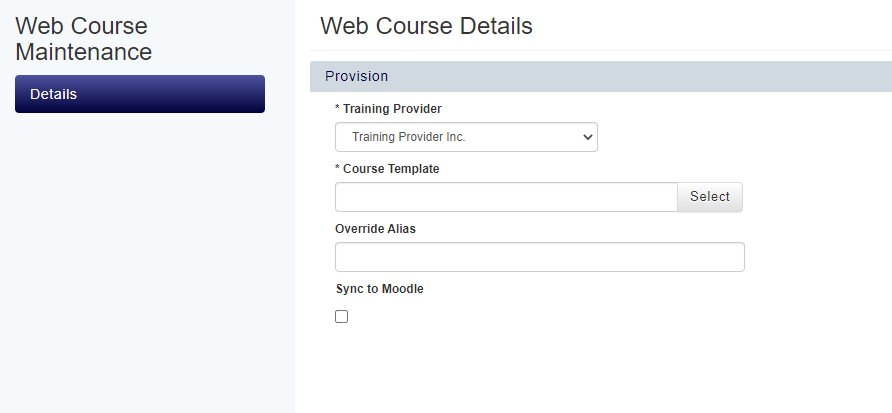
- Select the Training Provider from the drop-down box and choose the Course Template you want to use.
- Enter an Override Alias to rename the Course if required.
- Enter the start and end dates and times of the Course and if not already entered at the Course Template level, and enter information such as duration, minimum and maximum number of places, Venue, Trainer, cost and financial options. If you're not sure of any of these details, you can add them at a later date.
- There are a number of remaining optional fields including:
- Advertise - this allows you to choose whether the course will display on your Course list or not.
- Hide From Web - ticking this will prevent the Course date from showing on your website.
- Click Save to save your Course.
How to define Colours on the Course Calendar
- Navigate to the Courses - Calendar view.
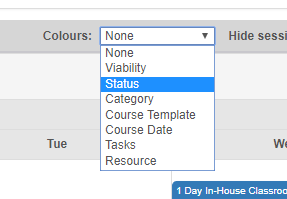
- At the top of the Calendar, you will see Colours: with a drop down list. This drop down list will apply colours to courses depending on the Colour filter you choose. In the example below, Course Status has been chosen:
- Once you have selected Status to show on the Course Calendar, you will see the Courses on the calendar change colour, depending on the different statuses that the Courses have:
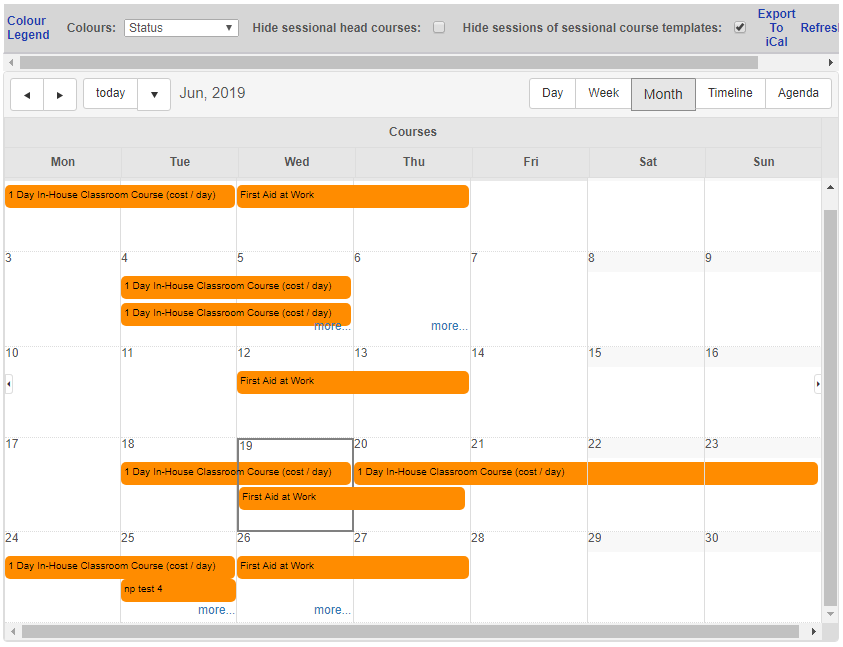
- To view what each colour means, click Colour Legend in the top left hand corner. This will show each Colour and what they represent based on the Colours type you have chosen.
| Info | ||
|---|---|---|
| ||
If you select custom colours for your Course Templates, the text will always show as black in the Calendar, so you shouldn't use the colour black as your custom colour. |
How to use Filters on your Course Calendar
- Click Advanced in the top right hand corner of the Calendar.
- The Advanced settings will then appear. Here you can set what you would like to filter your Calendar by Course Templates, Course Status, or Resource Types. You can also choose what information you would like the Course item on the Calendar to show. The "Tooltip" on the Calendar Item is the menu that appears when you right-click on an Item. The link to create a Public Link to the Calendar is also here.

- After making your changes, you can choose to Clear Options, Save Options, or Apply Options.