| Live Search | ||||||||
|---|---|---|---|---|---|---|---|---|
|
For a video tutorial on DataGrids, click the icon below…
Global Search
Each page on accessplanit has a Global Search option embedded into the header, next to the Help icon.

This Global Search field can be used to quickly search results from the following DataGrids:
Accounts
Course Templates
Invoices
Opportunities
Users
It is possible to go directly into any of the above DataGrids and search directly, but if you need quick access, then the Global Search field is a great place to start.
Clicking the icon to the right hand side of the magnifying glass allows you to focus your search, the less items you have selected, the faster your search results will be:
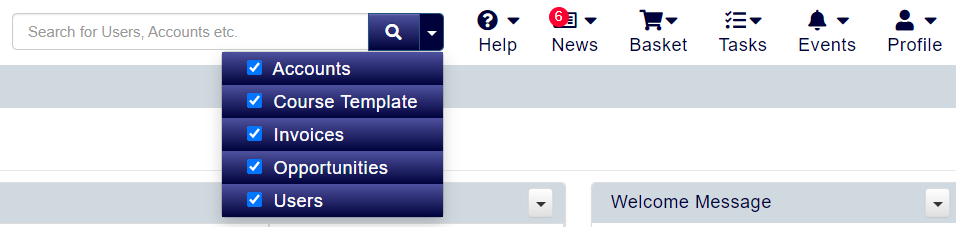
Removing options from this list will dramatically increase the result speed of your search, this list may grow to other popular DataGrids in the future to make searching even more intuitive.
How to edit the displayed columns in a DataGrid
Columns can be added or removed and reordered in any DataGrid using the small icon found at the right hand side of your DataGrid:
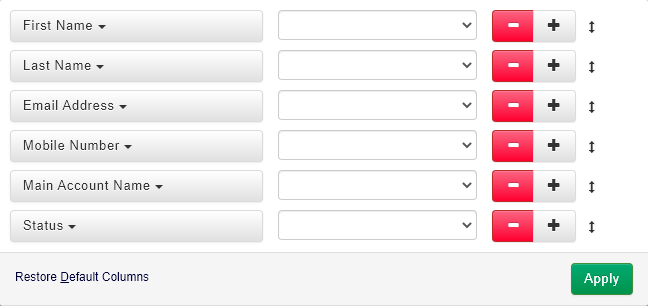
Clicking this icon displays the current columns, and from here you can add additional columns, remove columns and choose which columns you'd like to sort your DataGrid by:
Field Selector - This drop down item is the name of the DataGrid column, you can change it for any other field available in the currently selected DataGrid by selecting from the list displayed when you click it.
Ascending / Descending - This option determines the order of the selected column.
Insert or Remove - Clicking the Minus - removes the current column, clicking Plus + inserts a column underneath the plus that is clicked.
Drag to Reorder - Clicking and dragging on this icon allows you to reorder the columns on your DataGrid.
Click Apply to apply the selection to the DataGrid.
How to search a DataGrid
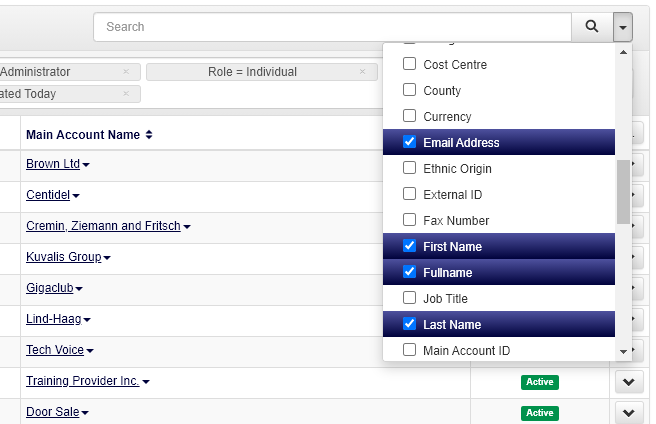
Typing in the search criteria then pressing enter or clicking the magnifying glass will bring back results based on the search keyword.
To define which columns are searched, select the small downwards arrow icon. Clicking this arrow shows all of the fields in the current DataGrid, and anything already selected is what is currently searchable. Anything deselected is ignored.
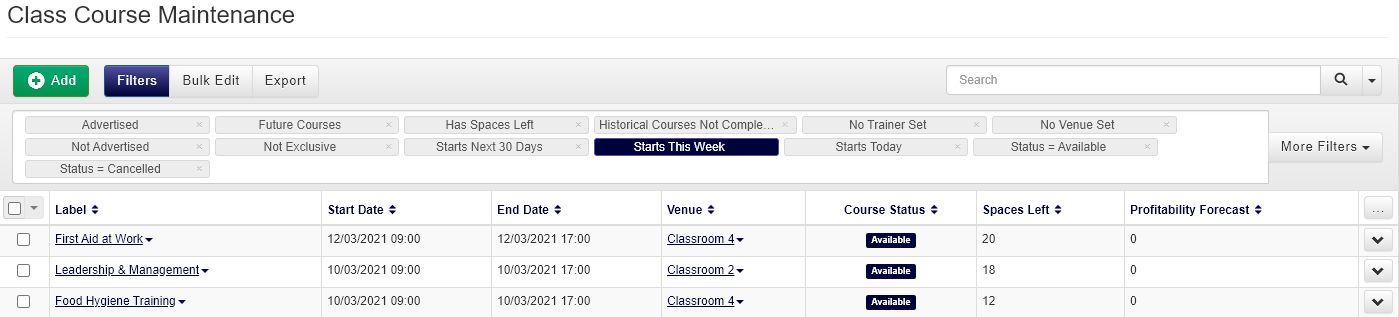
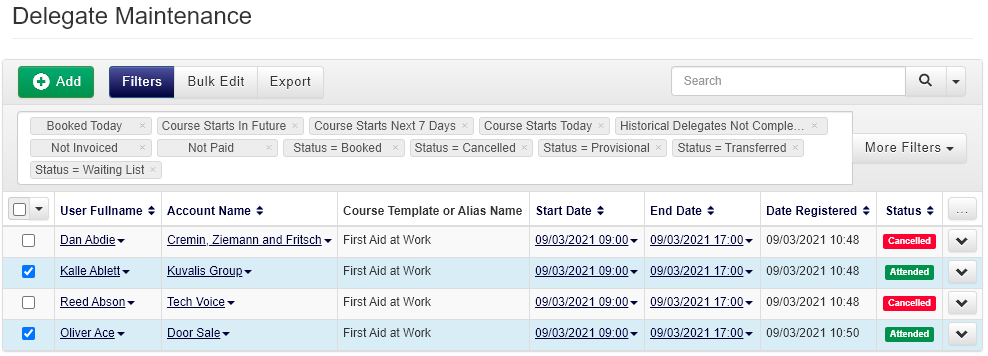
How to use Filters
Filters allow you to limit the results shown in your DataGrid, so you can quickly find the rows that you are looking for. Whether you need to action something with those rows, export them, or bulk edit them, filters are there to help you find them faster.
There are two ways to filter your DataGrid: you can either use your saved filters or you can build an ad-hoc filter for use now.
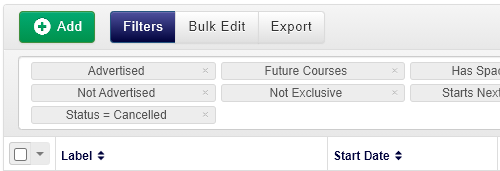
Saved filters
Your saved filters are displayed in your favourites bar:
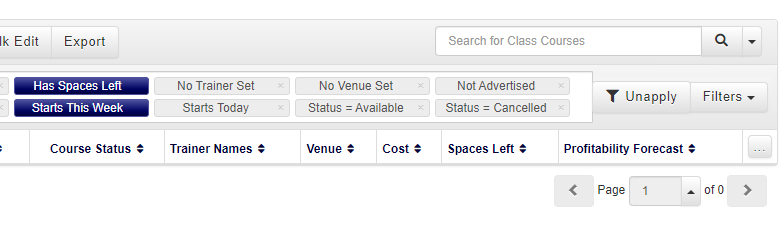
To apply a saved filter, click on it from the favourites bar, your filter will be applied and it will turn blue in the favourites bar:
To unapply your filter, just click it again, or click Unapply to unapply all.
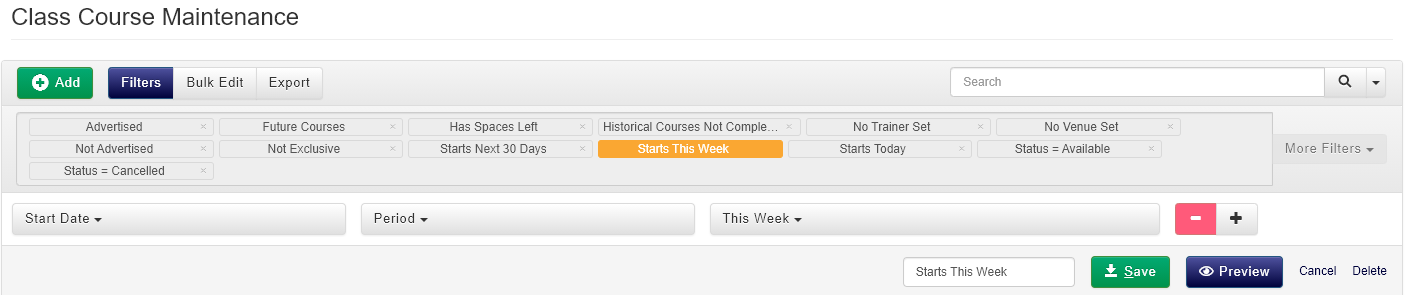
To edit your filter, double click on it from the favourites bar, your filter's settings will show and the filter will turn orange in the favourites bar:
Creating new & ad-hoc filters
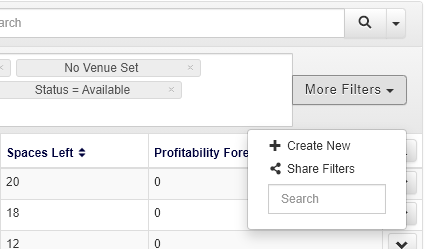
To build a new filter click on the More Filters button and select Create New.
The page will then display the options that you need to build a new filter.
Here is an example of a filter that will only show free courses. There are three parts to this and all filters that you build:

The first selector is for the name of the field that you are filtering by, in the above example this is the cost of the course.
The second and third selectors are where you define how that field is filtered, in the above example the course cost will be equal to '0'.
You can add as many rows into your filters as you would like. This is really useful if you need to build complex filters. For example, if you would like to have a filter that only displays courses that are available next month, you would build this filter with two rows:

Once you have built up your filter you can click the Preview button to apply it to your DataGrid:

If you would like to save your filter for use later, type a name in place of the 'new filter' text and click Save. It will then be added to your favourites bar at the top of your DataGrid.
Toggle Any/All Filters
To change your filter to show results when any of the conditions are met, double click on it from the favourites bar, or create a new filter to enter the edit mode.
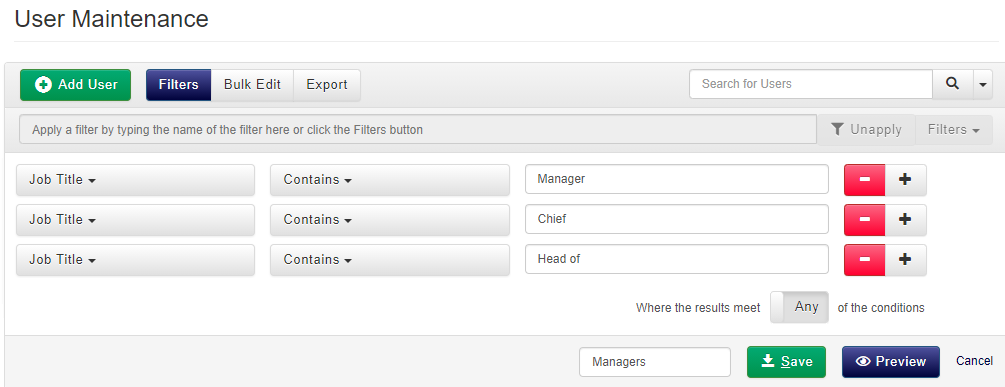
Click on the ‘All’ toggle button to change this to ‘Any’.
How to add and remove Filters from your favourites bar
To remove filters from your favourites bar click on the x on the filter's label. Please note that this doesn't delete your filter. Your filter will be moved into your More Filters list for that DataGrid so you can add it back in again at a later date.
To add a filter into your favourites bar open the More Filters list and click on it from here.
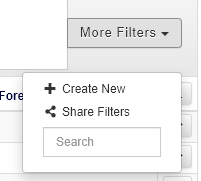
How to Share Filters
Filters can be shared between training administrators only. When a filter is shared the filter is actually copied. This means that if the original filter is modified, the 'copy' is not affected.
If a filter is attempted to be shared with an administrator who already has a filter with the same name, the share/copy will fail and you would have to rename the original.
Make sure you are in the filters view by clicking the Filters button on any DataGrid
Select the More Filters option at the top right hand side of the DataGrid, and then the Share Filters option.
From the pop up window you will need to select the filters from the drop down list.
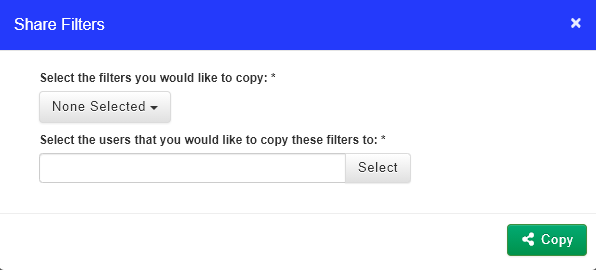
When you have selected the Filter(s) you would like to share, click the Select button to choose who the filters will be shared with, only users with the role of Training Administrator will show in the list of users.
Click Copy button to share a copy of the selected Filters with the selected Training Administrators.
If you try to share a Filter with a Training Administrator who already has a filter with the same name, the platform will not allow you to do this. You will be presented with the message: The following filter(s) could not be shared as the User already has a filter with that name:
The same platform message will display the user ID in question, and the name of the filter that could not be copied.
How to use Bulk Edit
Bulk Edit gives you the option to update all selected rows with the information you specify. This means you can update multiple records at a time.
Select the records (items) of data that you want to change a field on by ticking the boxes on the left column of each record.
You can bulk update as many records as you like, and to select all of the records in the current page you can check the tick box in the header for the left column.
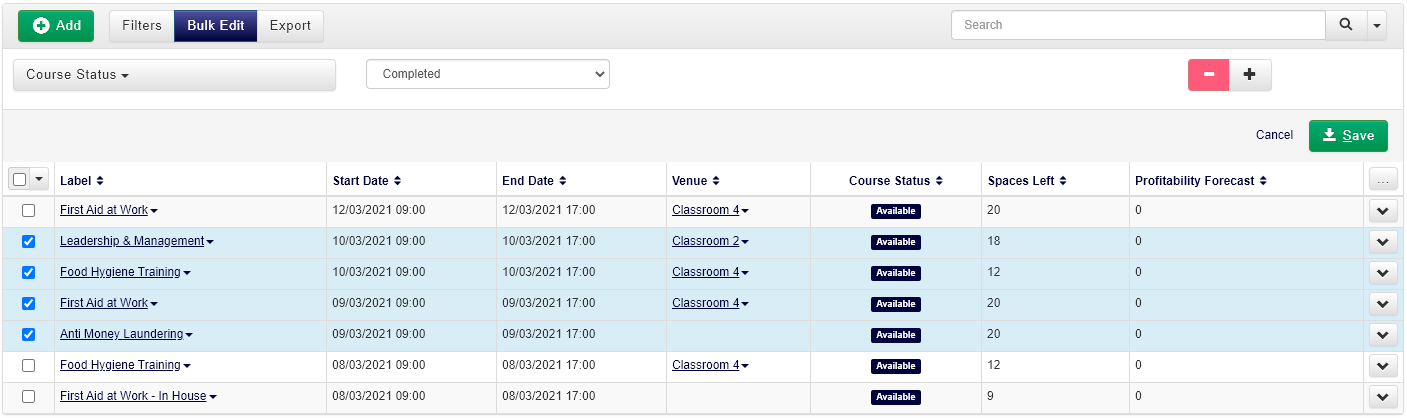
Clicking the Bulk Edit option from the top of the DataGrid will show a drop-down selector that defaults to the first possible field that can be updated by the tool.
Within the Users maintenance DataGrid, the options all relate to User details, with all the options in the Class Courses DataGrid being related to Course details.
Click Save to execute the Bulk Update.
How to export information from a DataGrid
The Export function allows you to export the information you require from your DataGrid into one of many familiar file formats.
Clicking Export presents you with the following options:
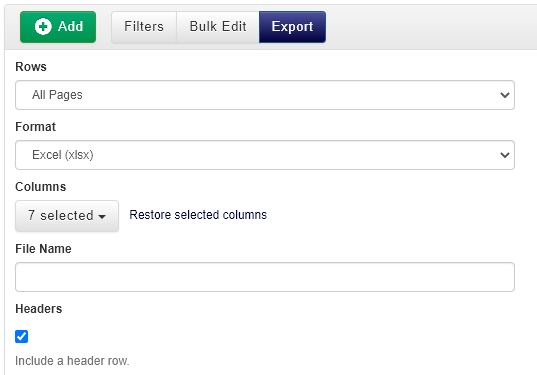
Rows - This selector has three options:
All Pages will export all the pages in the DataGrid
Current Page will export only the current page of data selected on the grid
Selected Rows will export only the rows that have the tick box selected
Format - This selector allows you to specify the output file format of the export, the options are as follows: Excel XLXS, Excel XLS. Word DOCX, CSV, PDF, XML
Columns - This option allows you to specify the columns that are included in the export. Selecting 'Restore selected columns' will set the option back to its default and remove any columns you may have added or removed.
File Name - This will be the name of the file once it has been exported. (NOTE: You cannot include the . symbol in the File Name as this will corrupt the file when saved)
Headers - Allows you to specify if the header columns will be included in the export or not.Once you have defined your settings, click Export. This will then download the file to your desired location.
| Info |
|---|
Please note: Each Excel cell has a character limit of 32,767. If you exceed the character limit in your export, the entire Excel page will fail to load. To avoid problems, keep the number of characters in your cell below the limit. |
How to email from a DataGrid
You can email users directly from many DataGrids in the accessplanit platform, with various 'To Address' options depending on which grid you are using.
Go to the DataGrid you want to email from, for example the Class Delegates Smart Grid.
Select the records you wish to email regarding, e.g. the delegates you want to send an email to.
Click on the down arrow in the top left of the grid and select Email.
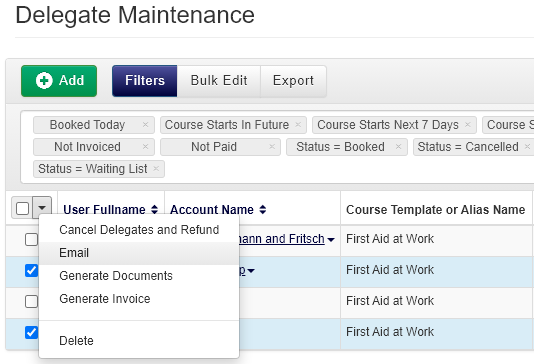
You will see a dialog box similar to below:
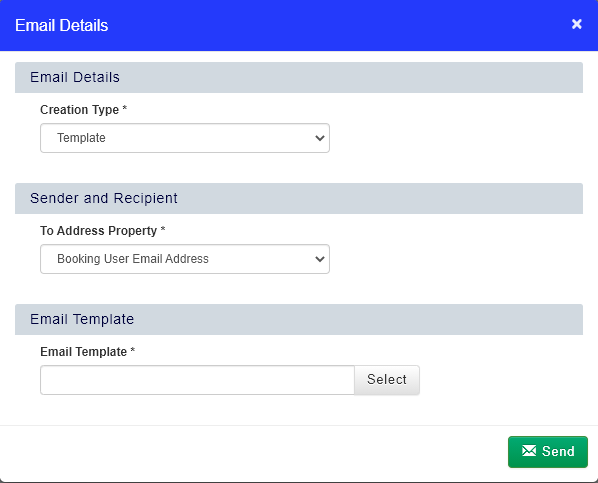
Creation Type is whether you would like to send a pre-existing email template out, send an eCampaign, or create a new AdHoc email to send immediately.
To Address Property is which email address relating to the records in the grid do you want to receive this email. For example, you can send an email from the Delegates DataGrid to the delegate's booker or manager too.If you select eCampaign as the Creation Type, you will see these options:
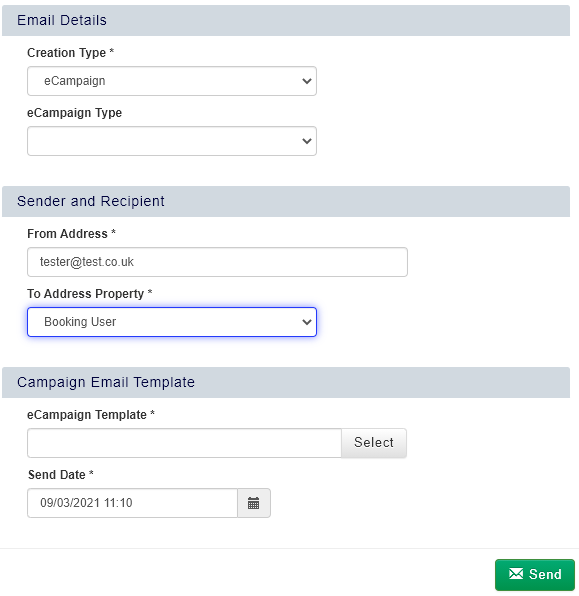
From Address is the email address that the eCampaign should be addressed from, which can be different to the default platform email address.
Send Date is when you would like the email to send out from the platform.When you have filled in all of the fields, you can click Send to send or schedule the email.